Managing Custom Fields
This document will cover how to create and manage custom fields for your Creator CRM lists and Activations.
What Are Custom Fields?
Custom fields are additional columns you can add to a Creator List to track information beyond the default creator properties, such as notes, feedback, or approval status. They are configured per list and appear as editable columns in the creator table.
Accessing Custom Fields
To manage custom fields for a list:
- Click Creators in the left navigation
- Click CRM
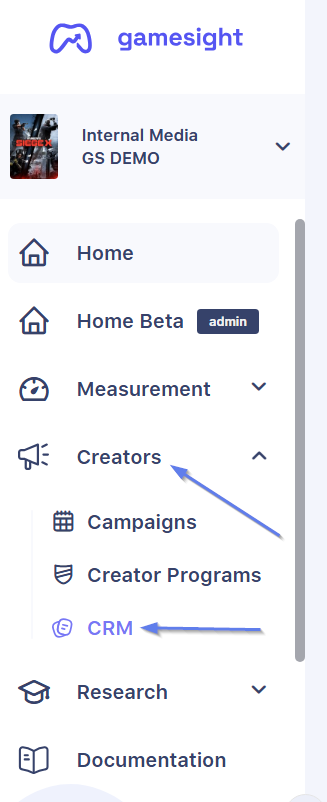
- Hover over the list you want to configure and click the edit icon

- Select the Custom Fields tab from the left sidebar
Adding a Custom Field
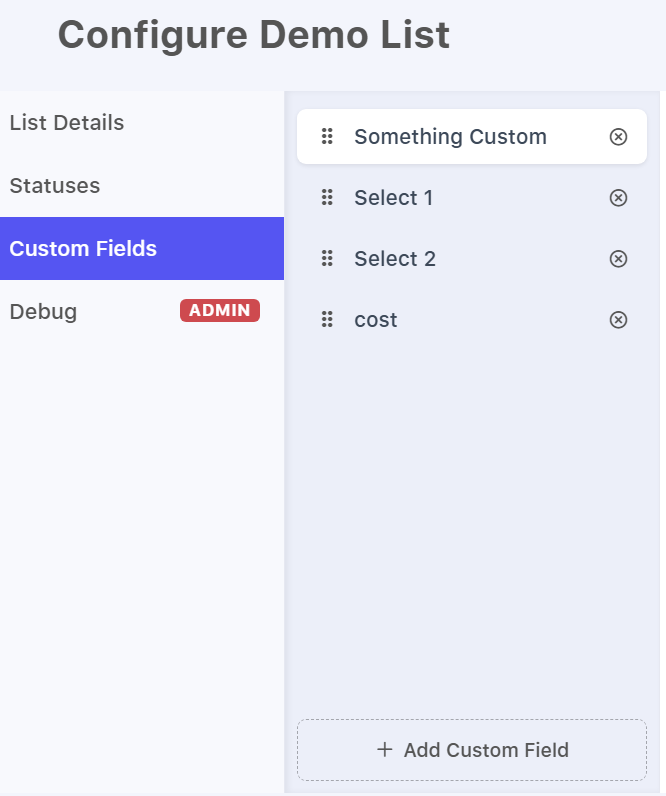
To add a custom field:
- Click Add Custom Field
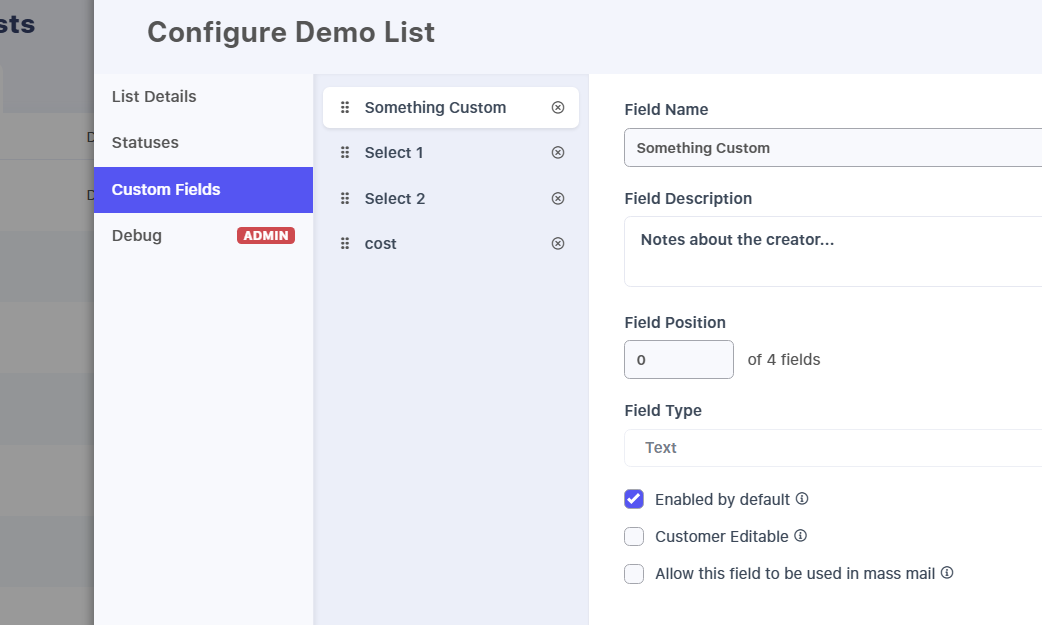
- Fill in the field details:
Field Name - The column header shown in the creator table (e.g., "Notes" or "Contract Status").
Field Description - A short description of what the field is used for.
Field Position - The display order of the field relative to other custom fields.
Field Type - Choose from the options below:
| Type | Description |
|---|---|
| Text | Free-form text input. An expand button lets users open a larger text area for longer entries. |
| Select | Dropdown with a fixed list of options you define. Enter each option and press Enter to add it. |
| Autocomplete | Text input with predefined suggestions. Enter options the same way as Select. |
| Checkbox | A simple true/false toggle. |
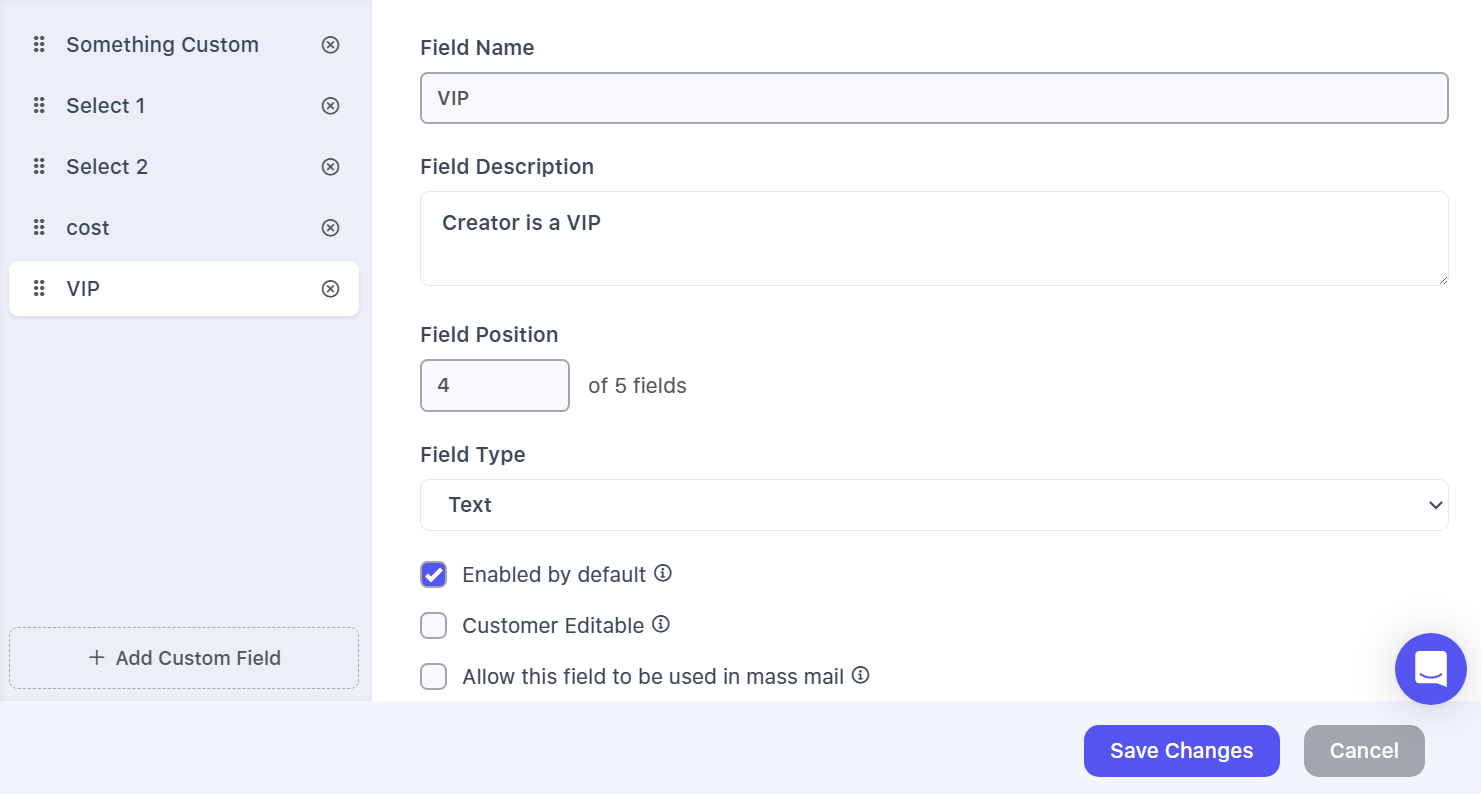
- Click Save Changes
Field Settings
When creating or editing a custom field, you can control how it behaves:
Enabled by default - If checked, the field column will be visible in the creator table automatically. If unchecked, users can enable it manually via the column picker.
Editing a Custom Field
To edit a custom field:
- Open the list settings panel and select the Custom Fields tab
- Click the field name in the left sidebar
- Update the name, description, options, or settings
- Click Save Changes
Deleting a Custom Field
To delete a custom field:
- Open the list settings panel and select the Custom Fields tab
- Click the × icon next to the field name in the sidebar
- Click Save Changes
Deleting a field removes it and all associated values from the list.
Entering Values in the Creator Table
To enter or edit a custom field value for a creator:
- Locate the custom field column in the creator table
- Click the cell to edit the value inline
- For text fields, click the expand icon to open a larger editing view
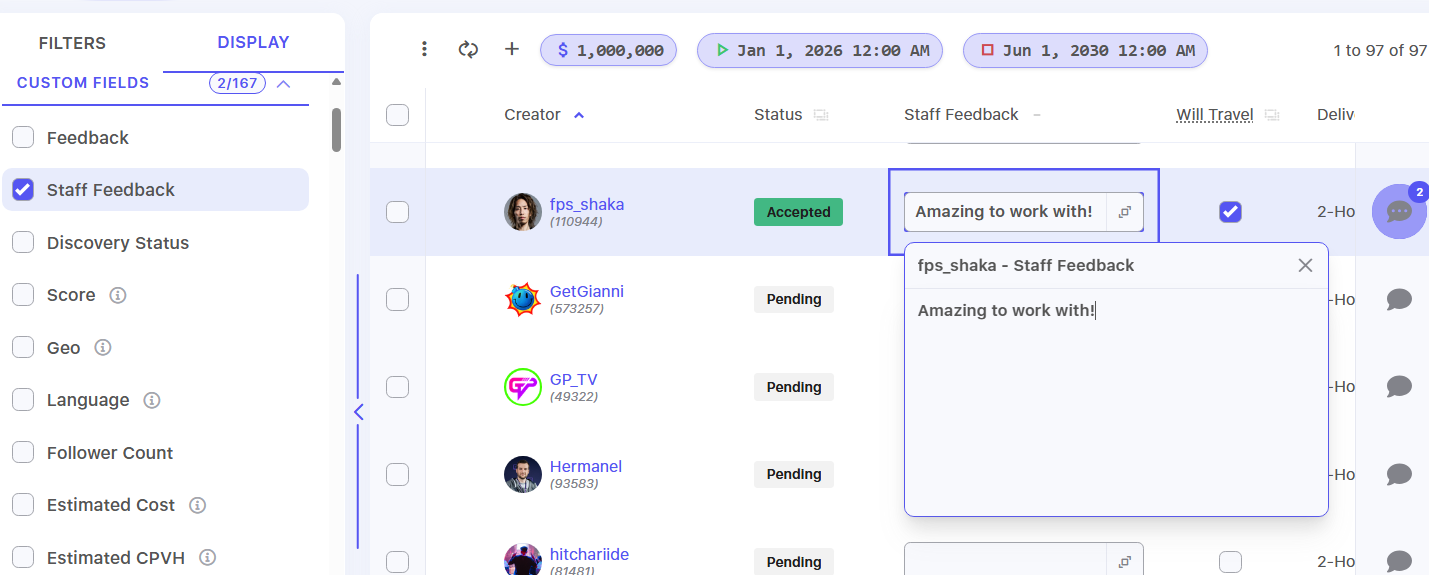
Changes save automatically. A status indicator at the top of the page shows Saving while the update is in progress and Saved when complete.
Updated about 1 month ago