Measurement API
This quick start guide provides an overview of how to implement the Gamesight Measurement API into your game.
Integrating a Console Game?Head over to our Console Quick Start guide for details about how to implement Gamesight on Xbox, Playstation, or Nintendo Switch.
Introduction
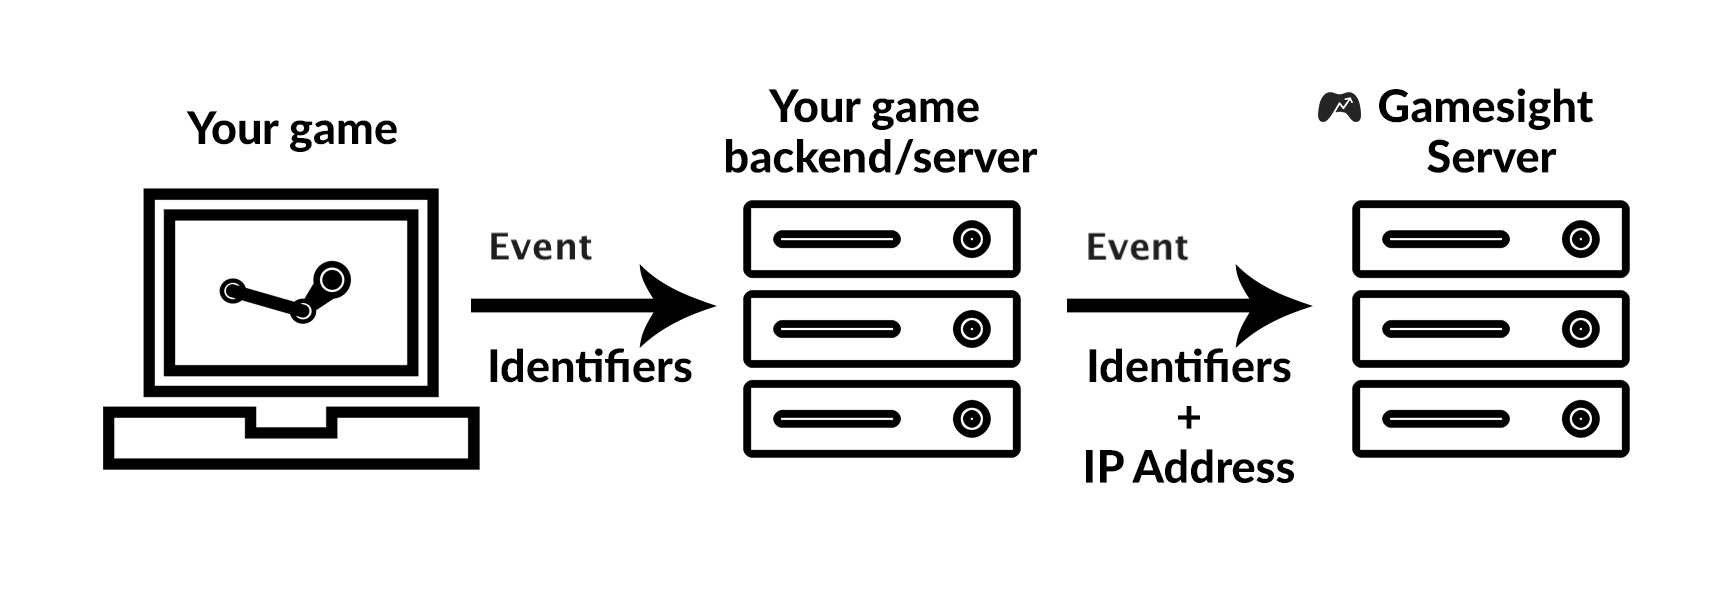
The Measurement API accepts a stream of event data along with corresponding device level identifiers through a REST interface to power marketing insights for your game. The recommended integration path is shown in the following diagram.

Game Client - The game client is responsible for notifying the game server of specific events that a player performs. It is likely that most of the interesting interaction points in your game are already instrumented in this way for your existing BI tooling. The only added task for the game client is the collection of device identifiers to be sent alongside the event.
Game Server - The game server accepts in-game events and packages them into the Gamesight event format, enriching the existing identifiers with the player's IP address along the way.
Gamesight Server - Accepts fully formed event payloads from the game server and performs analysis and attribution.
No Game Server? No Problem!If your game doesn't have a backend server you can still integrate with Gamesight! Please get in touch using the chat bubble on the right side of the page and we can configure a free proxy to take the place of the Game Server in your integration.
The remainder of the guide provides step by step instructions for how to perform the base level integration with the Measurement API using the above model.
Step 1. Generate an API Key
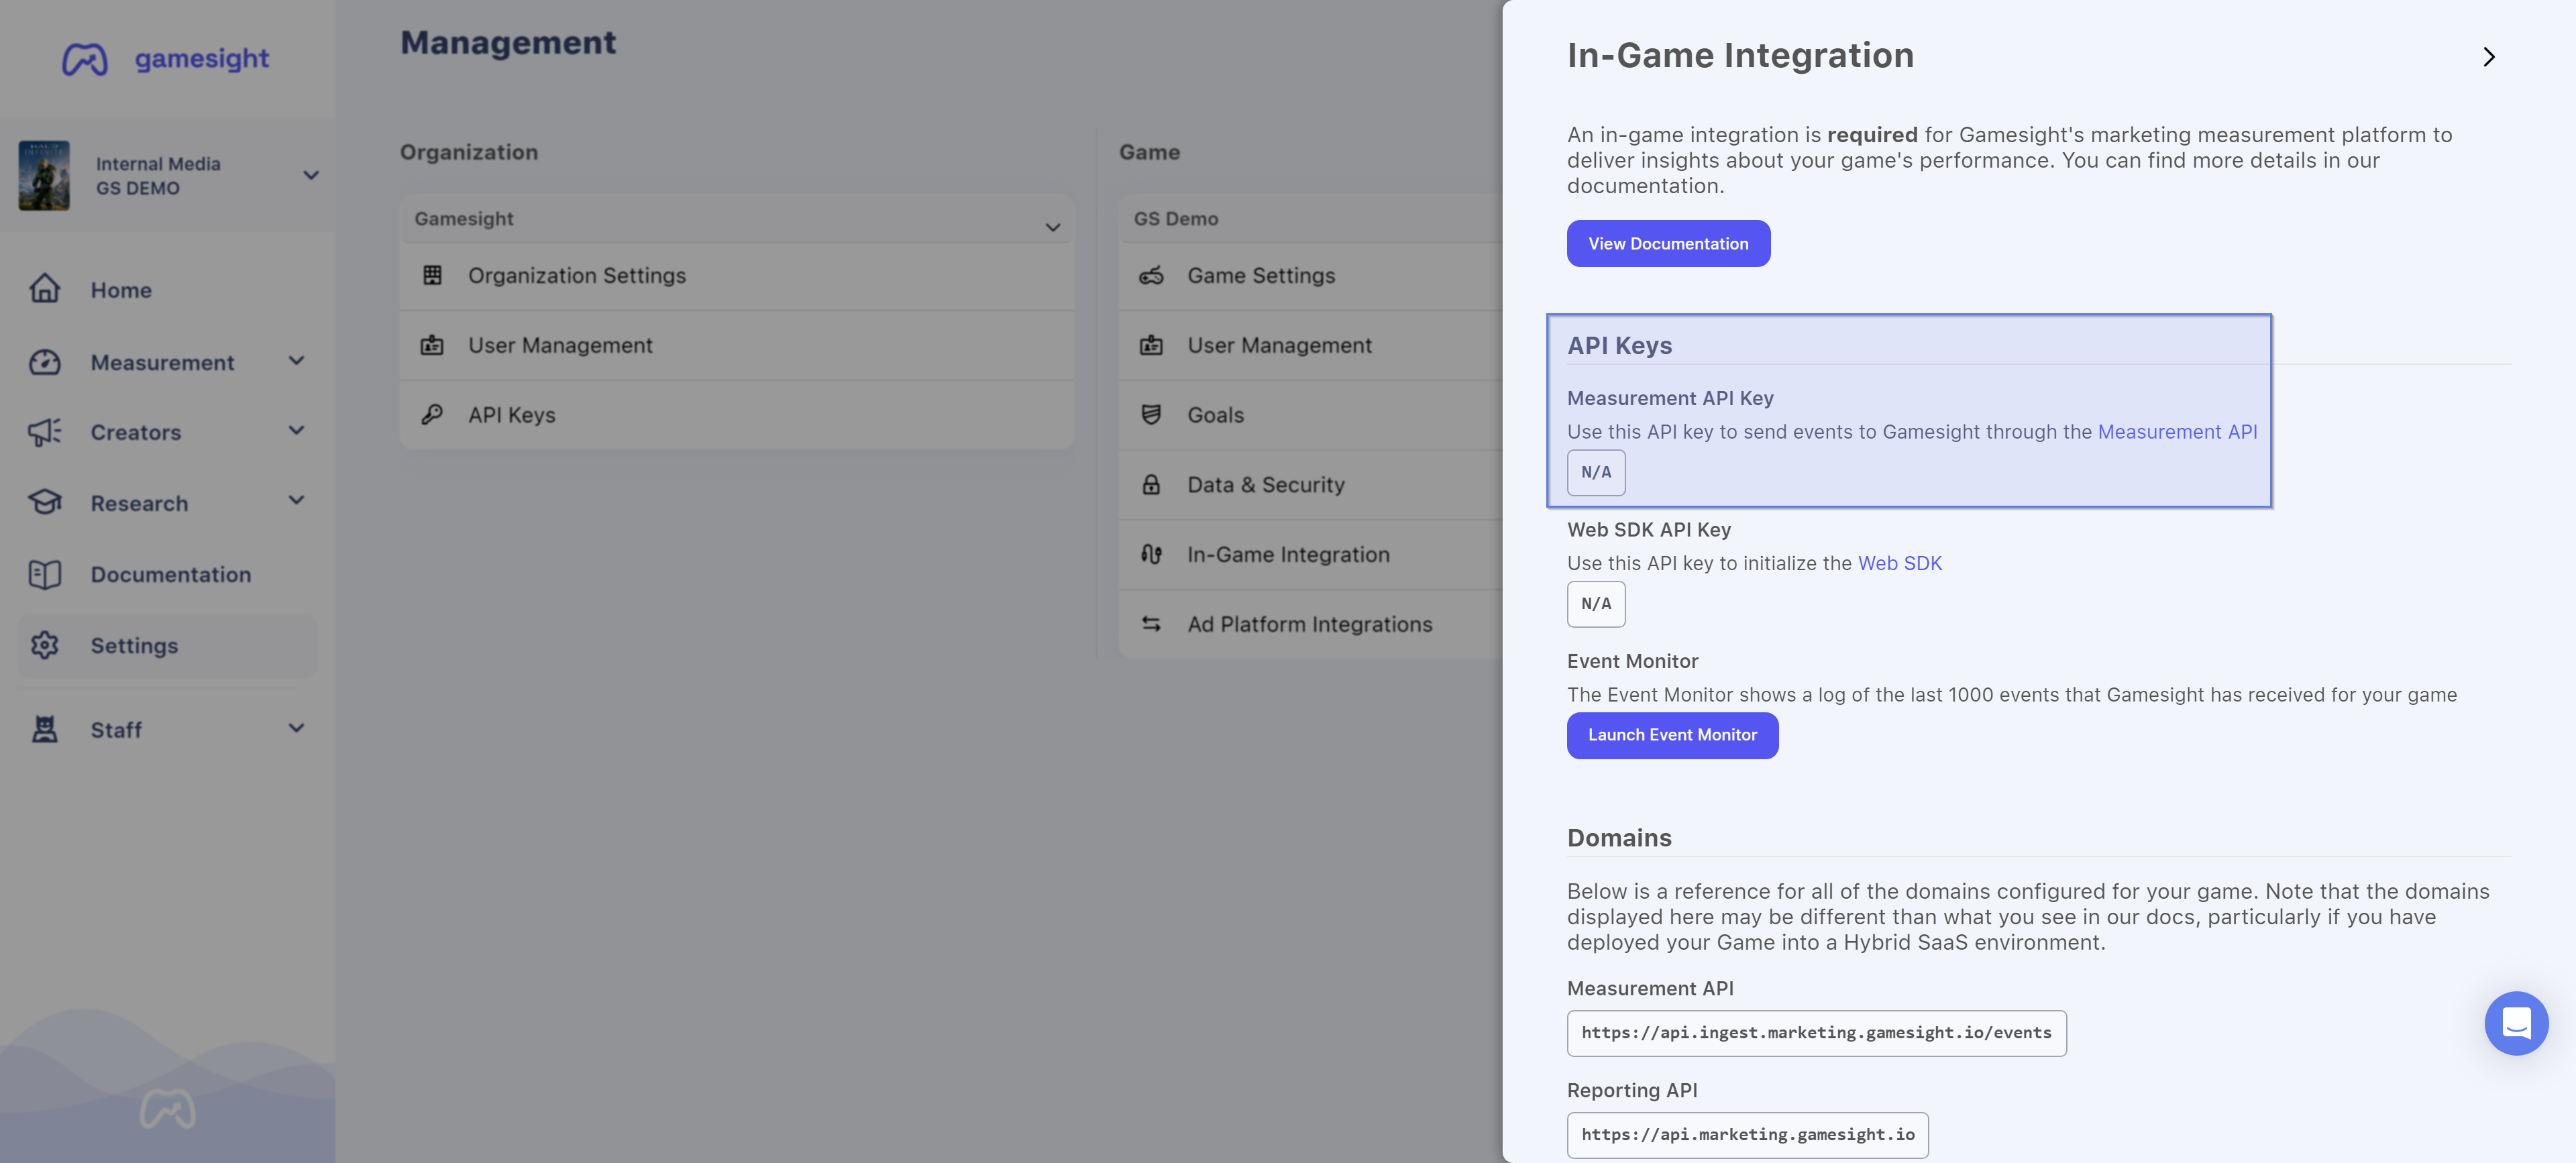
A valid API key is required before you will be able to access the Measurement API. API keys can be generated through the "Settings" tab on the Gamesight dashboard under the In-Game Integration option.

If you do not have access to this page please contact an Admin for your Game so they can grant you the "Game Integrator" permissions.
Step 2. Determine User ID Value
One of the most important fields in the Measurement API is the **user_id** value. By providing Gamesight with a unique User ID for each player we can provide:
- More accurate reporting by preventing "double counting" of game sales
- Enable your BI team to tag users in your data warehouse based on their attributed referral source
- Advanced reports on user journeys and flows from web to game client and back
- Improved debugging experiences and visibility into the event stream
Requirements
Here are some important considerations when selecting your User ID value:
Unique - Each user must get a unique User ID
Consistent - The User ID must be consistent between game sessions
Meaningful - The ID should be a value that can be related back to other metrics your BI team is already recording internally.
Private - To protect users it is important that the User ID value is not personally identifiable to people outside of your company. This means avoiding public identifiers like email addresses or usernames.
To meet these requirements we recommend that you use some for of internal Account ID. In the past we have seen success with values such as uniquely hashed Steam IDs, or game-specific account ids, or UUIDs that are associated with in-game accounts through a lookup table.
Step 3. Collect Identifiers in Game Client
Before you will be able to send an event to the Measurement API you will need to collect some identifiers from the user's device. This information is used as part of the Gamesight fingerprinting process. You can see the details on the available identifiers and expected formats here.
For most games the following two identifiers are sufficient:
osresolution
Step 4. Collect Game Launch Event
The next step is to setup a call to the Measurement API each time a user launches the game. This call should be sent from your Game server as soon after your game has launched as possible.
curl https://api.ingest.marketing.gamesight.io/events \
	-X POST \
	-H 'Authorization: SOMEAPIKEYHERE' \
	-H 'X-Api-Version: 1.1.0' \
	-H 'Content-Type: application/json' \
	-d "$(cat <<-EOF
  {
    "user_id": "b91f8k5r",
    "type": "game_launch",
    "identifiers": {
      "ip": "172.123.245.14",
      "resolution": "1920x1080",
      "os": "Windows 10",
      "language": "en",
      "timezone": 420
    }
  }
EOF
)"
The IP address of the player's computer is used as part of our attribution process. When events are logged to our API from a server we require that the player's IP is manually passed to our API.
Step 5. User Notice
User Privacy NoticeThe following section is not legal advice. Please consult with your company's legal counsel to determine the best approach for your company and players.
We recommend that you provide your users with either notice of the integration or some control over whether metrics collection is enabled in-game. While not legally required given the nature of the data shared, many gamers are more comfortable having control over the metrics their game sends to third parties.
The do not track list feature in the Gamesight console can be used as a fallback to block data collection on users when an in-game opt-out solution isn't viable. Right to access and data removal requests can be handled via our GDPR APIs.
Step 6. Testing & Deployment
That's it! You have now integrated the Measurement API into your game. For details on more advanced integrations check out our complete reference.
You can also checkout our Testing Your Game Integration guide for details on how you can ensure your integration was successful.
For more information, or help integrating Gamesight, contact us through live chat (on the right side of the page) or email us at [email protected]
Updated 4 months ago
