Tracker Settings
Once a Tracker is configured there are several settings that you can modify to adjust the behavior and display of the Tracker.
To access the Tracker settings click on the name of the Tracker from either the Trackers page or in reporting. Navigate to the Settings tab to see the Tracker settings.

Tracker Settings view
Name
The Tracker name value defines the name that is shown in reporting for any Touchpoints that come through this Tracker. Updating this value will change the name displayed for this Tracker in all reports.
Note that the Name value is different from the Tracker's ID. ID values are often set to Network's campaign, ad group, or ad ID values and not editable.
Destination URL
This value controls the landing page that Click URL redirects users to. Note that it is also possible to override the destination for a Tracker using URL Parameters & Macros. If you see a destination_url parameter in your Click URL this value will be used as the destination for the tag.
Attribution Window
You can learn more about the attribution window setting in the Attribution Windows documentation.
Measurement Type
Depending on the ad platform integration, there are different tracking methods available:
- Direct - the most common tracking method where you directly apply click and impression tags to your campaigns
- Automatic Click Measurement - automatically detect ad platform sourced traffic through UTM parameters when users hit your landing page
- Google CM360 - If you are using CM360 as your ad platform, this measurement type will adjust your tags to be compatible when using CM360 as an ad server to wrap your Gamesight tags
Destination Management
Trackers have a built-in Destination Management tool that helps keep track of your common landing pages so you can easily reuse them and reference them between Trackers. This helps reduce the amount of copy-pasting you may need to do when switching over landing pages between beats.
After you save a Destination URL on your Tracker, you will see the "Add Destination URL to Game" button appear next to the Destination URL settings.
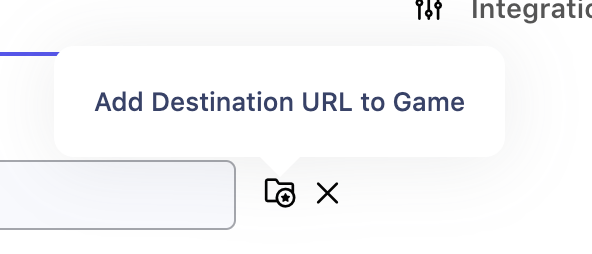
Save this destination to be available by default to all Trackers in this Game
This will bring up a Game Settings panel where you can review your saved Destination URLs and set a Name for each page.
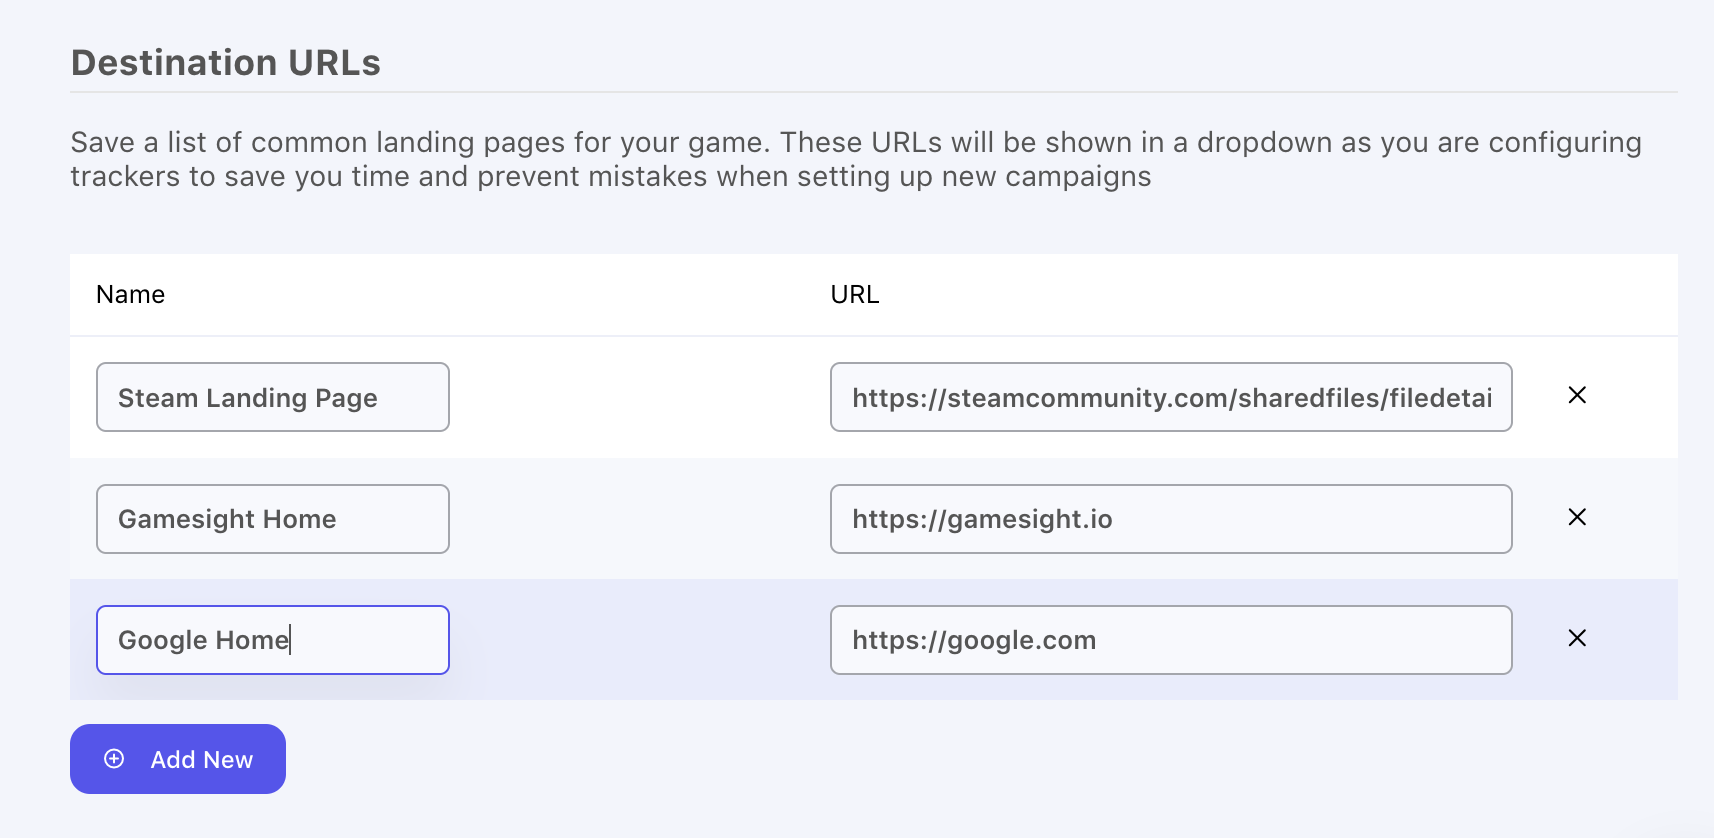
Saved Destination URL list
Once you have saved your Destinations you will see them populate by default in the future every time you go to update the destination for a Tracker. You can select one of the suggested options or insert a new value if your desired landing page isn't in the list.
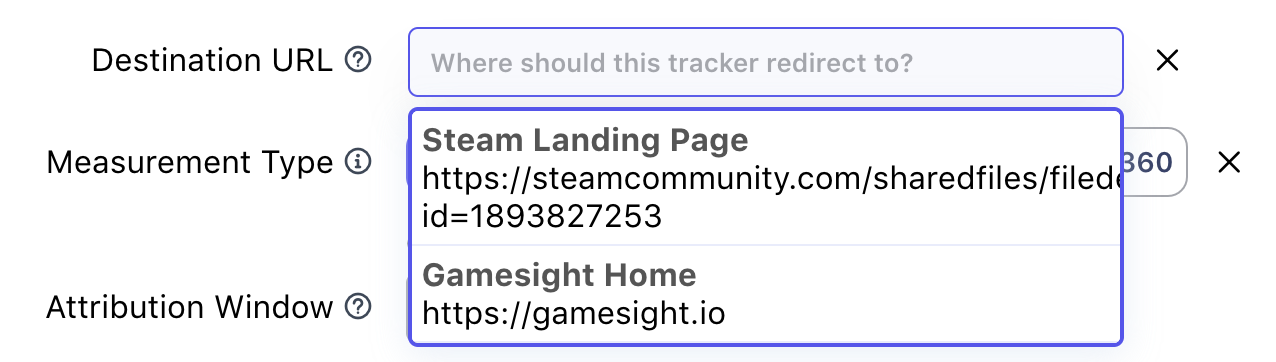
Autocomplete suggests your saved Destination URLs
Destination URL RestrictionsYou can also use the Destination URL settings to restrict the
destination_urlparameter on your ad tags to only support certain landing pages. Learn more in our Data & Security documentation
Updated 10 months ago