Creator Program Checklist
This checklist is designed as a reference sheet covering all steps and phases of the Creator Program from launch through curating and maintaining your active Roster.
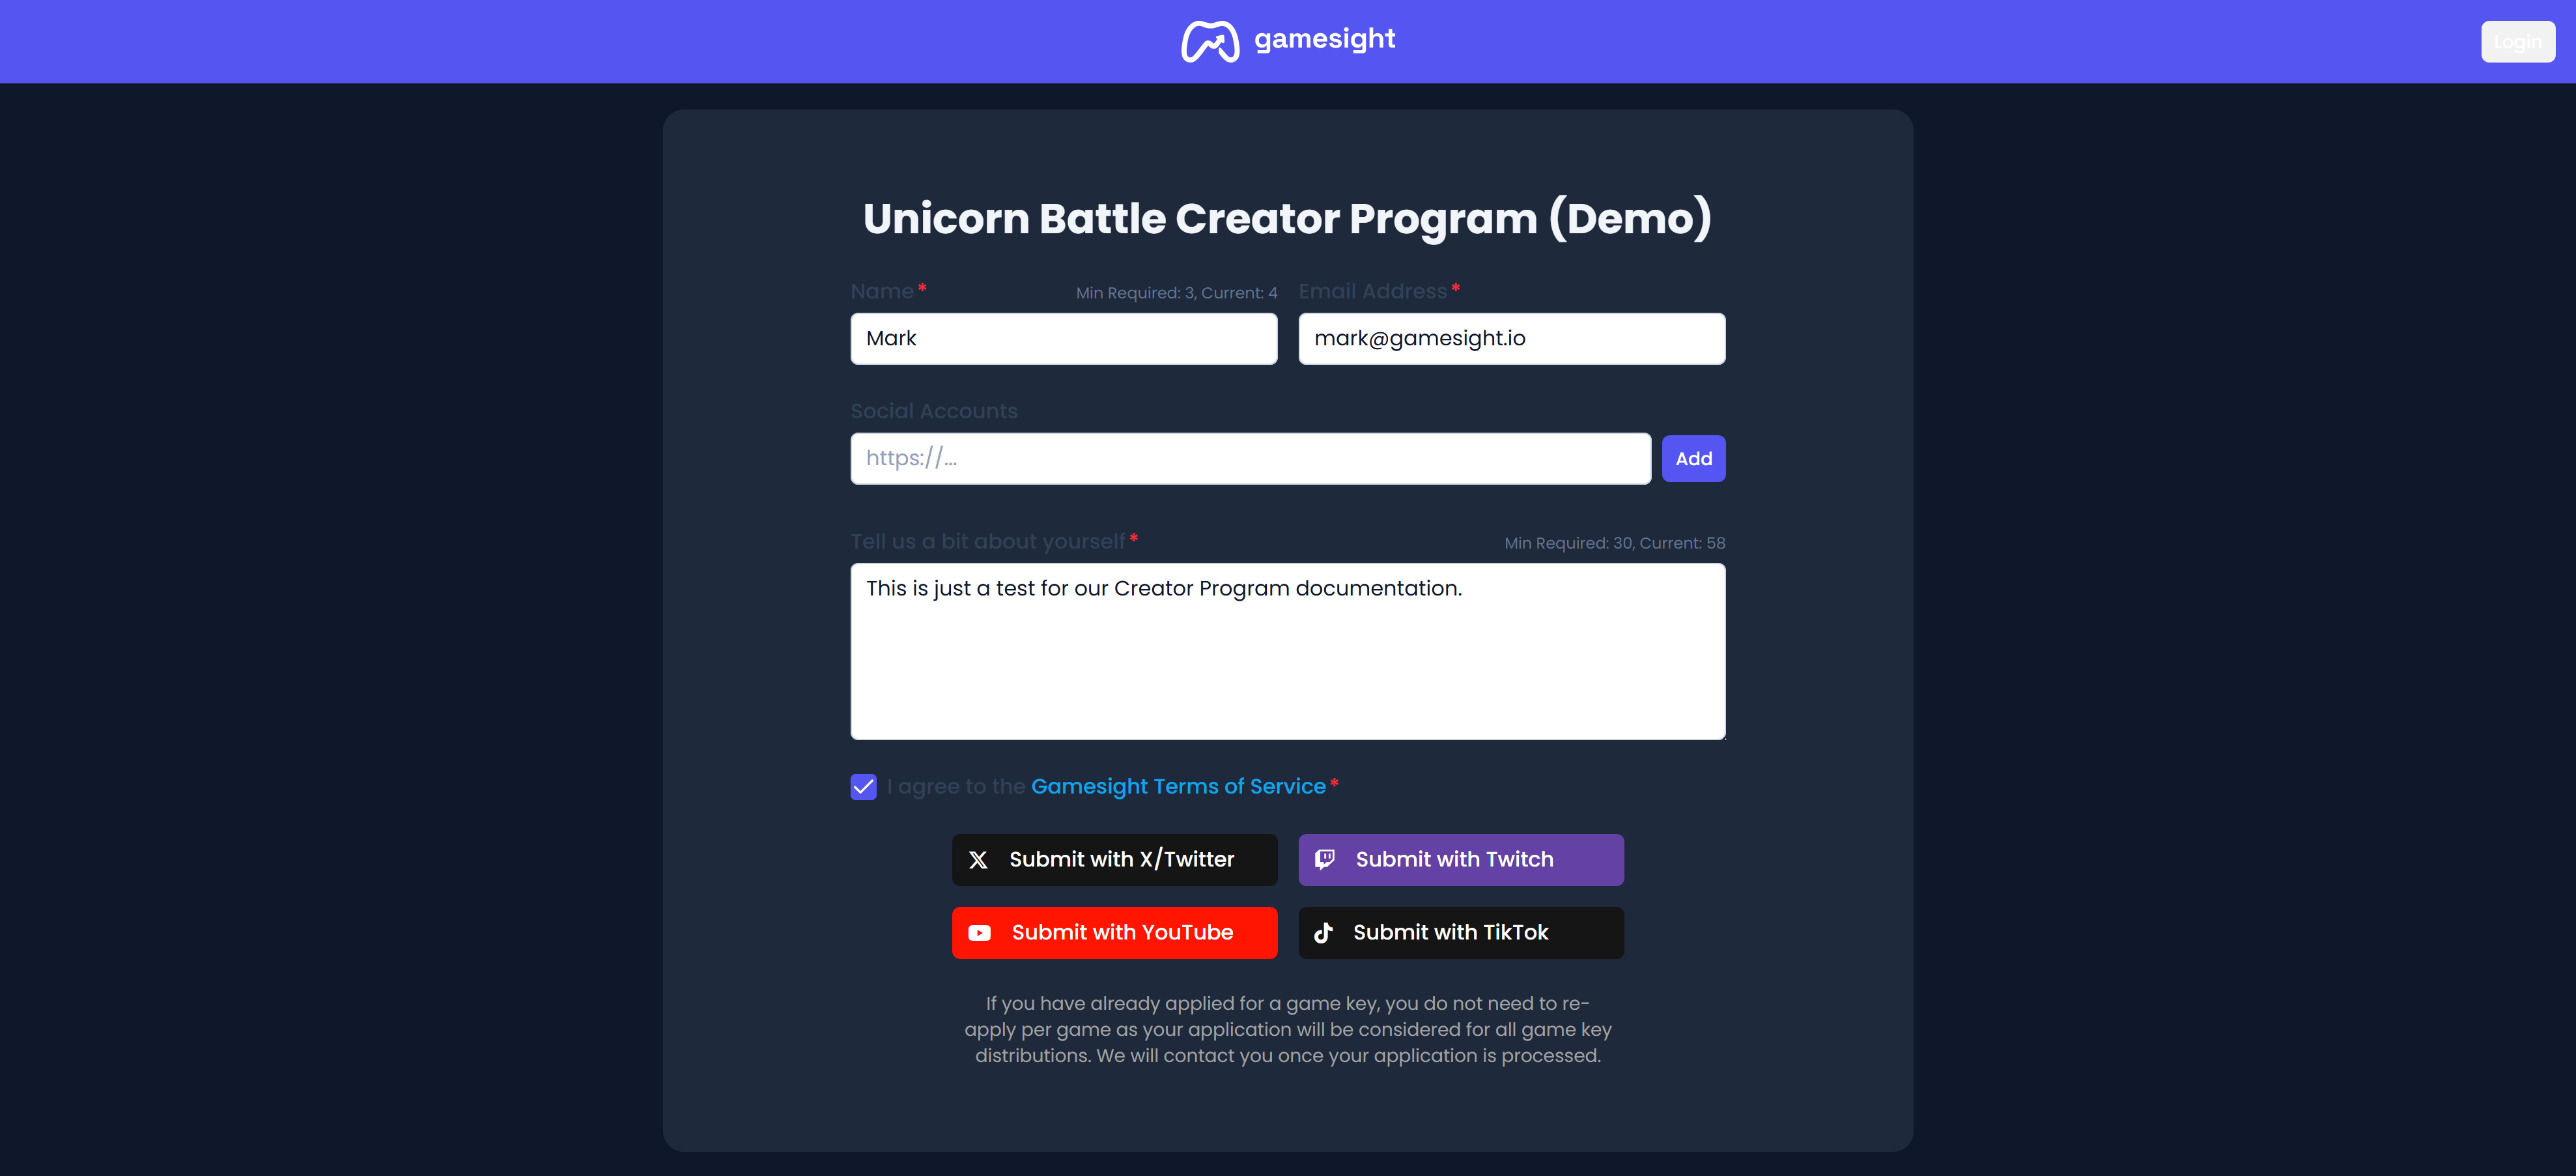
Step 1. Creator Program Website
Once your Creator Program Website is live, creators will begin submitting applications to join your program. This happens through a custom and dedicated site where creators are authenticated by the channel they are applying through (via oAuth). At this point, creators can keep track of their application status through theircreator program website login.
Creator Key Requests
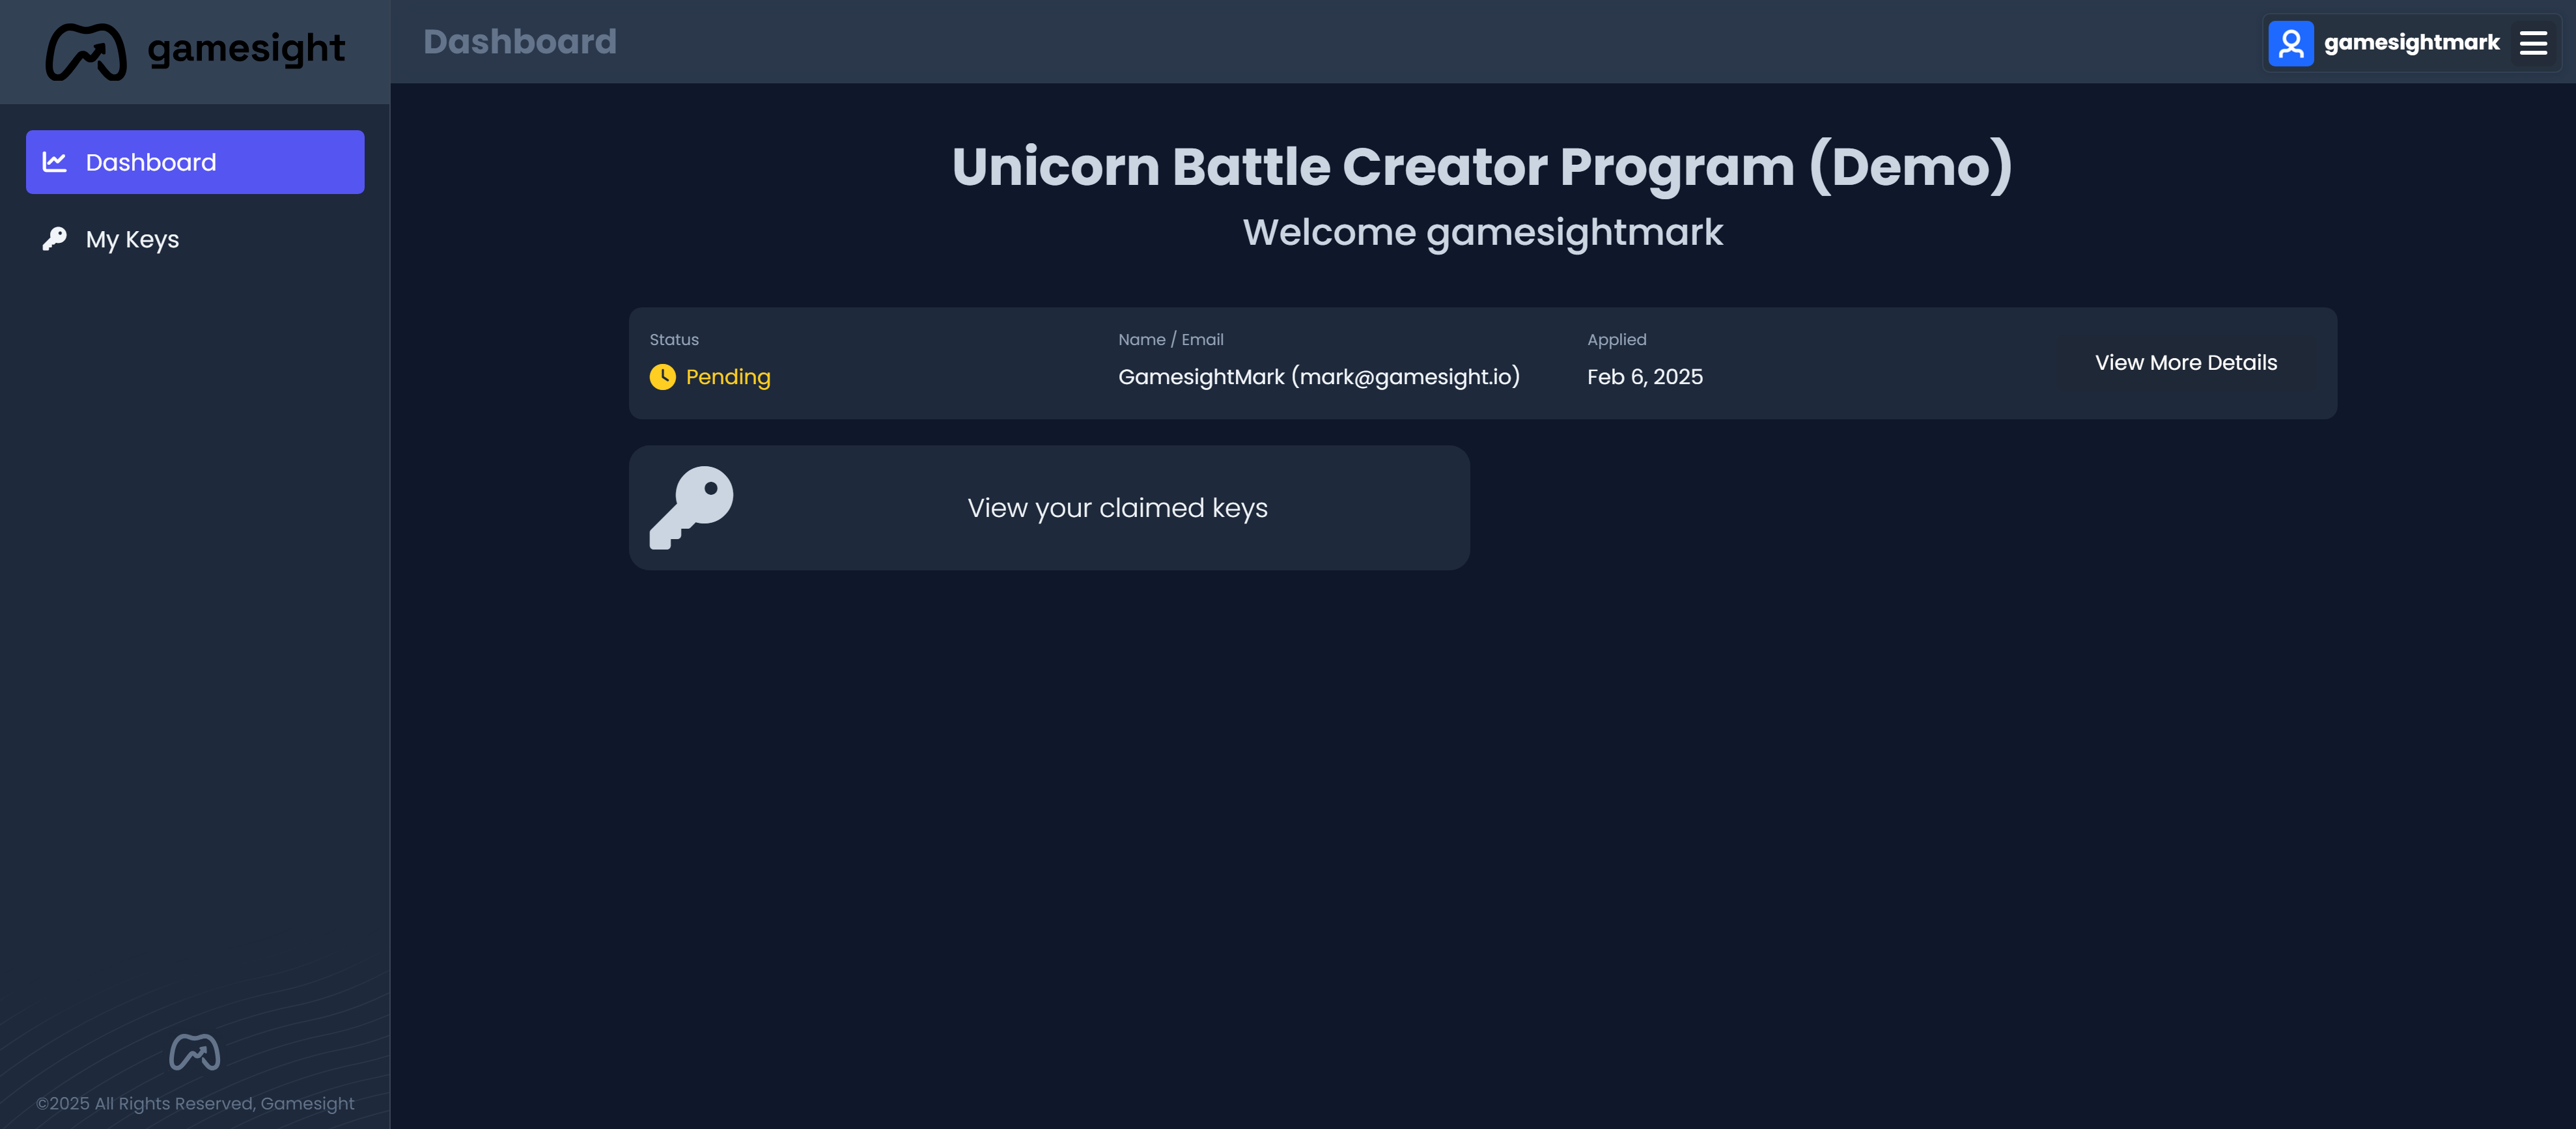
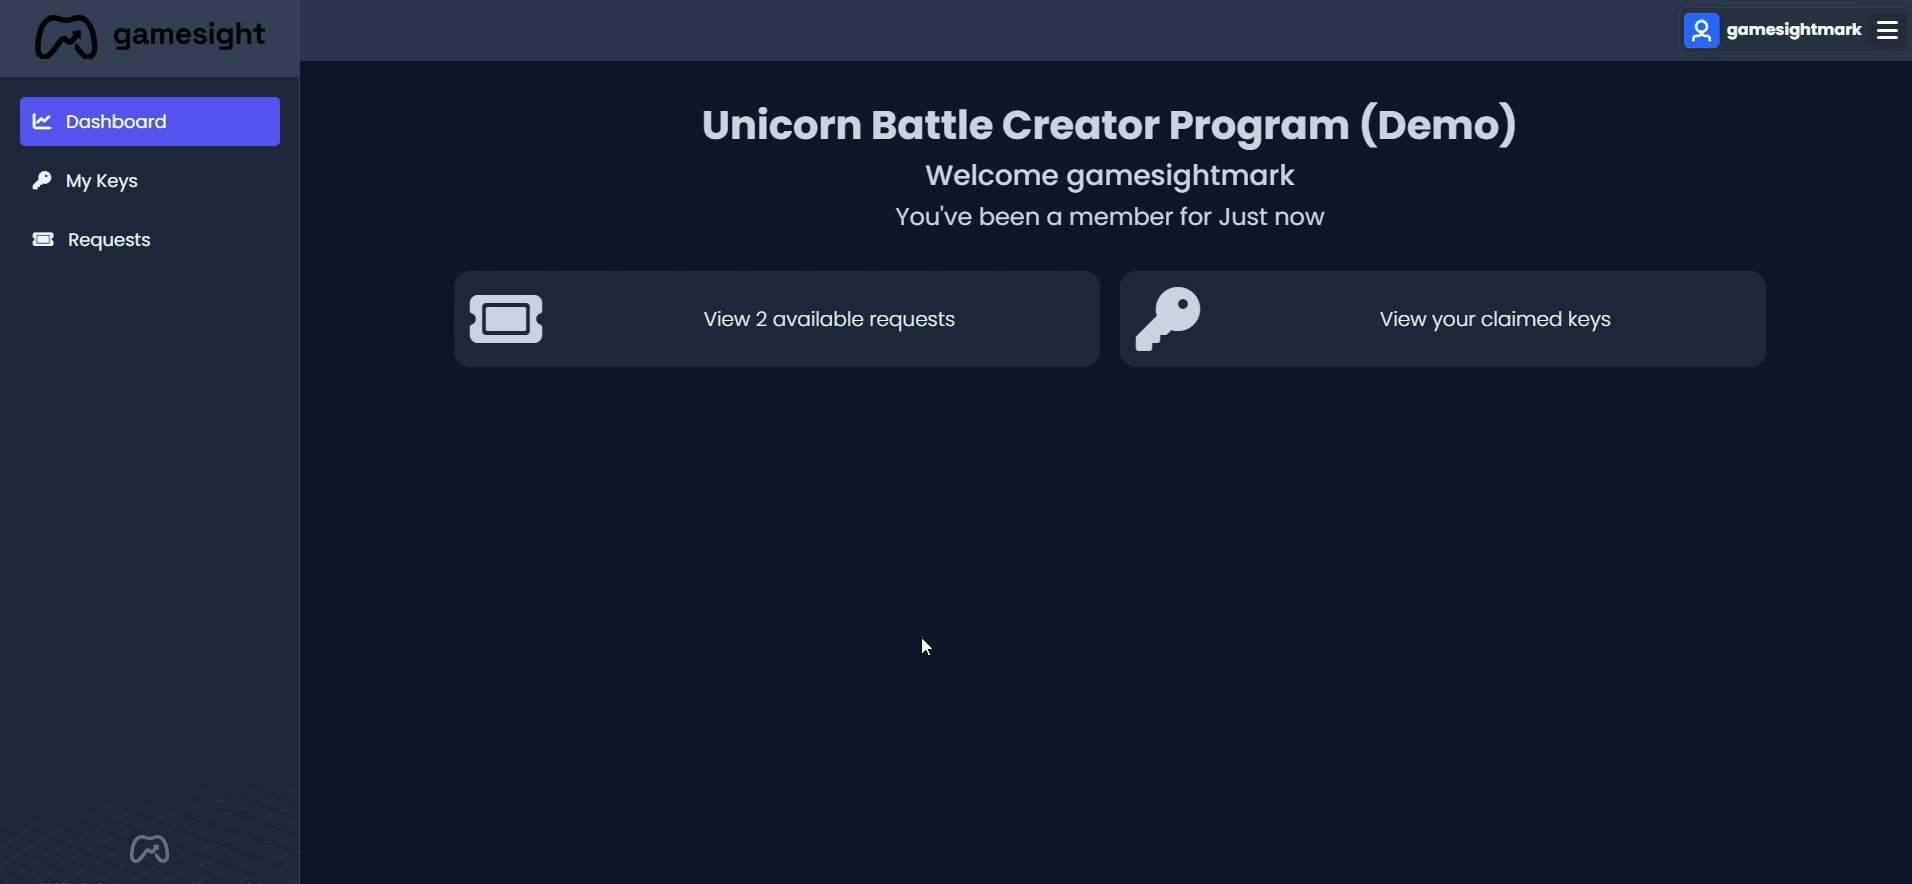
If your Creator Program includes Key Distribution/Requests, creators will be able to request game keys directly through their creator program login shown above. Key requests are easily managed by Gamesight staff (Creator Program Managers) through our internal tooling. An example of the Creator's Key Request journey is shown below.
Creator Key Redemption
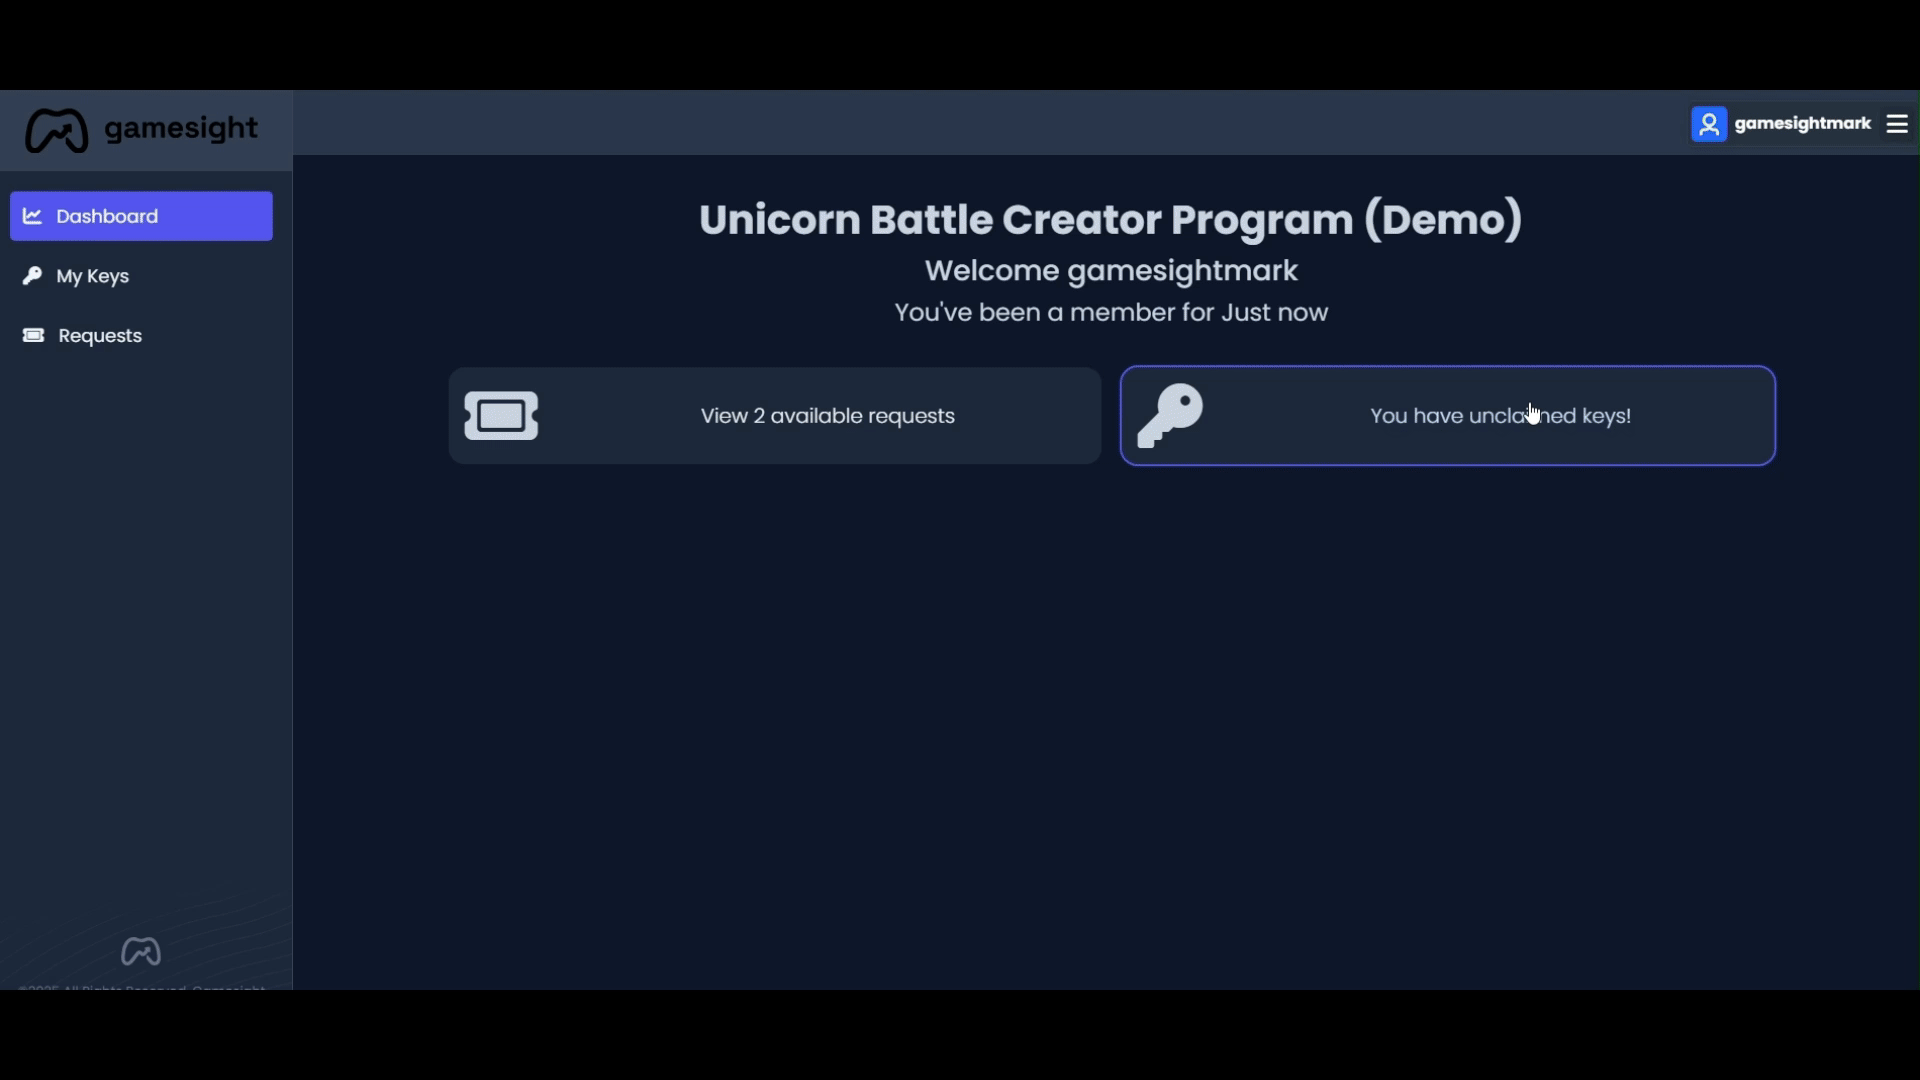
Once a creator's Key Request has been approved, they will be prompted to redeem their keys through their creator dashboard as shown below.
Step 2. Reviewing Creator Applications
Now that creator applications are being submitted through your creator program website, you can begin reviewing applications through your Creator Program's dashboard on the Applications tab. You can find detailed documentation pertaining to reviewing applications and application statuses here.

Step 3. Managing your Roster
All Approved creators are automatically migrated to your Creator Program's active Roster. To view and manage your Roster, simply click the Roster tab on your dashboard.
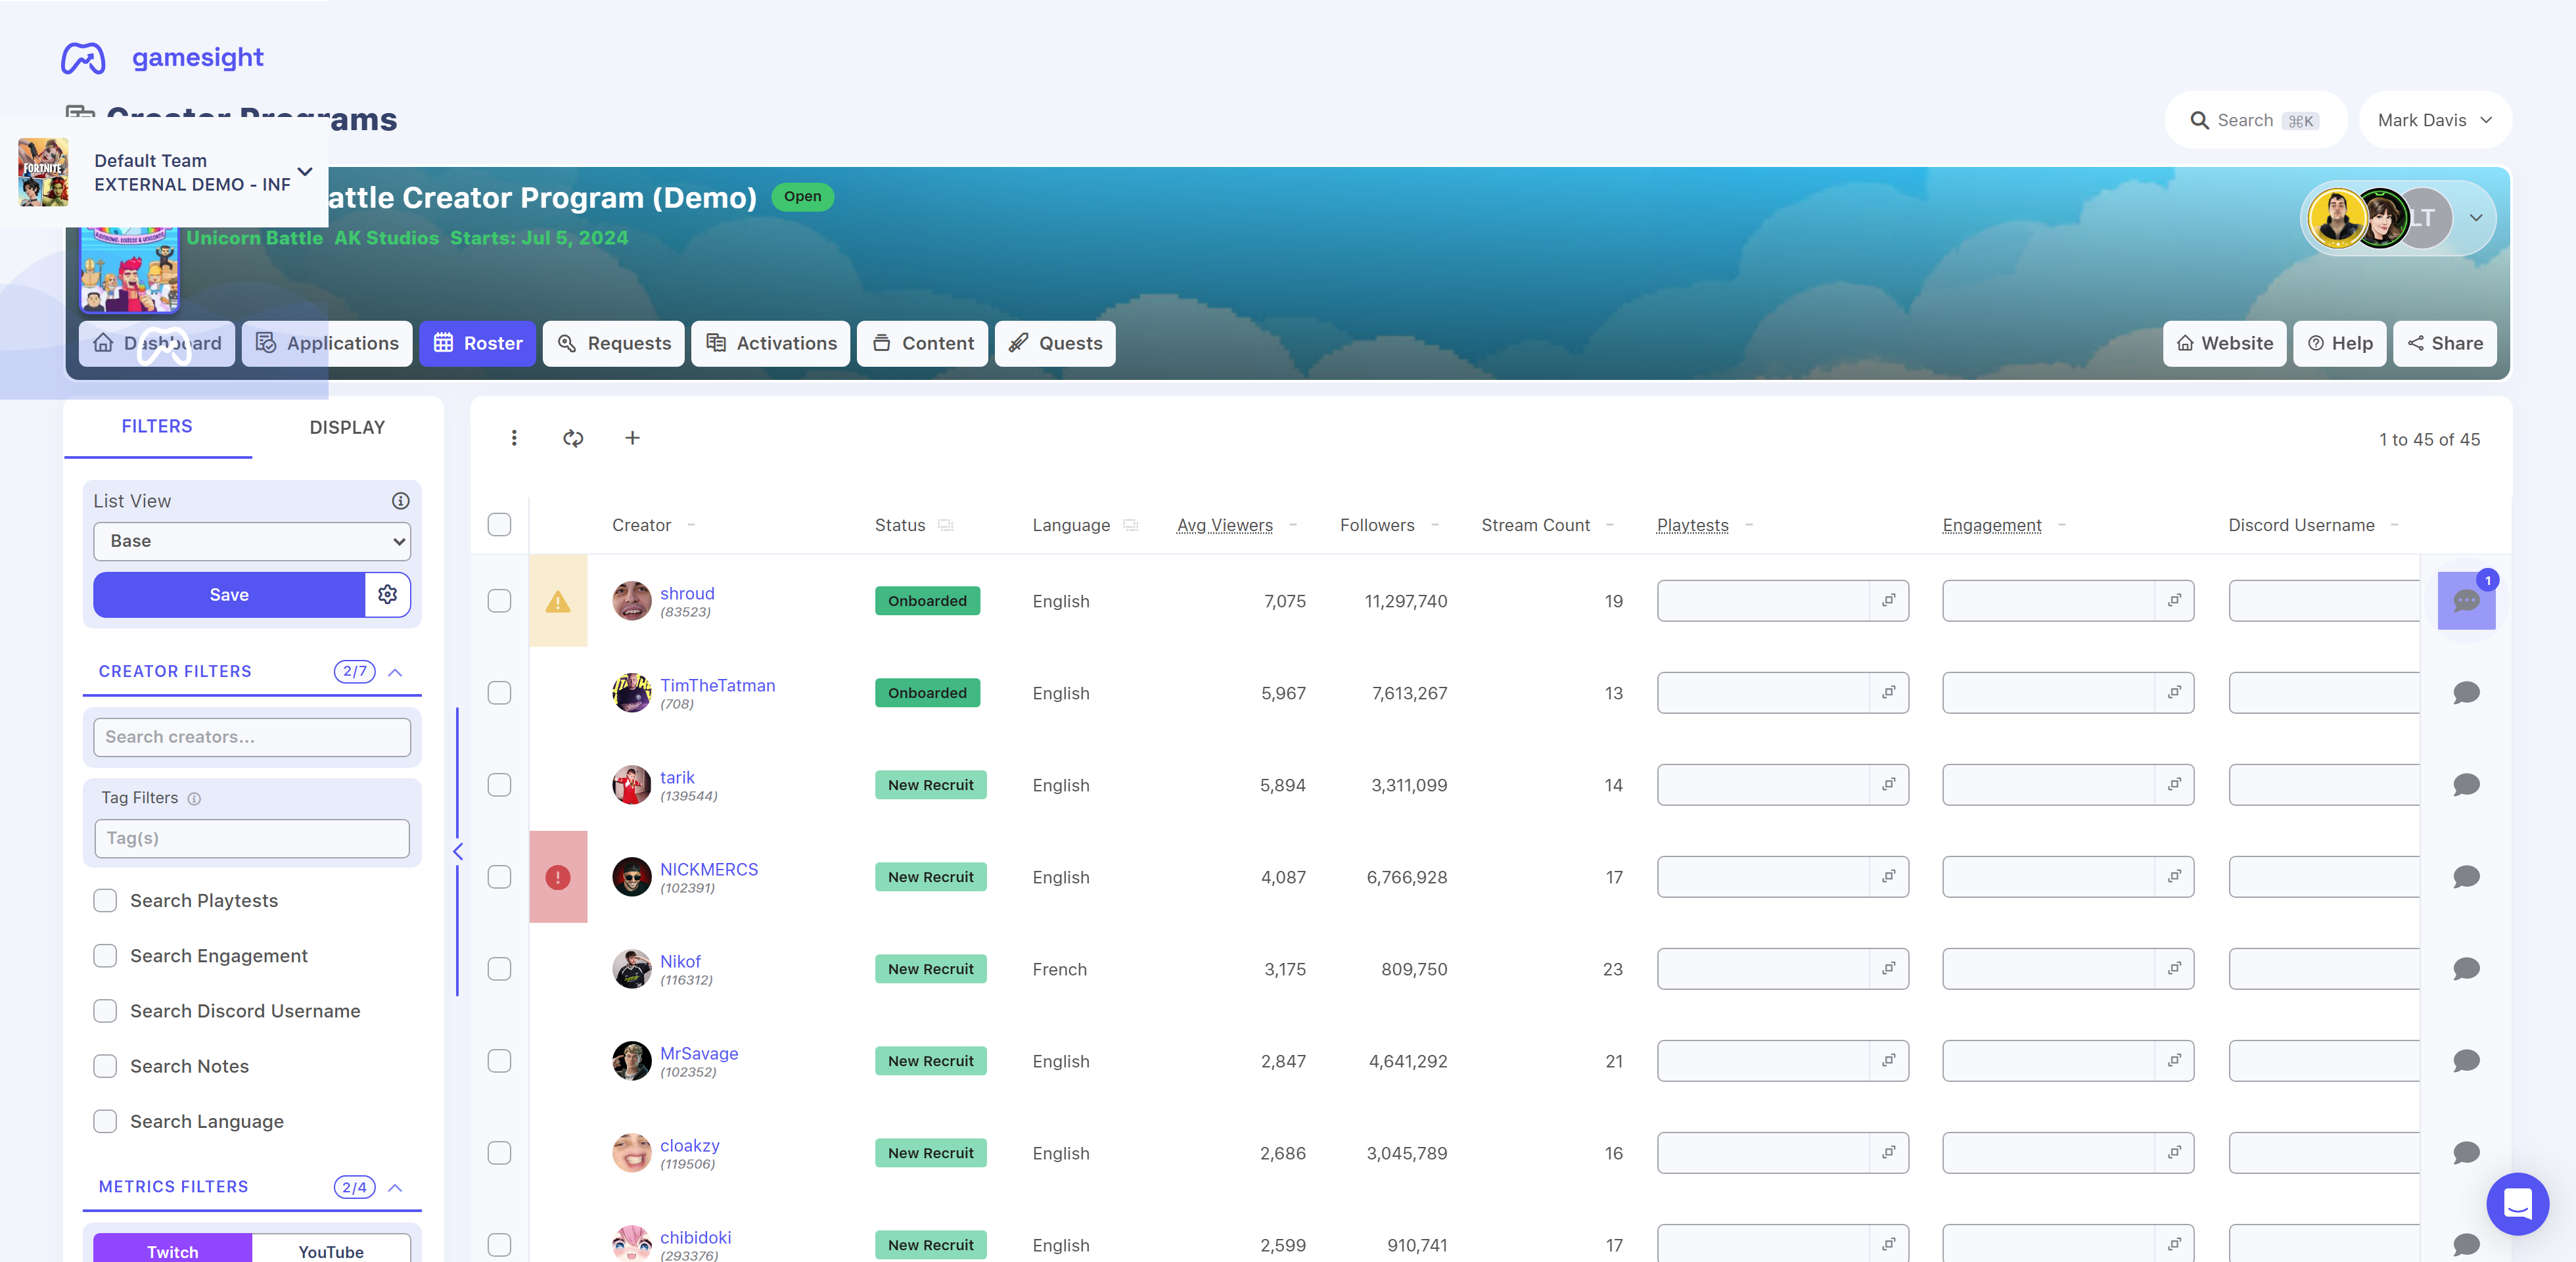
Check out our Creator Program Dashboard - Roster documentation to learn more!
Updated 7 days ago