Managing Statuses
This document will cover Managing Statuses for creators in your list.
CRM
By clicking CRM, you will be able to view and manage your Creator Lists. Choose a list to view by clicking on its name and you will be directed to your list of creators. If you do not have any lists available, check out our Creating a New List guide.

By clicking on the default Pending status as highlighted above, you will be prompted to choose a status for the creator you selected.

Once you have selected the status of your choice, click Save Changes to apply the change to your list.
Creator Statuses
Being able to modify creator statuses allows you to quickly and easily update your list so that team members can view changes and collaborate on the same page. You can set any default status of your choice, however Pending is set as the default automatically.
List Statuses
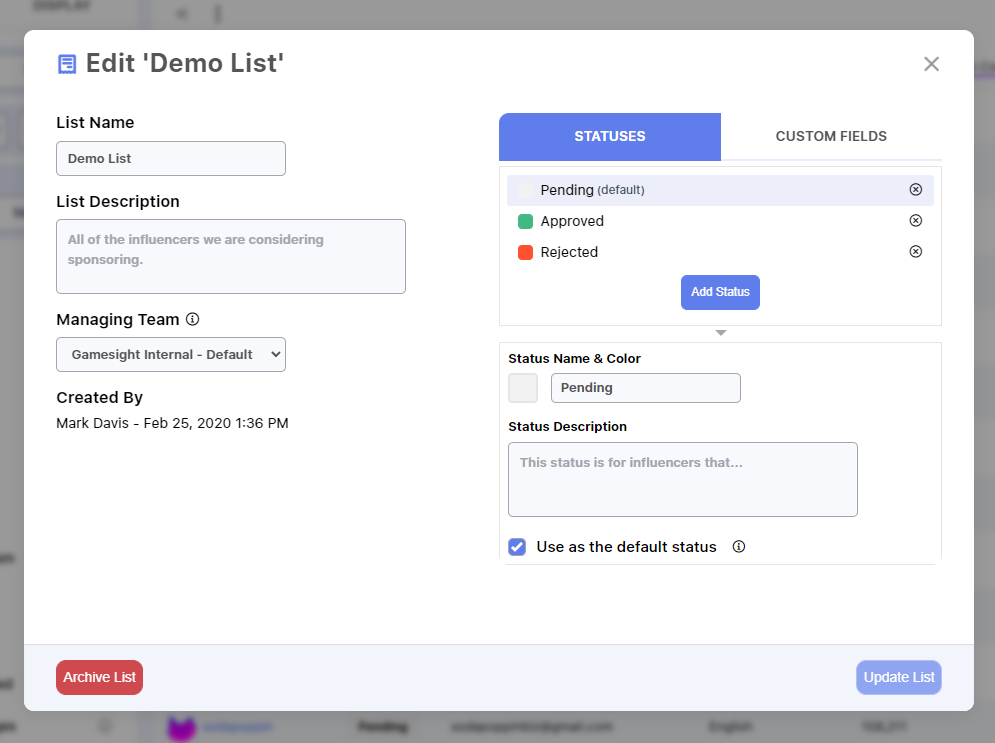
When creating/editing a list, you can also control which statuses are available for your list. Simply click CRM and then hover over the list you wish to edit, followed by clicking the edit icon.

The Edit feature will populate the above modal which will allow you to modify the team that is in control of managing the list, adding your own status names and corresponding colors, status descriptions to define what the status means, and even choosing a Default status for newly added creators (such as "Pending", or "New", for example).
Filtering by Status
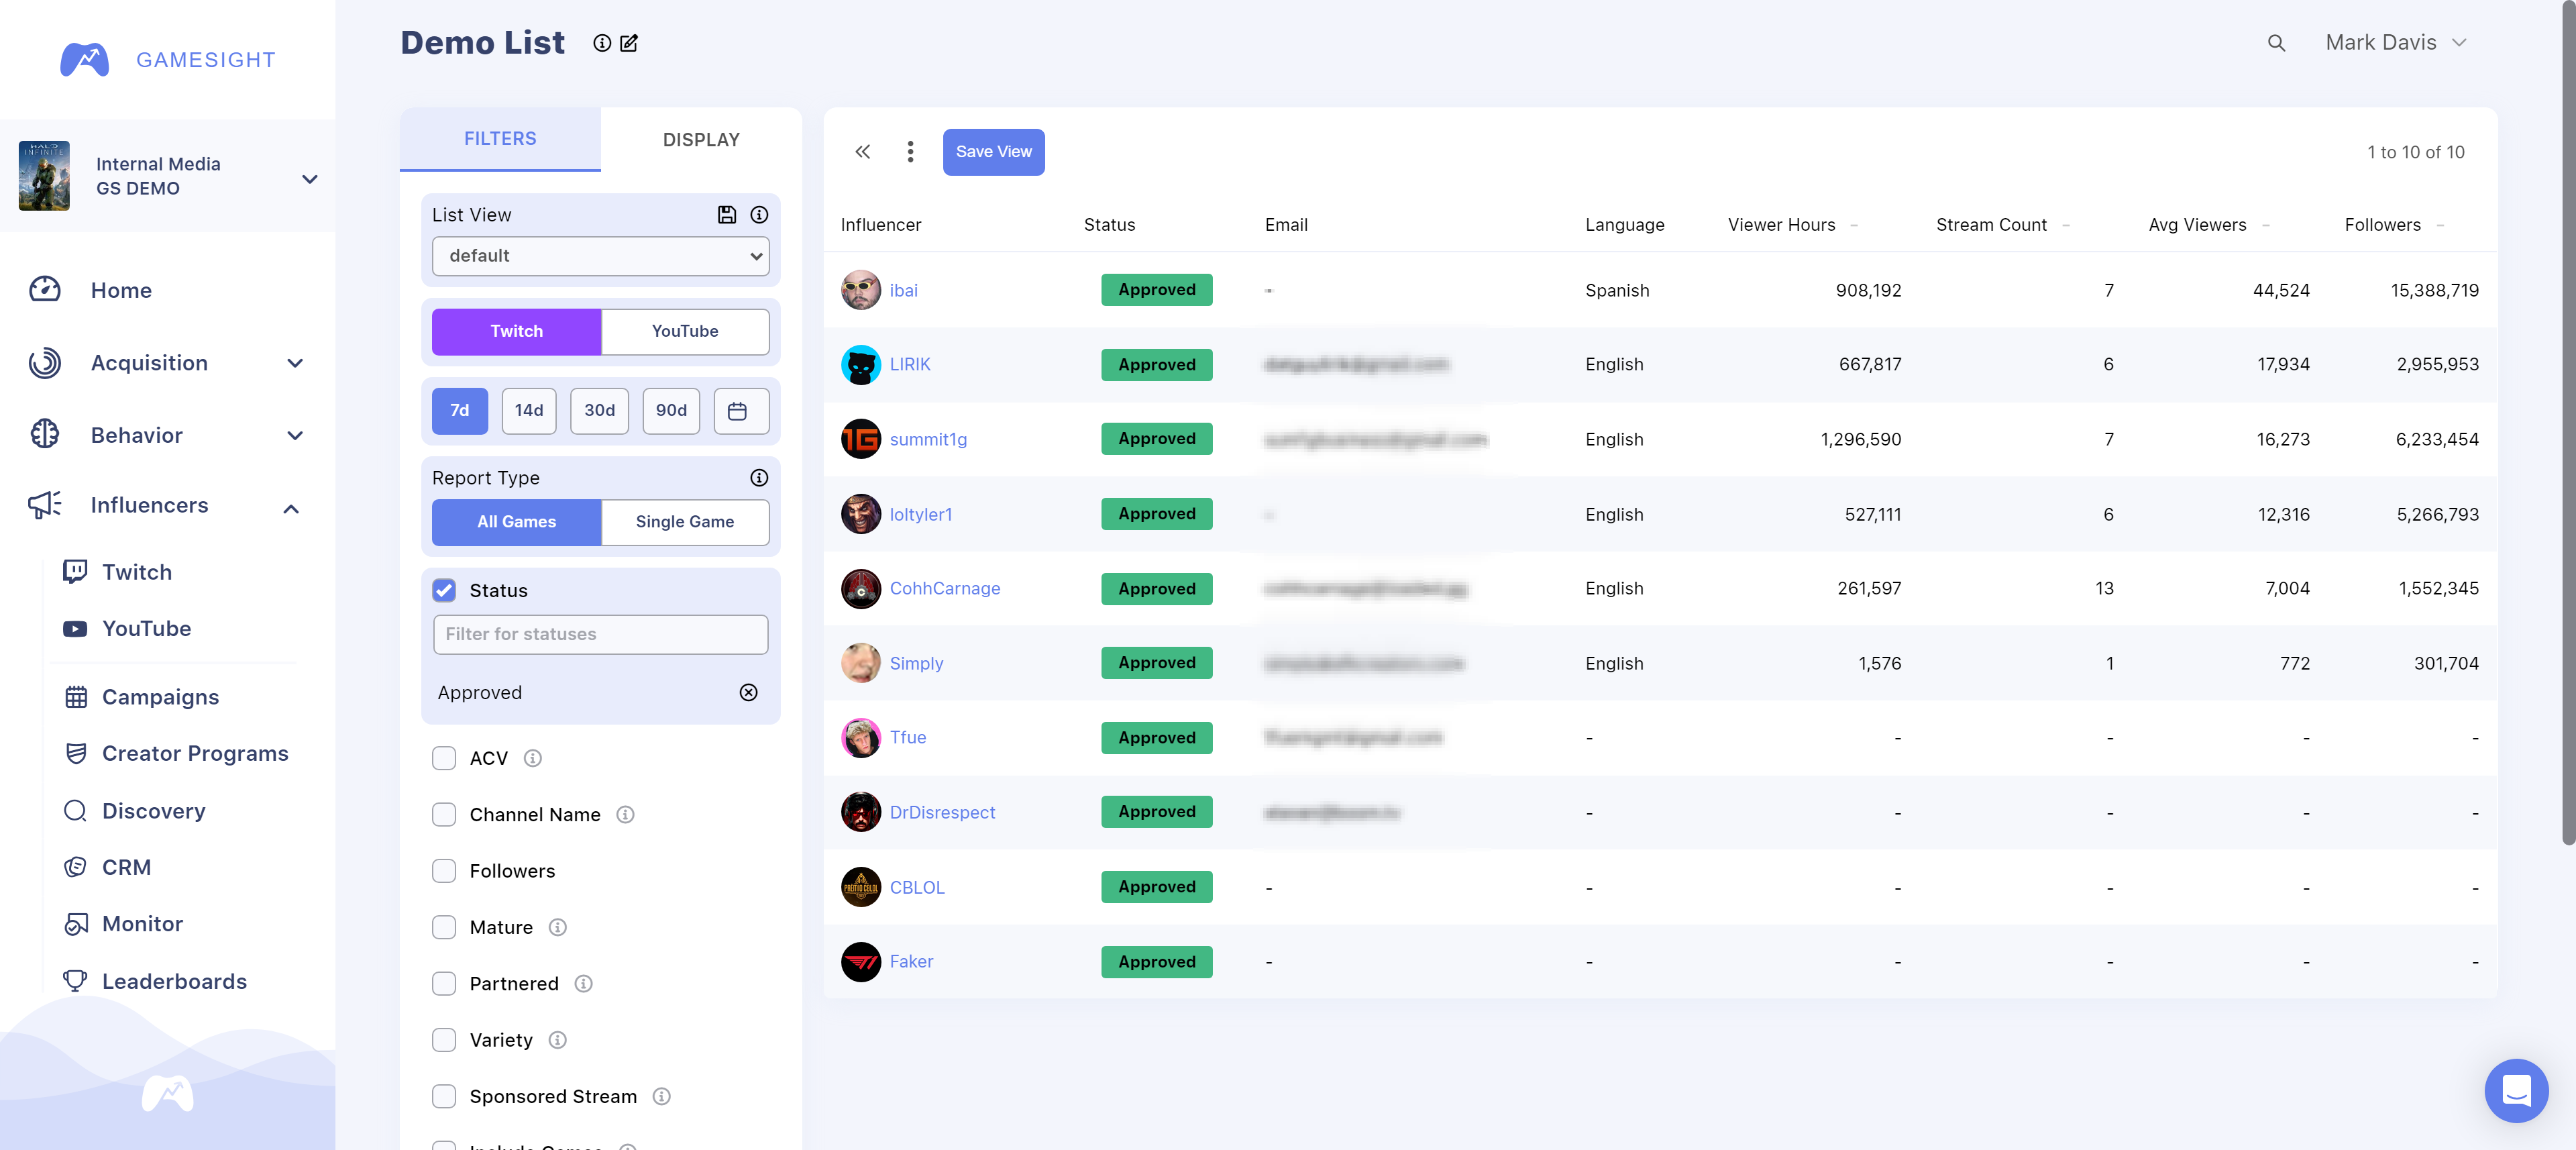
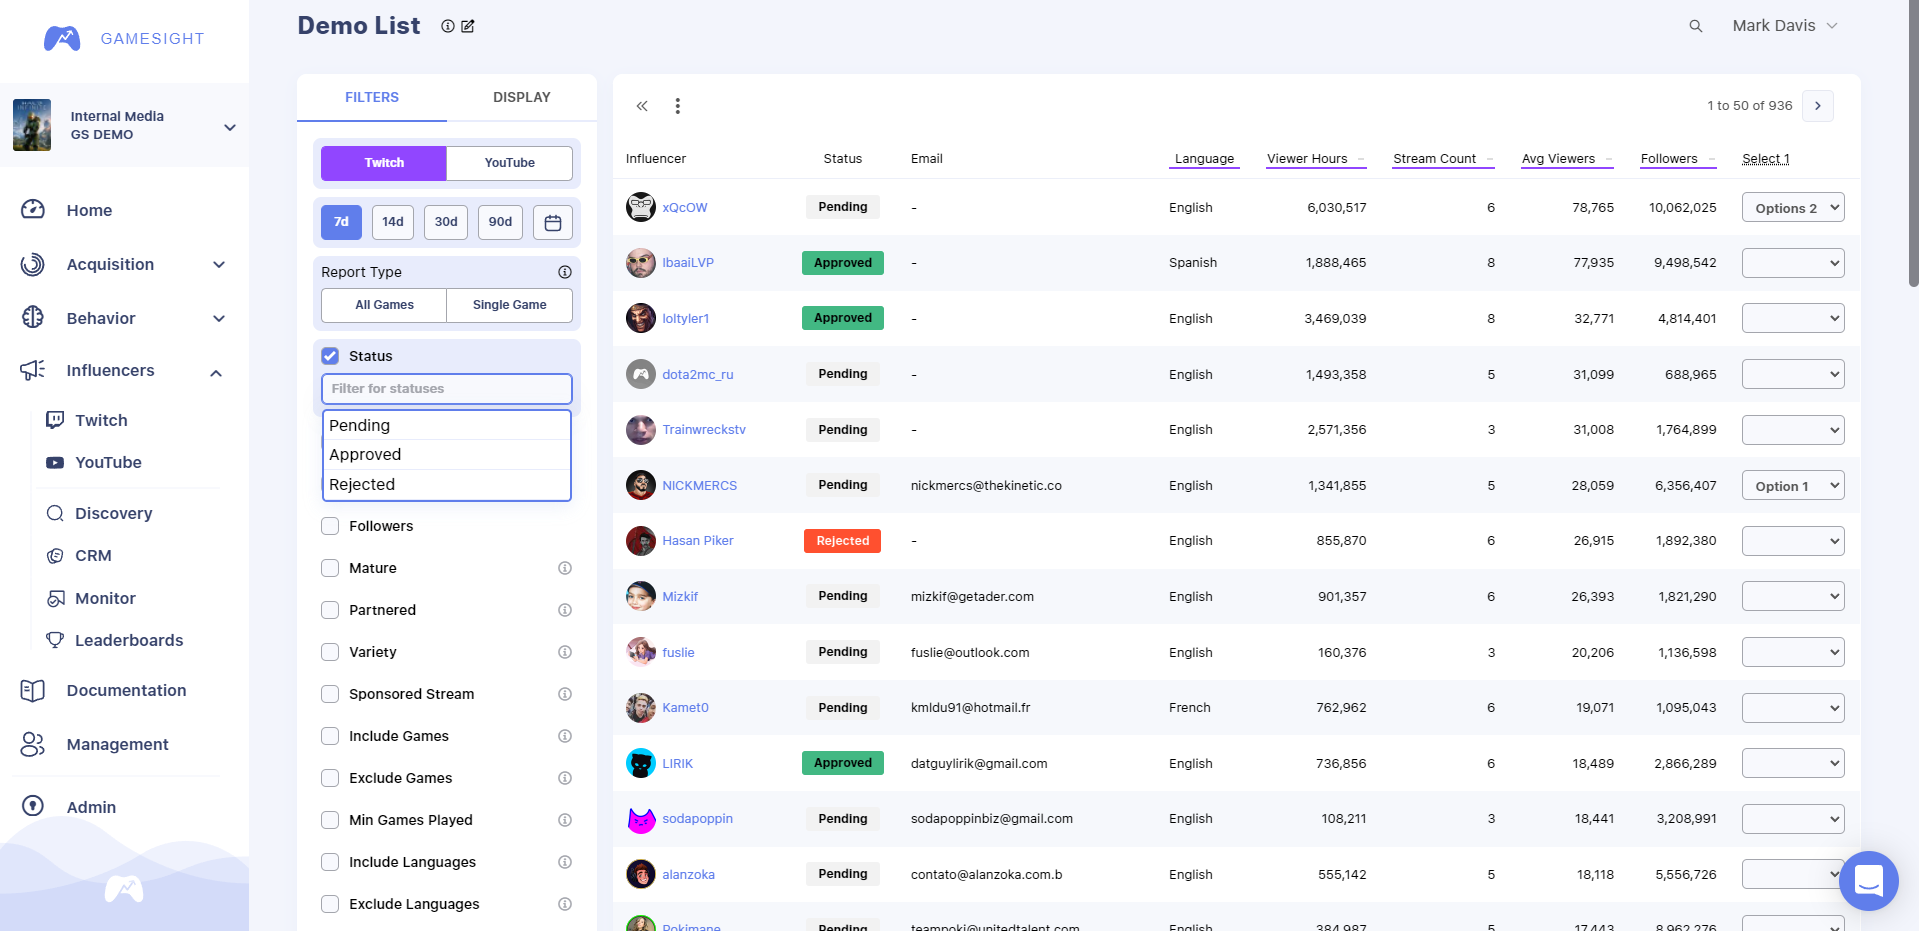
When viewing a list, you can also filter the creators being viewed by specific statuses. For example, if you only want to see "Pending" creators, simply use the Status filter on the left-hand side of the page. This is an easy way to quickly view only specific creators that match your selected status as shown below.

Updated 14 days ago
