
Configuring Goals
Goals are specific Events or combinations of Events that you are trying to drive users to complete. This may include buying your game, first match completed, user reactivation, or any other combination of events. Goals can be managed by clicking Management on the left-hand side of your console dashboard navigation, followed by clicking Goals below the Game column.
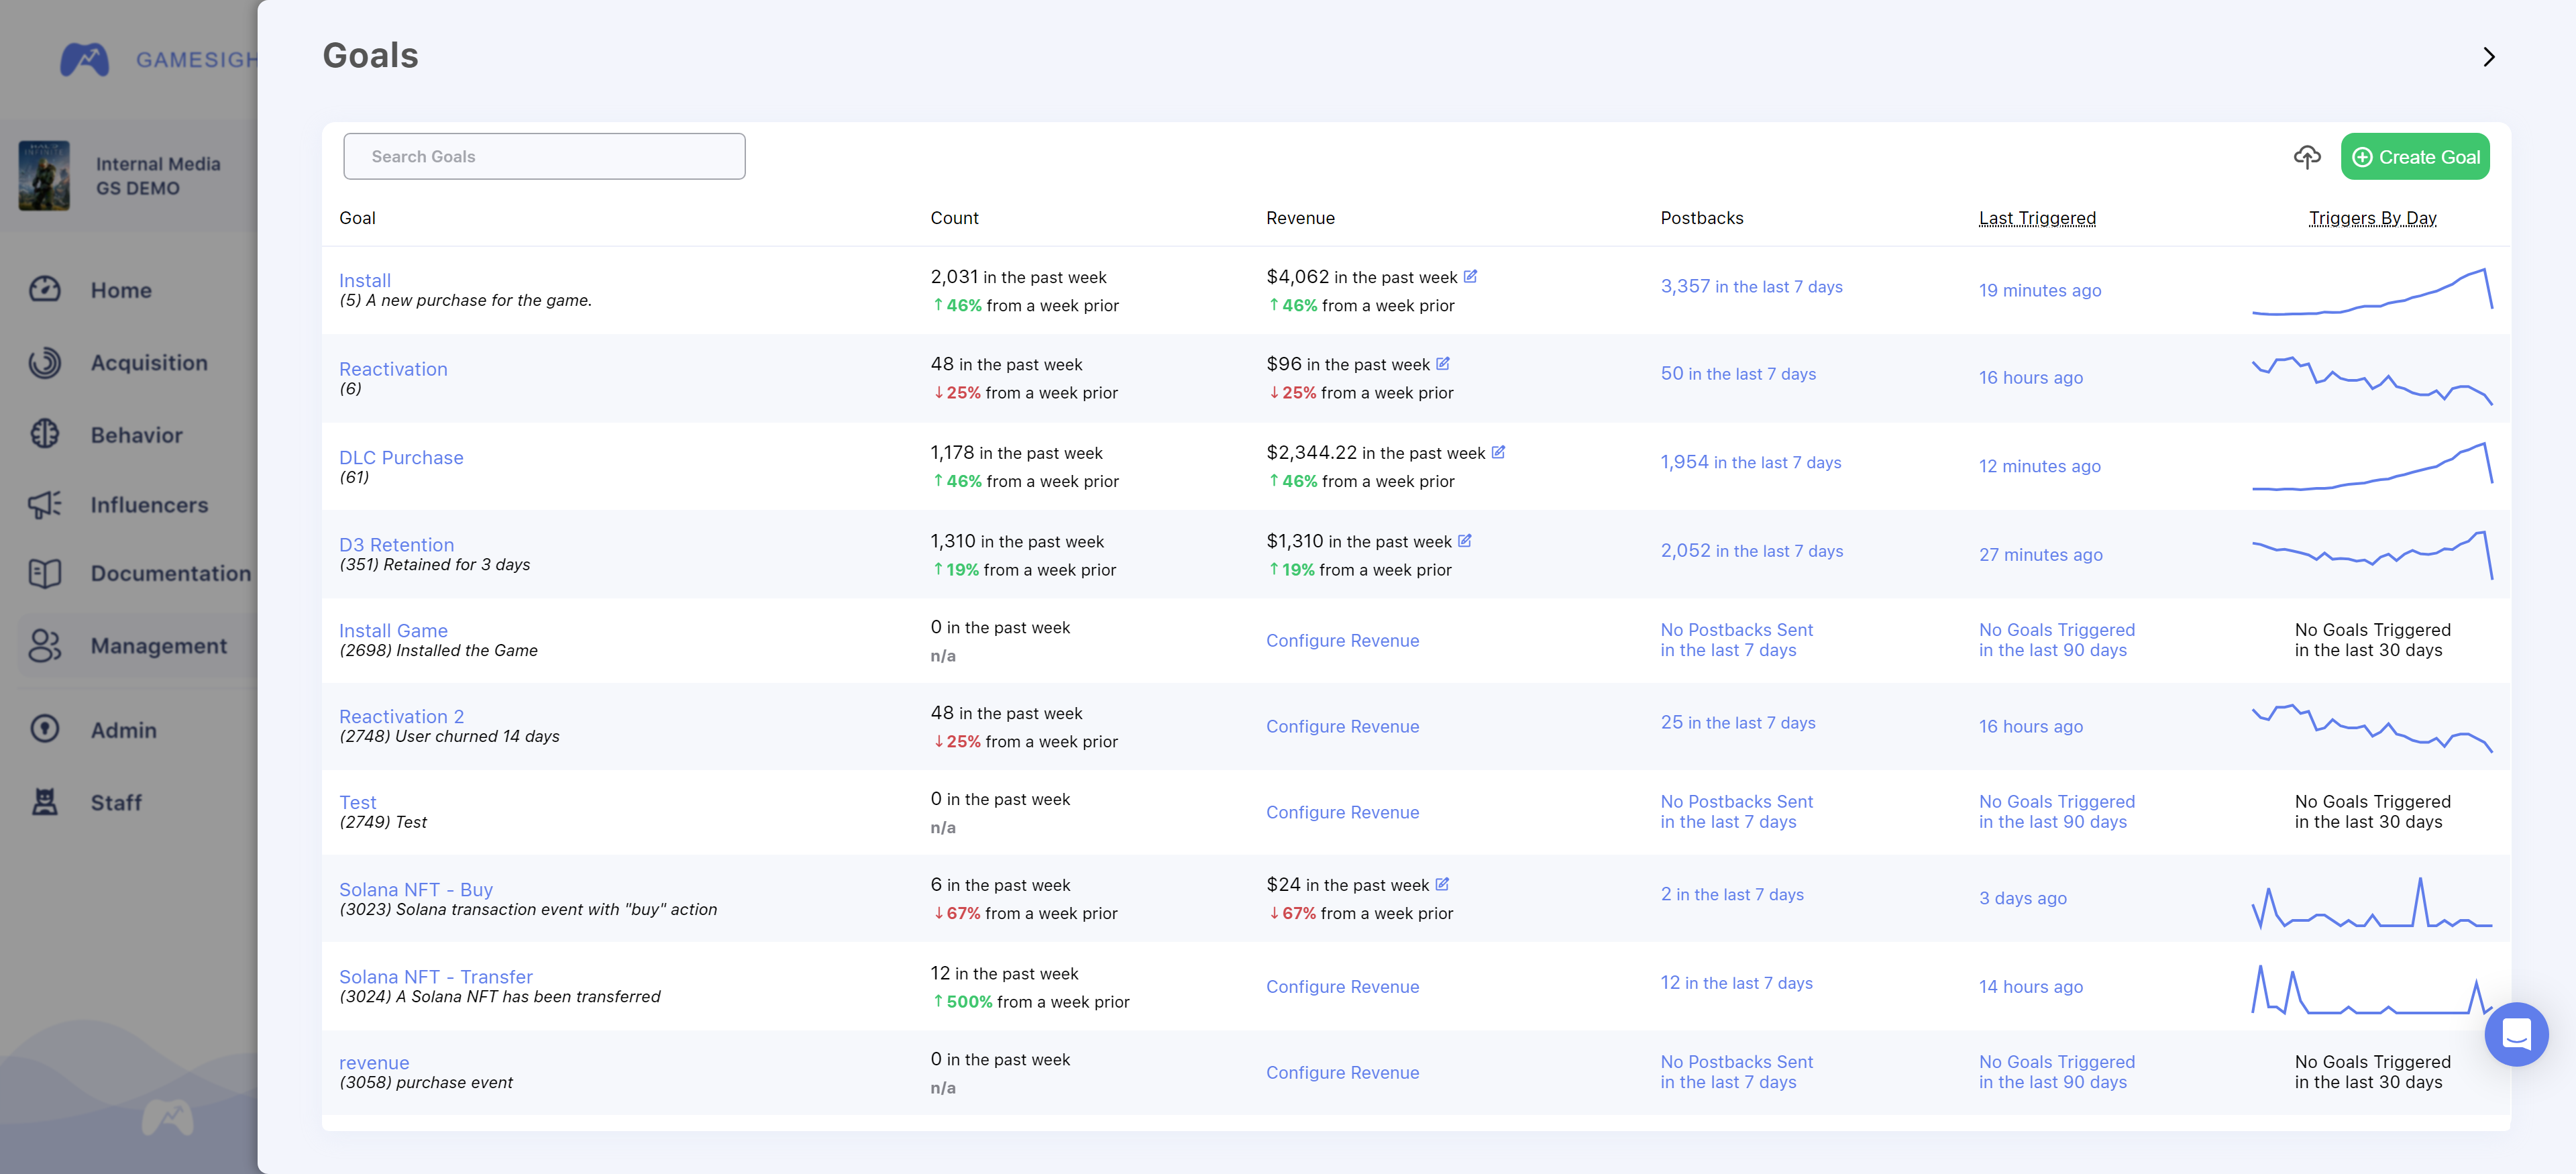
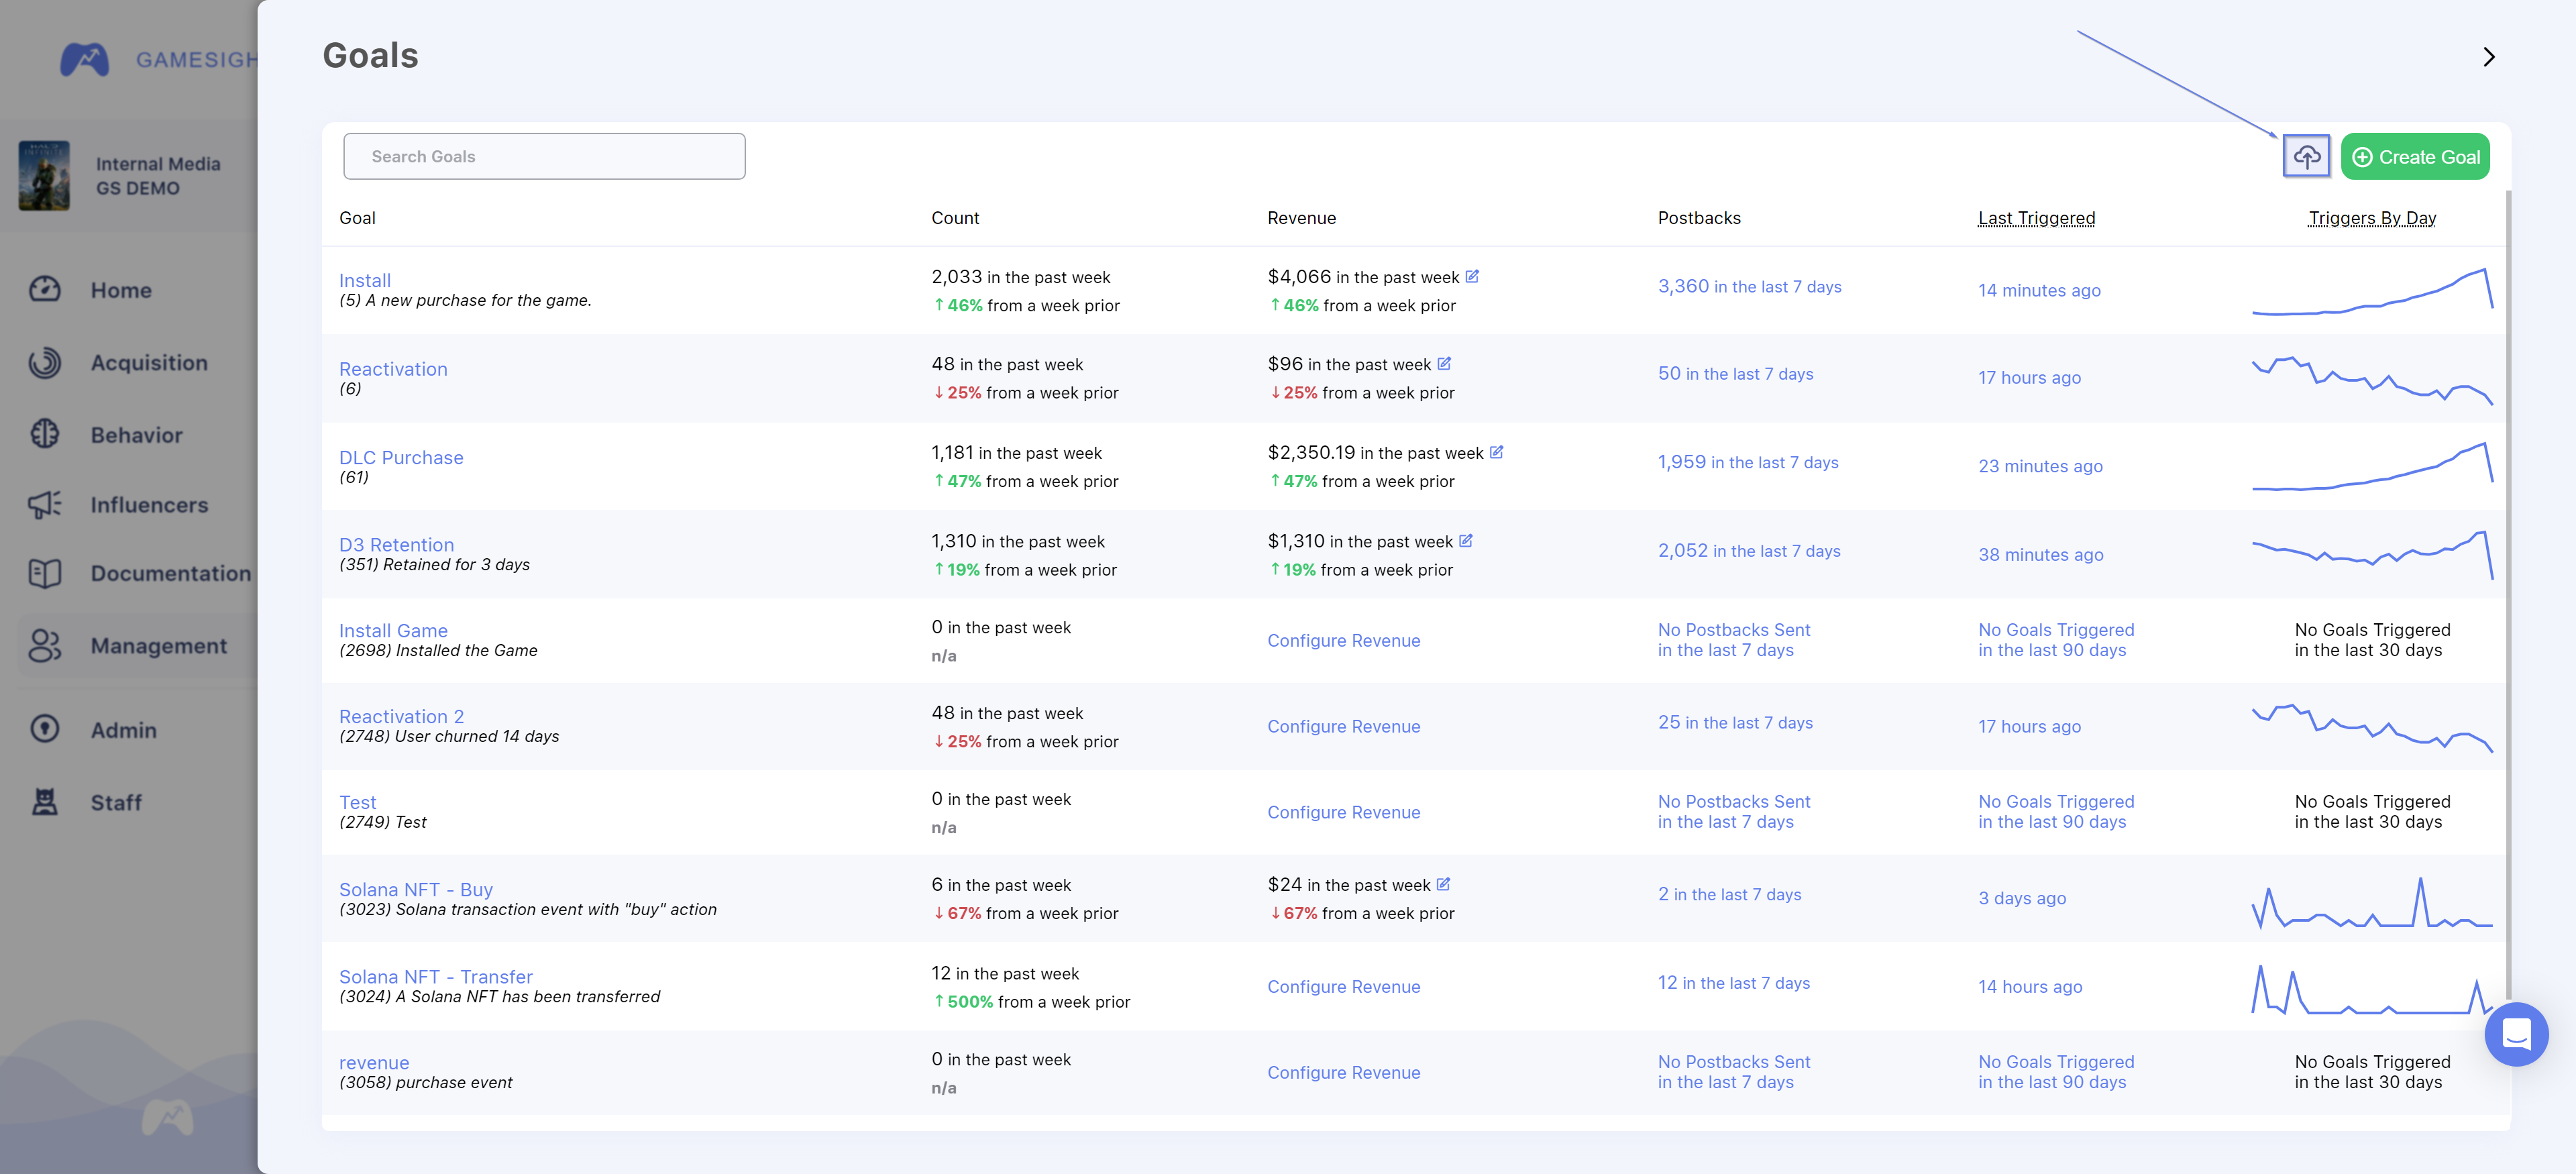
Goal overview panel
From this page, you can examine the configuration of your goals, create new goals, manage goal/event triggers, and see some of your goal activity (counts, revenue, postbacks, etc.).
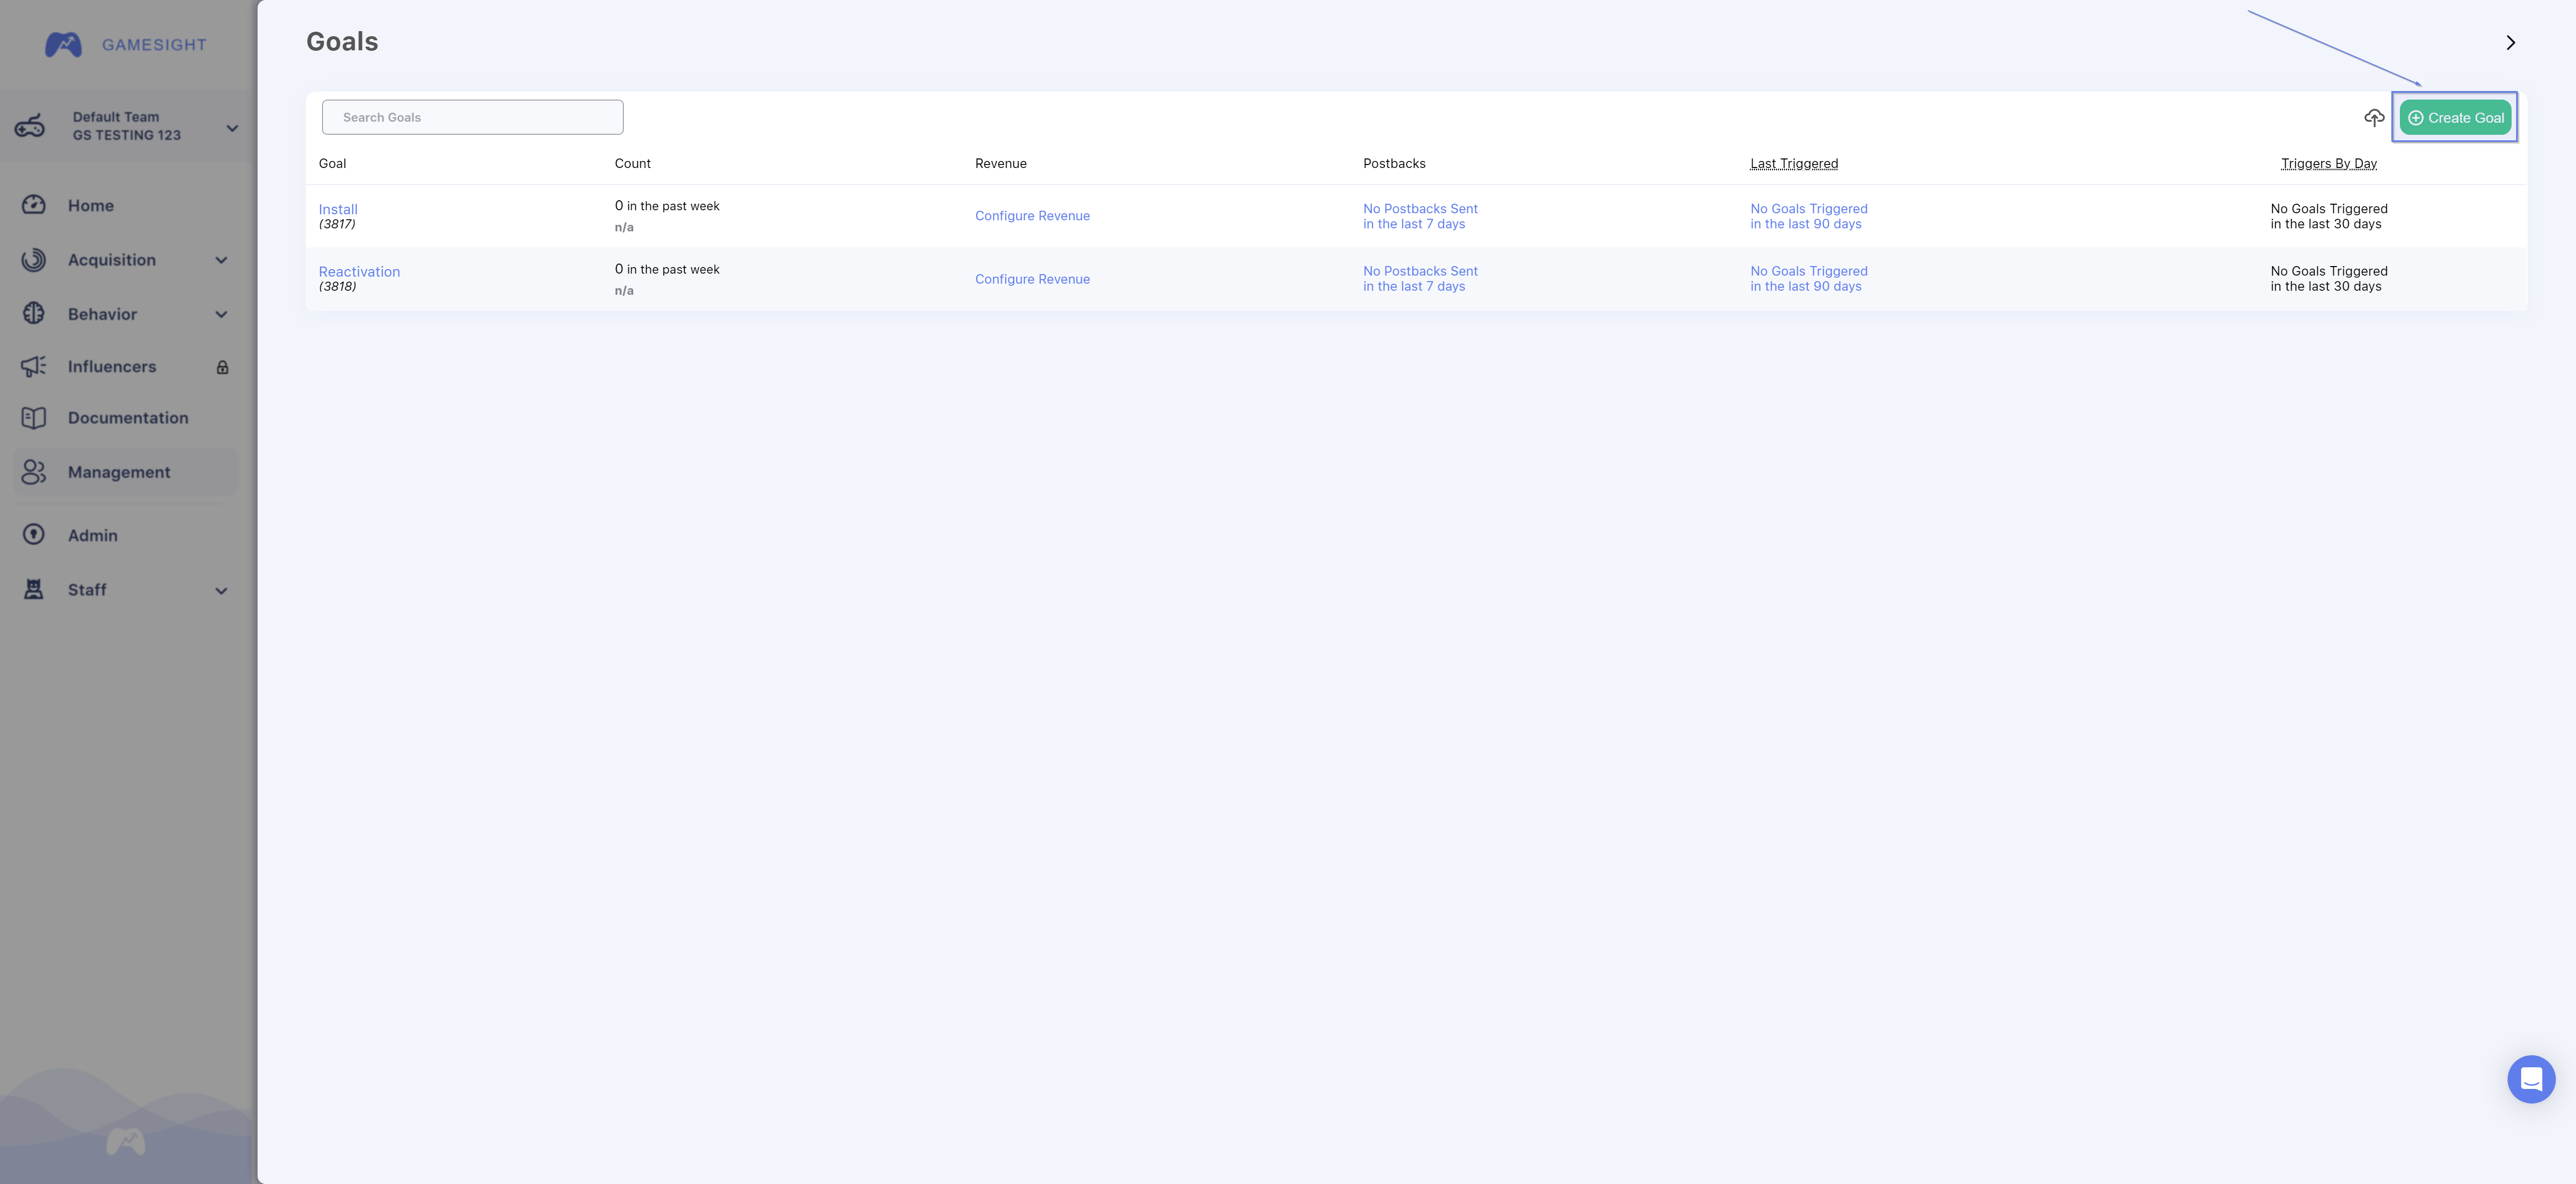
Default Goals
Every new game is set up with two default goals: Install and Reactivation
The default Reactivation goal is set up with a 14 day minimum retrigger time, which means a Reactivation triggers when a churned user returns to your game after a minimum of 14 days of inactivity.
You can find examples covering how to configure goals for common situations in the Use Case Guides.
Creating Goals
Goals can be created from the Management page of your dashboard by clicking Goals, followed by clicking the +Create Goal button

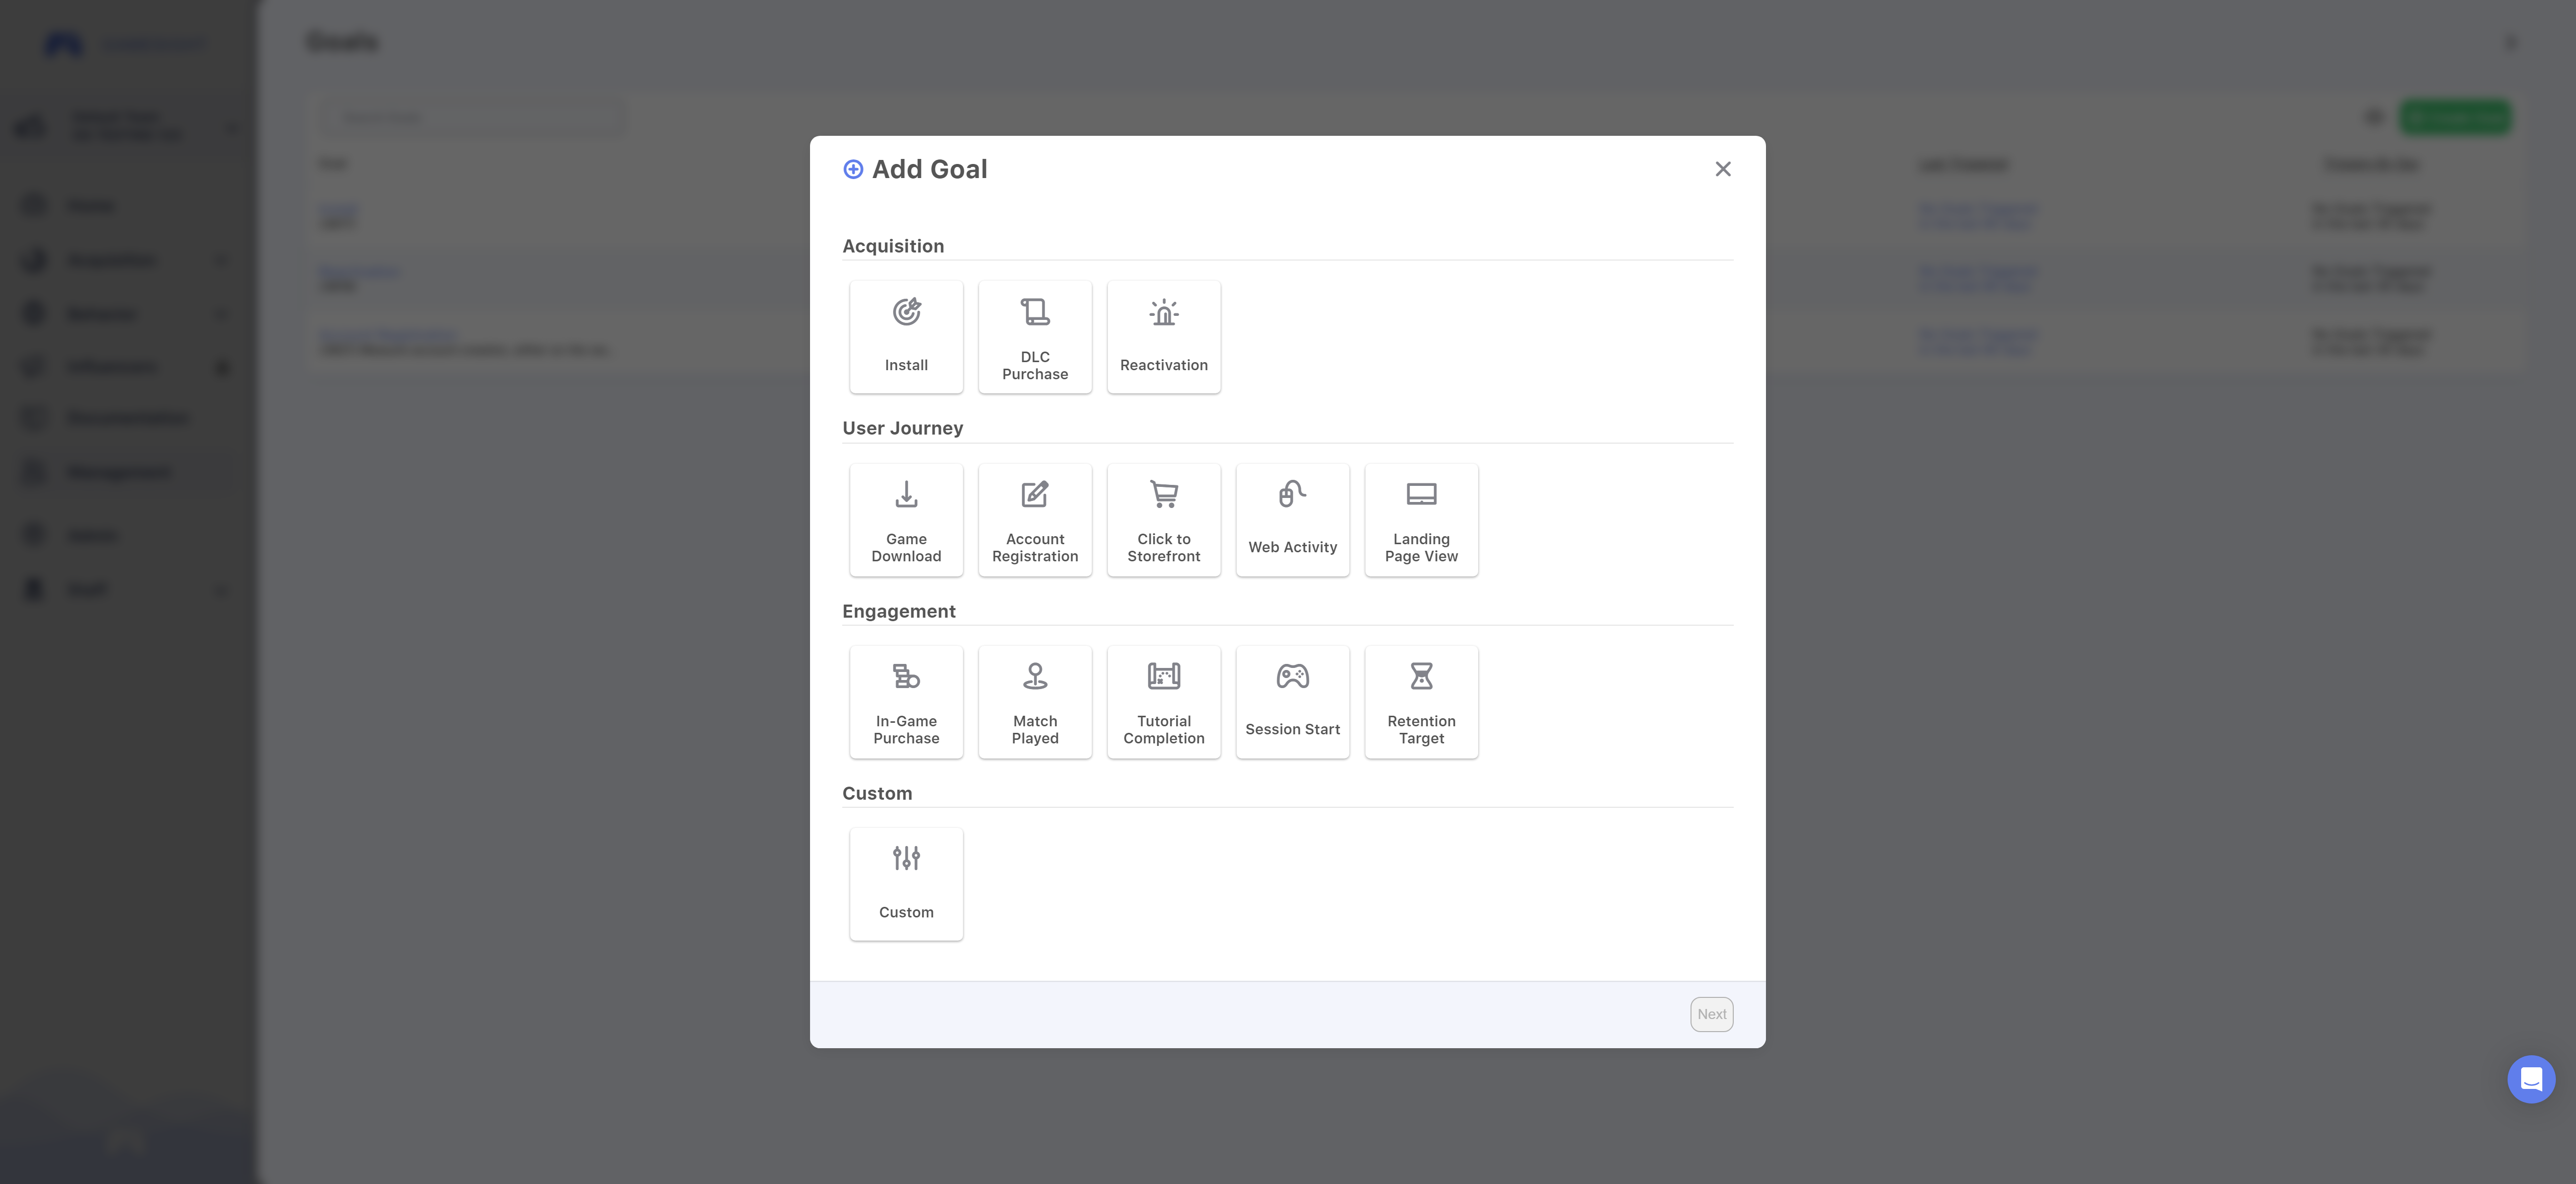
Goal Categories
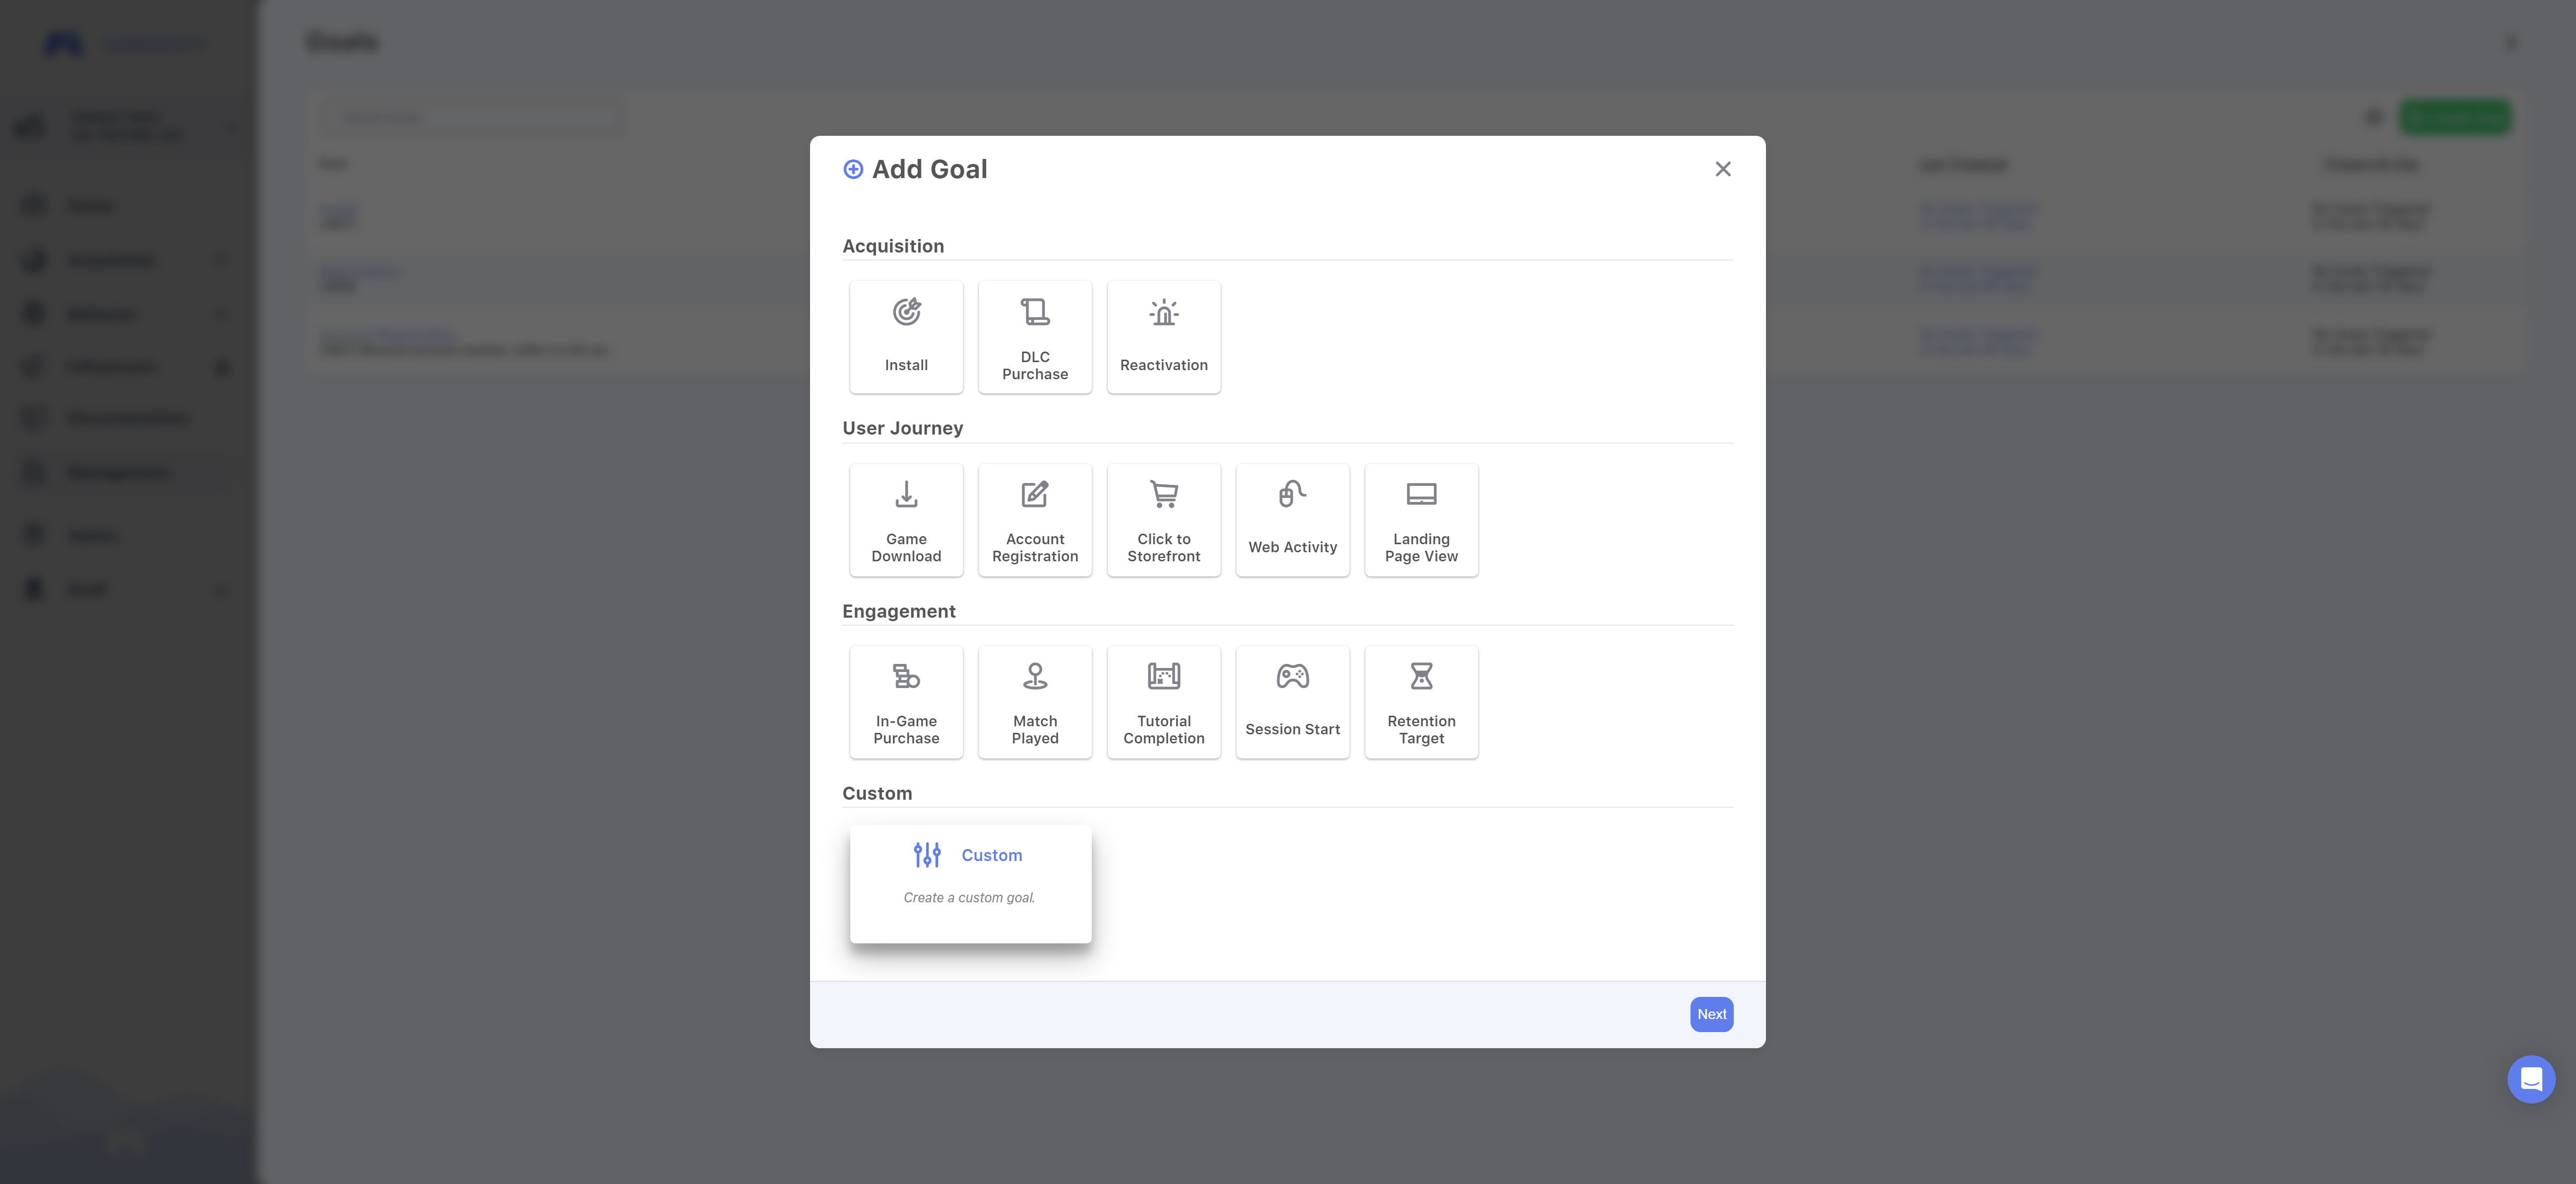
With the Add Goal menu open, you can choose the type of Goal that you would like to create by using some existing and very common Goal examples. As shown below, the first menu presents you with a list of "Goal Categories" that you can choose from. Simply click on the option that best fits the type of Goal that you would like to add.
Next, you need to provide an Event Type in the field provided.
In the example shown below, we will be creating an Account Registration Goal for a user who may sign up for an account on our website. The "Event Type" here should match what is being sent within the event payload that is being sent to Gamesight for measurement.
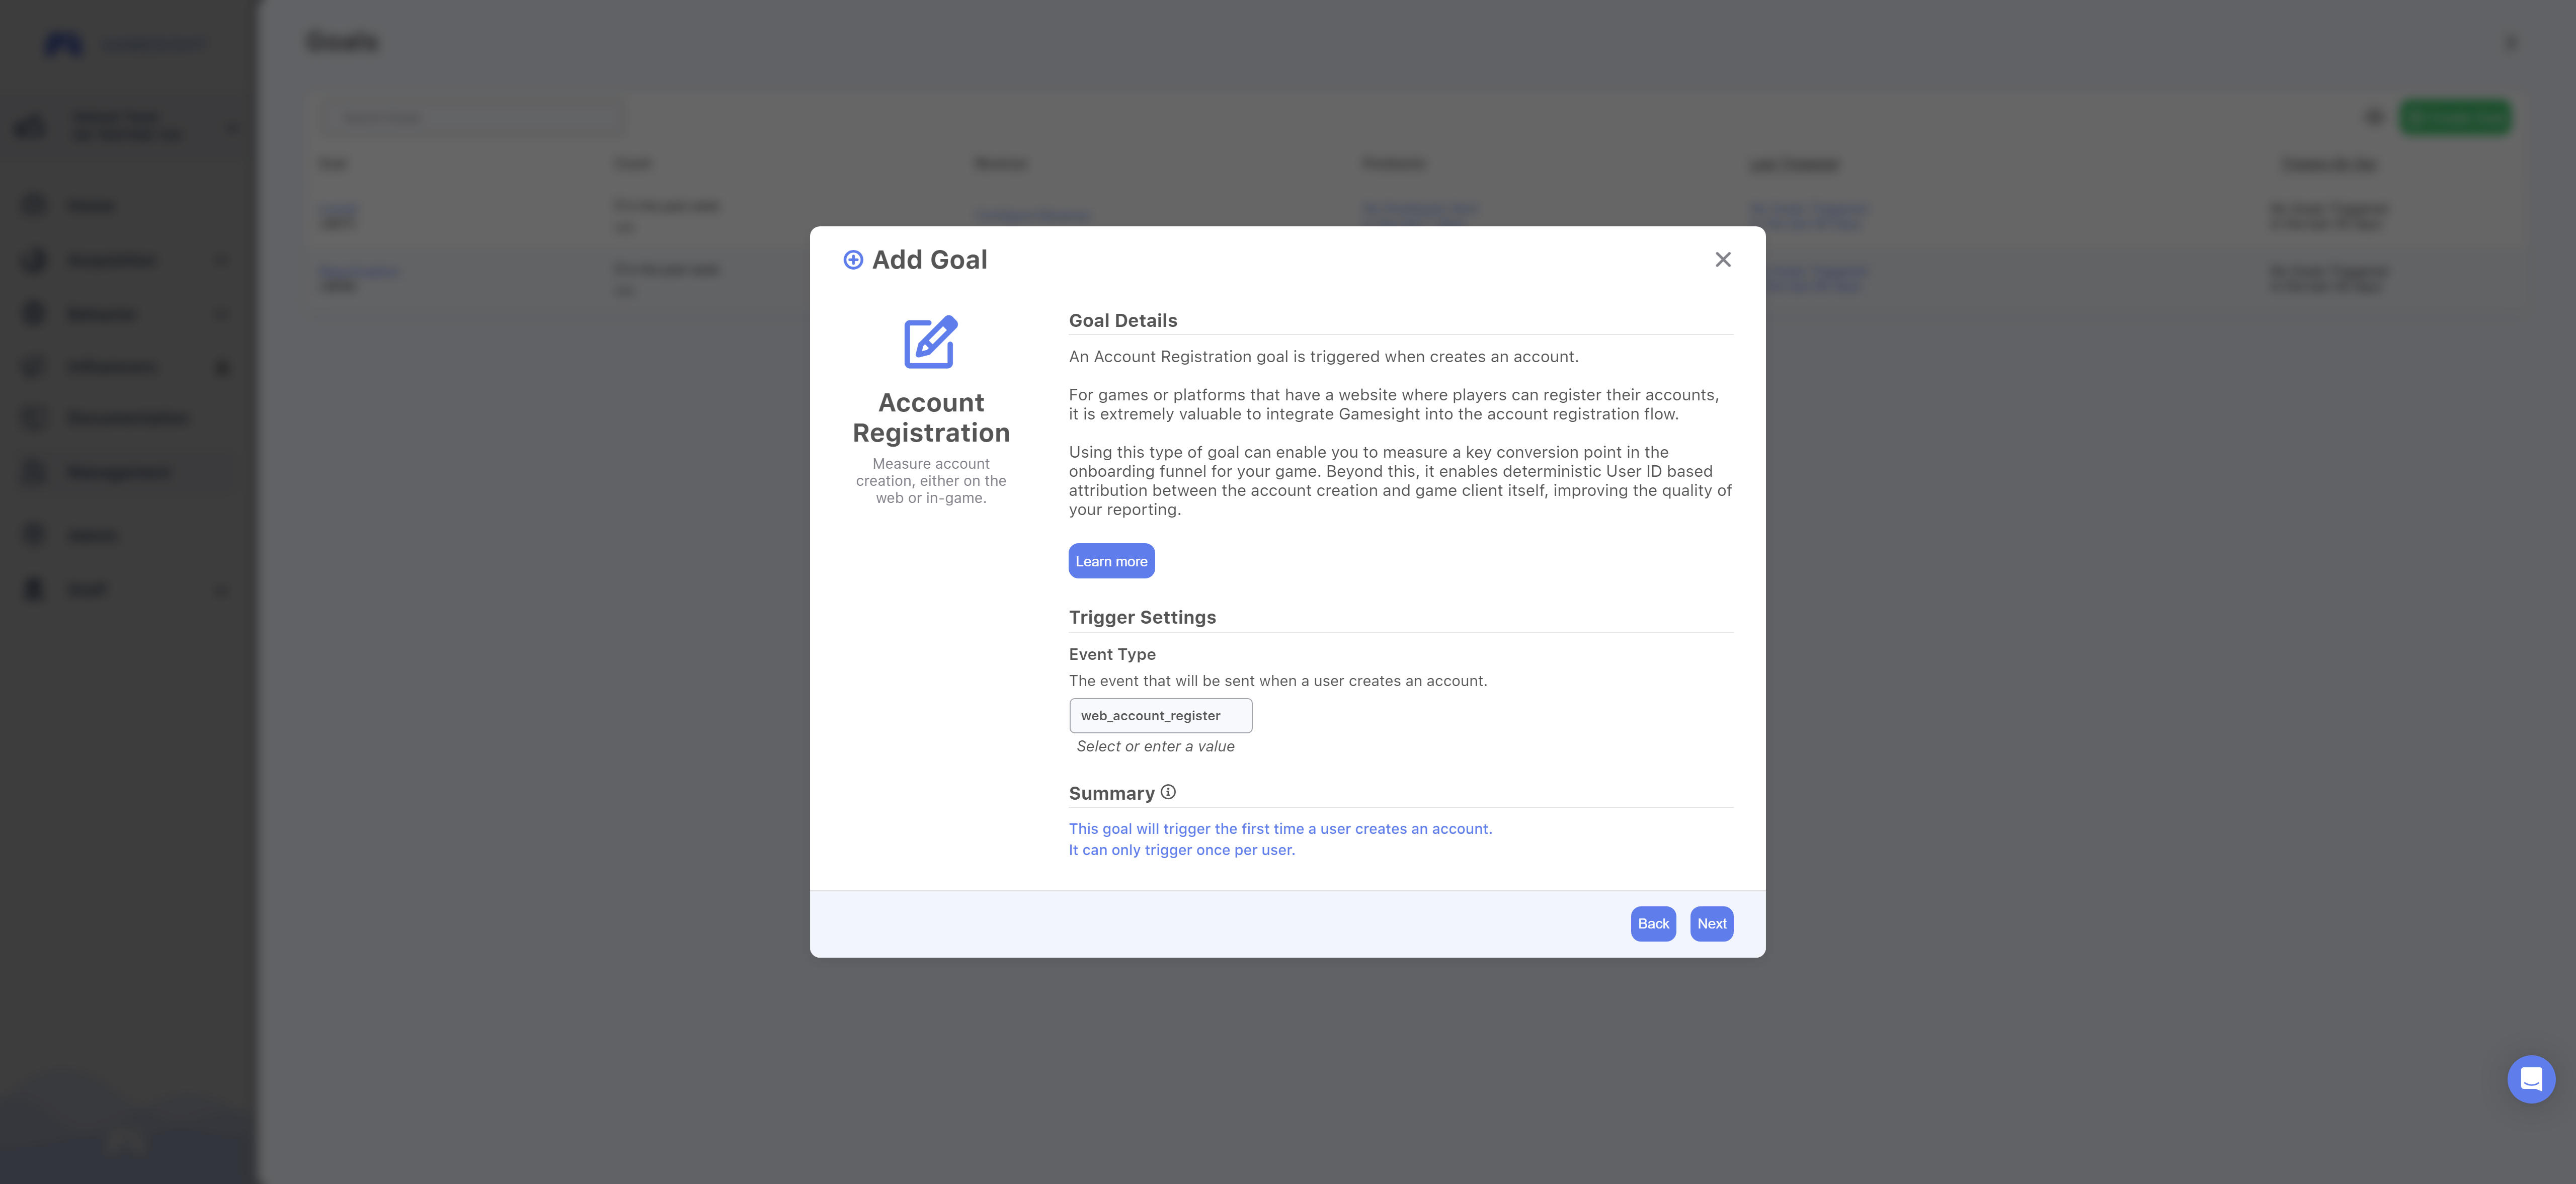
As shown in the Goal Summary, this Account Registration Goal will only trigger the first time that a user creates an account and only once per user.
Now that your Event Type is set, click "Next". Both the Name and description are filled in by default, however you do have the ability to modify them if you choose. Once you are finished, click Create to add your new goal.
Custom Goal
If the Goal that you are creating doesn't quite fit within the suggested categories, you can use the Custom option to set up your goal instead.
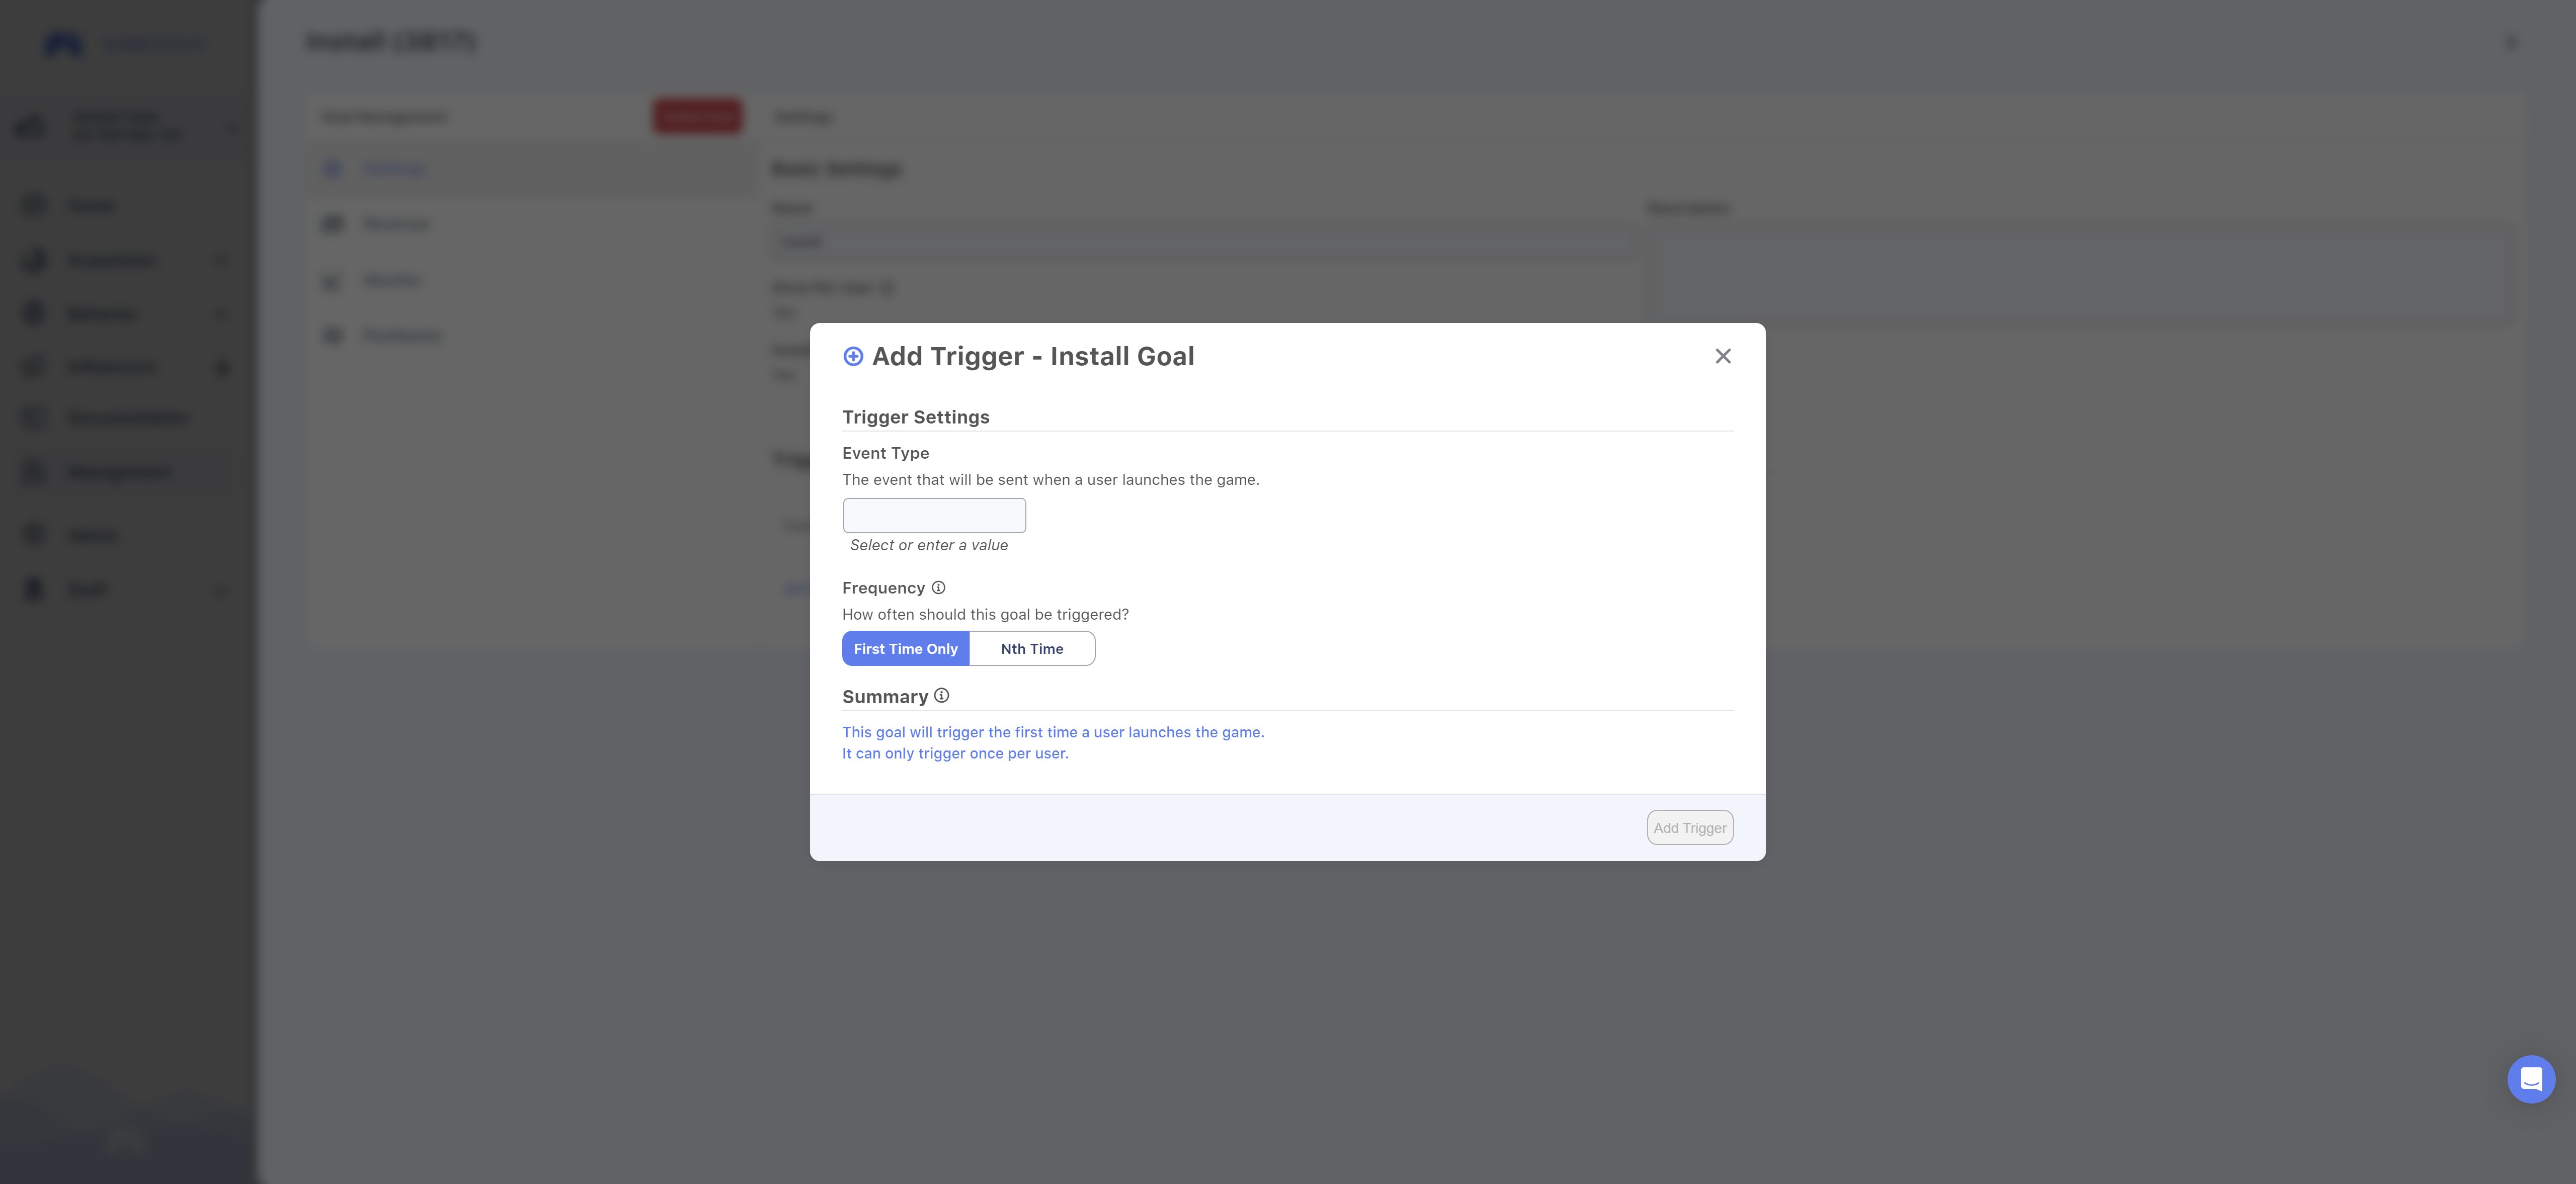
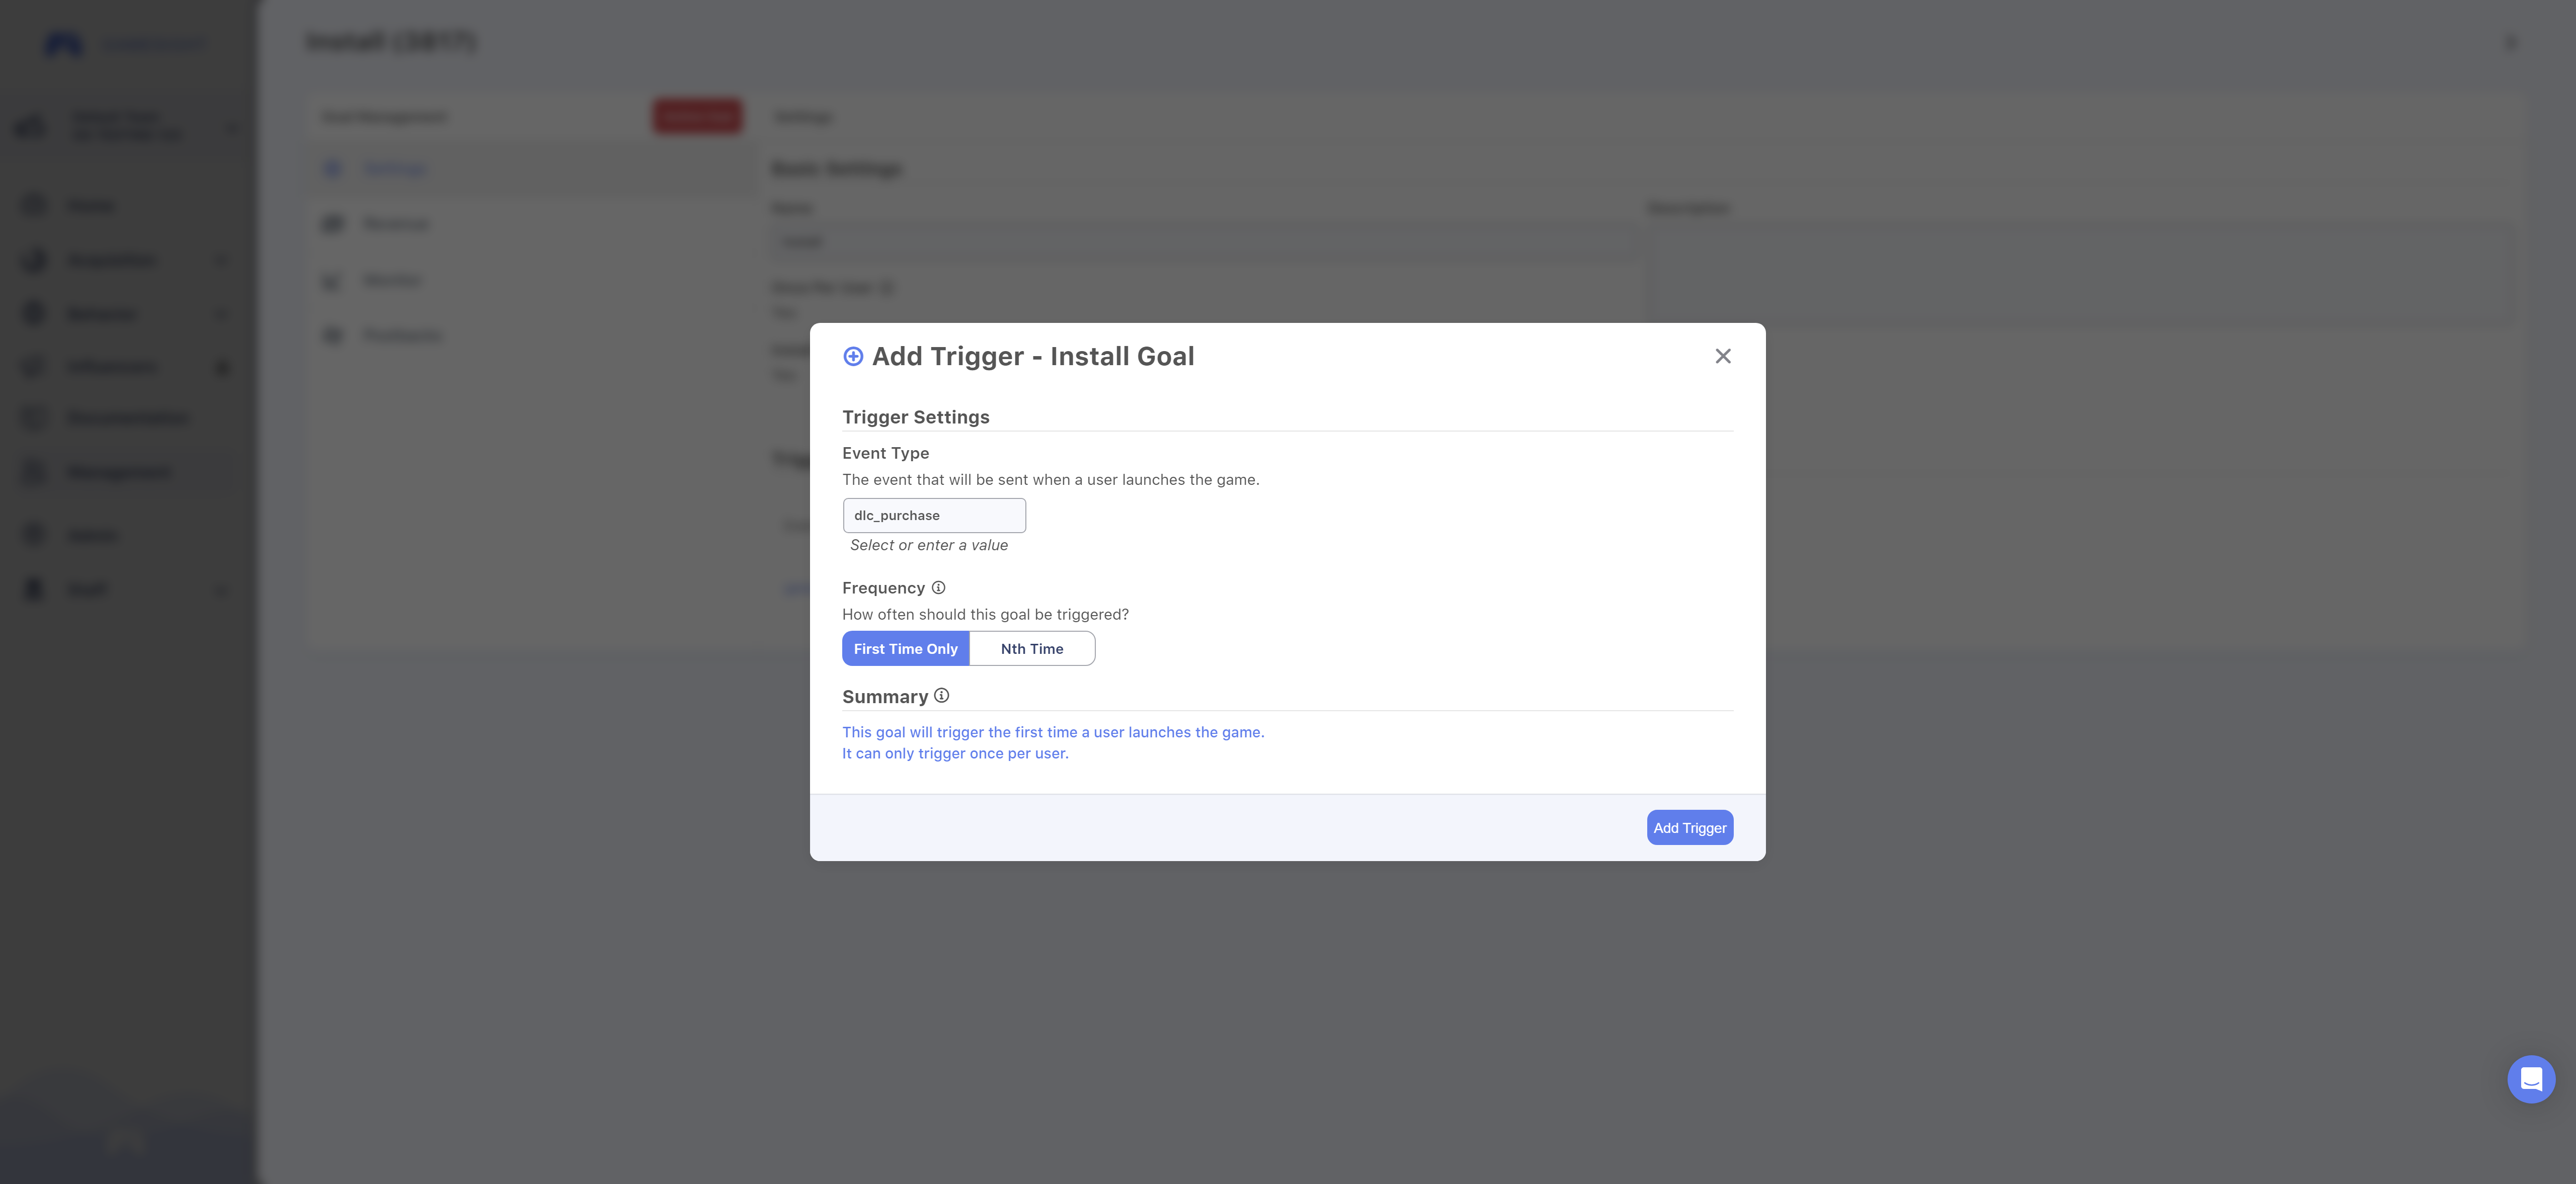
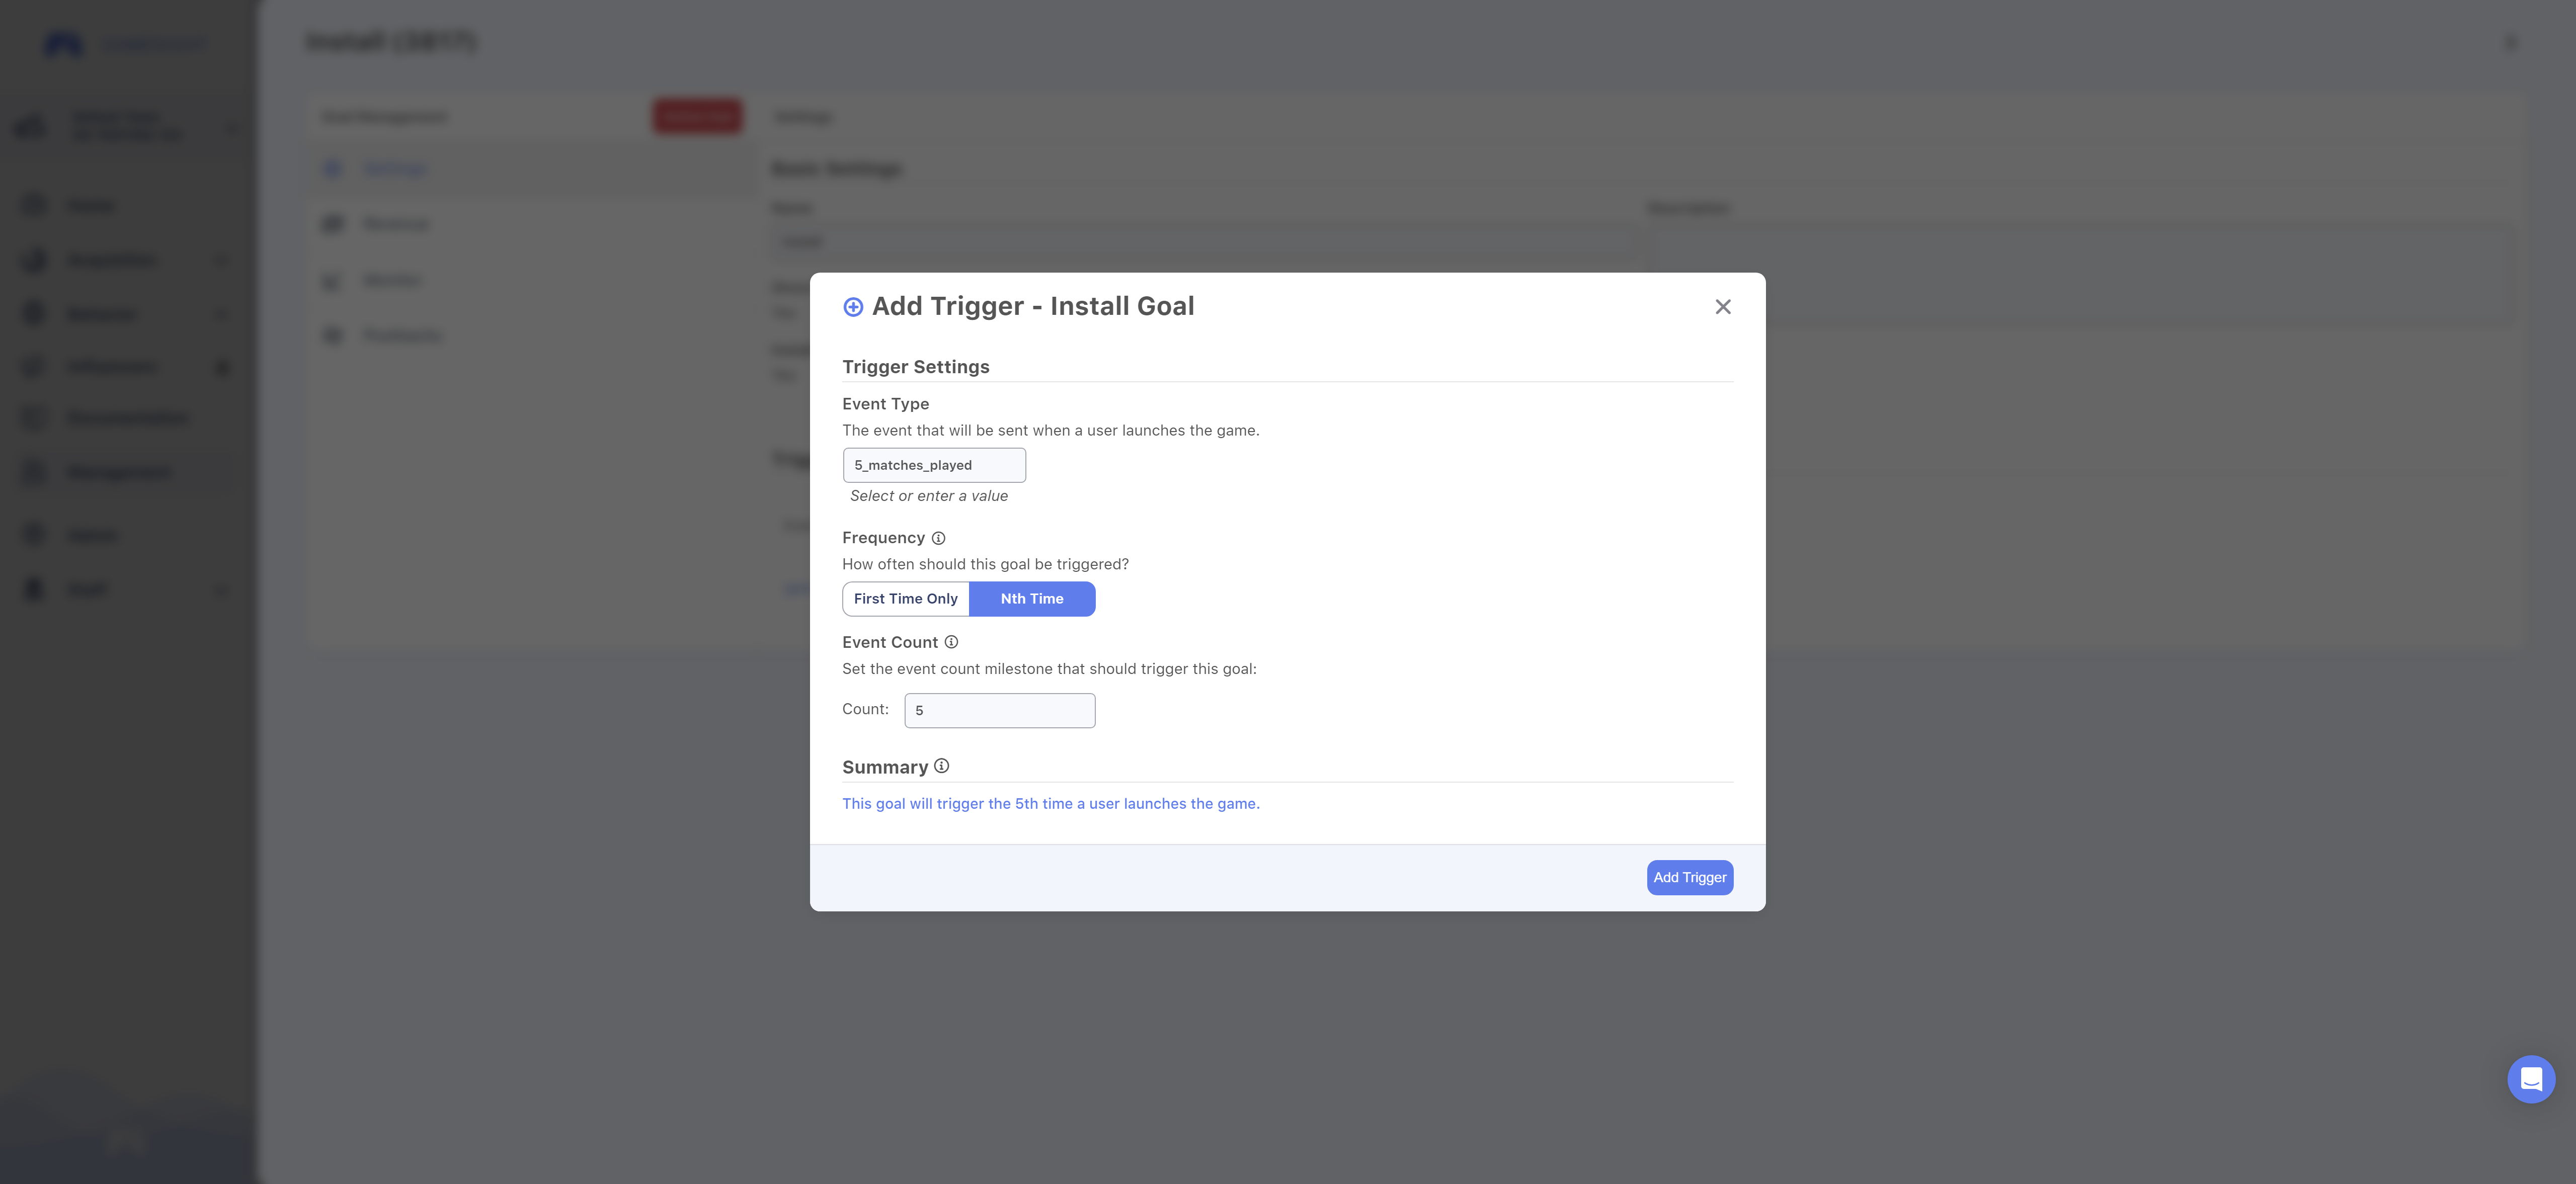
After clicking Next, you will be brought to your Goal's configuration menu where you can set the Event Type and Frequency.
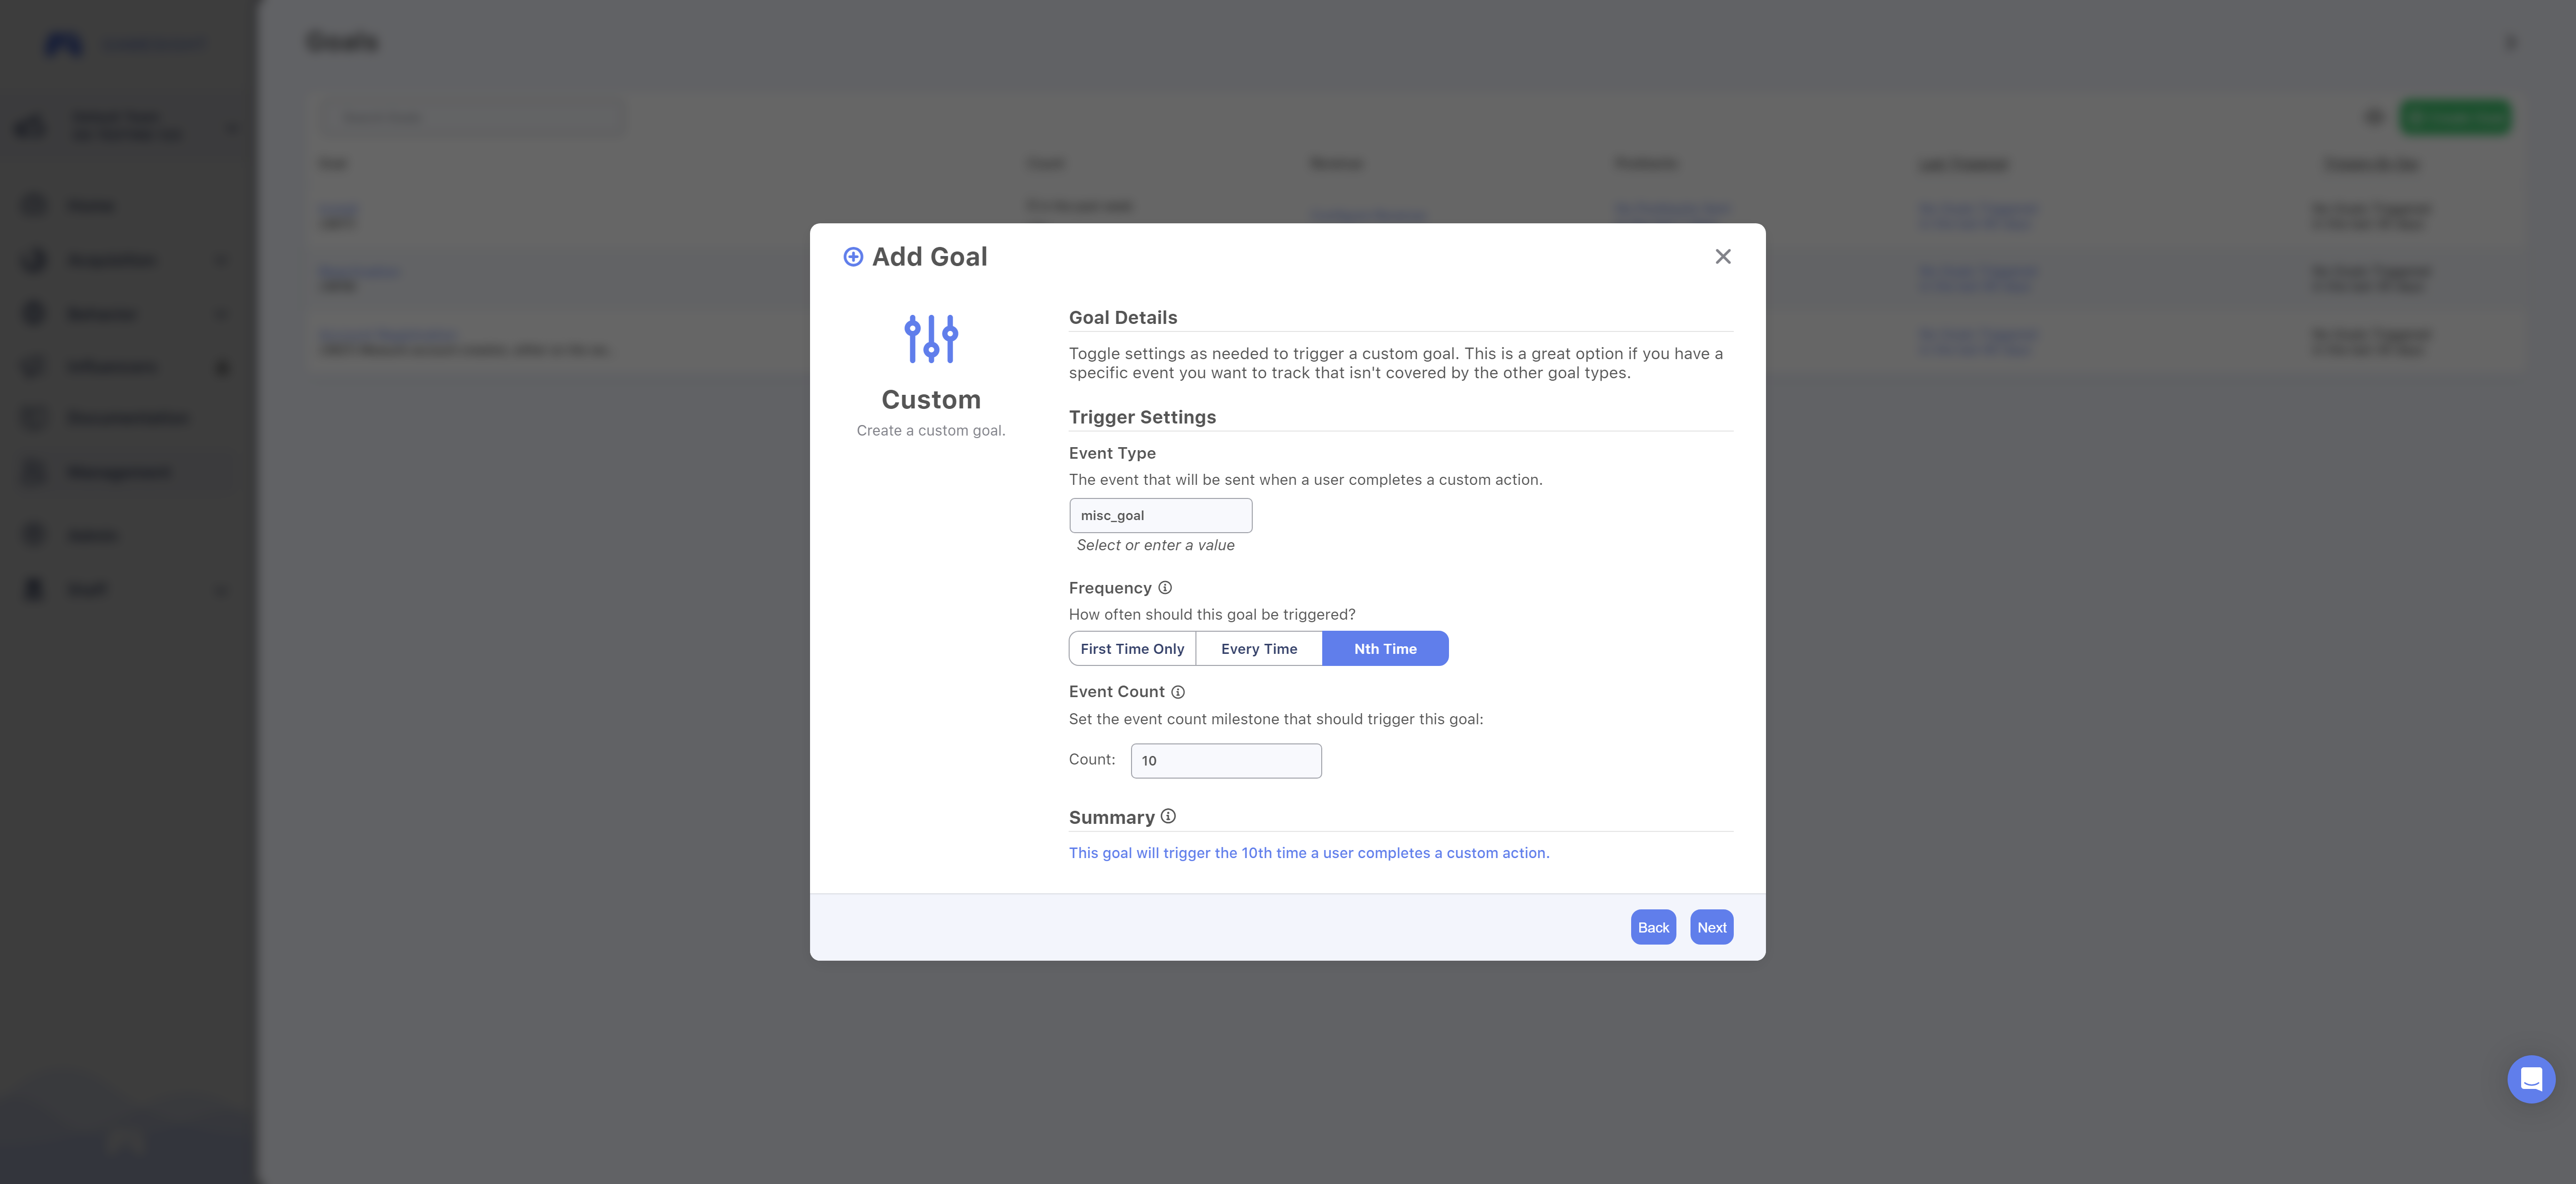
After setting the Event Type and Frequency, clicking Next will bring you to the final step where you can change your Goal's name from "Custom" to the name of your choice and optionally set a new Description. Once you are finished just click Create to finish the setup and add your new Goal to your game!
Trigger Configuration
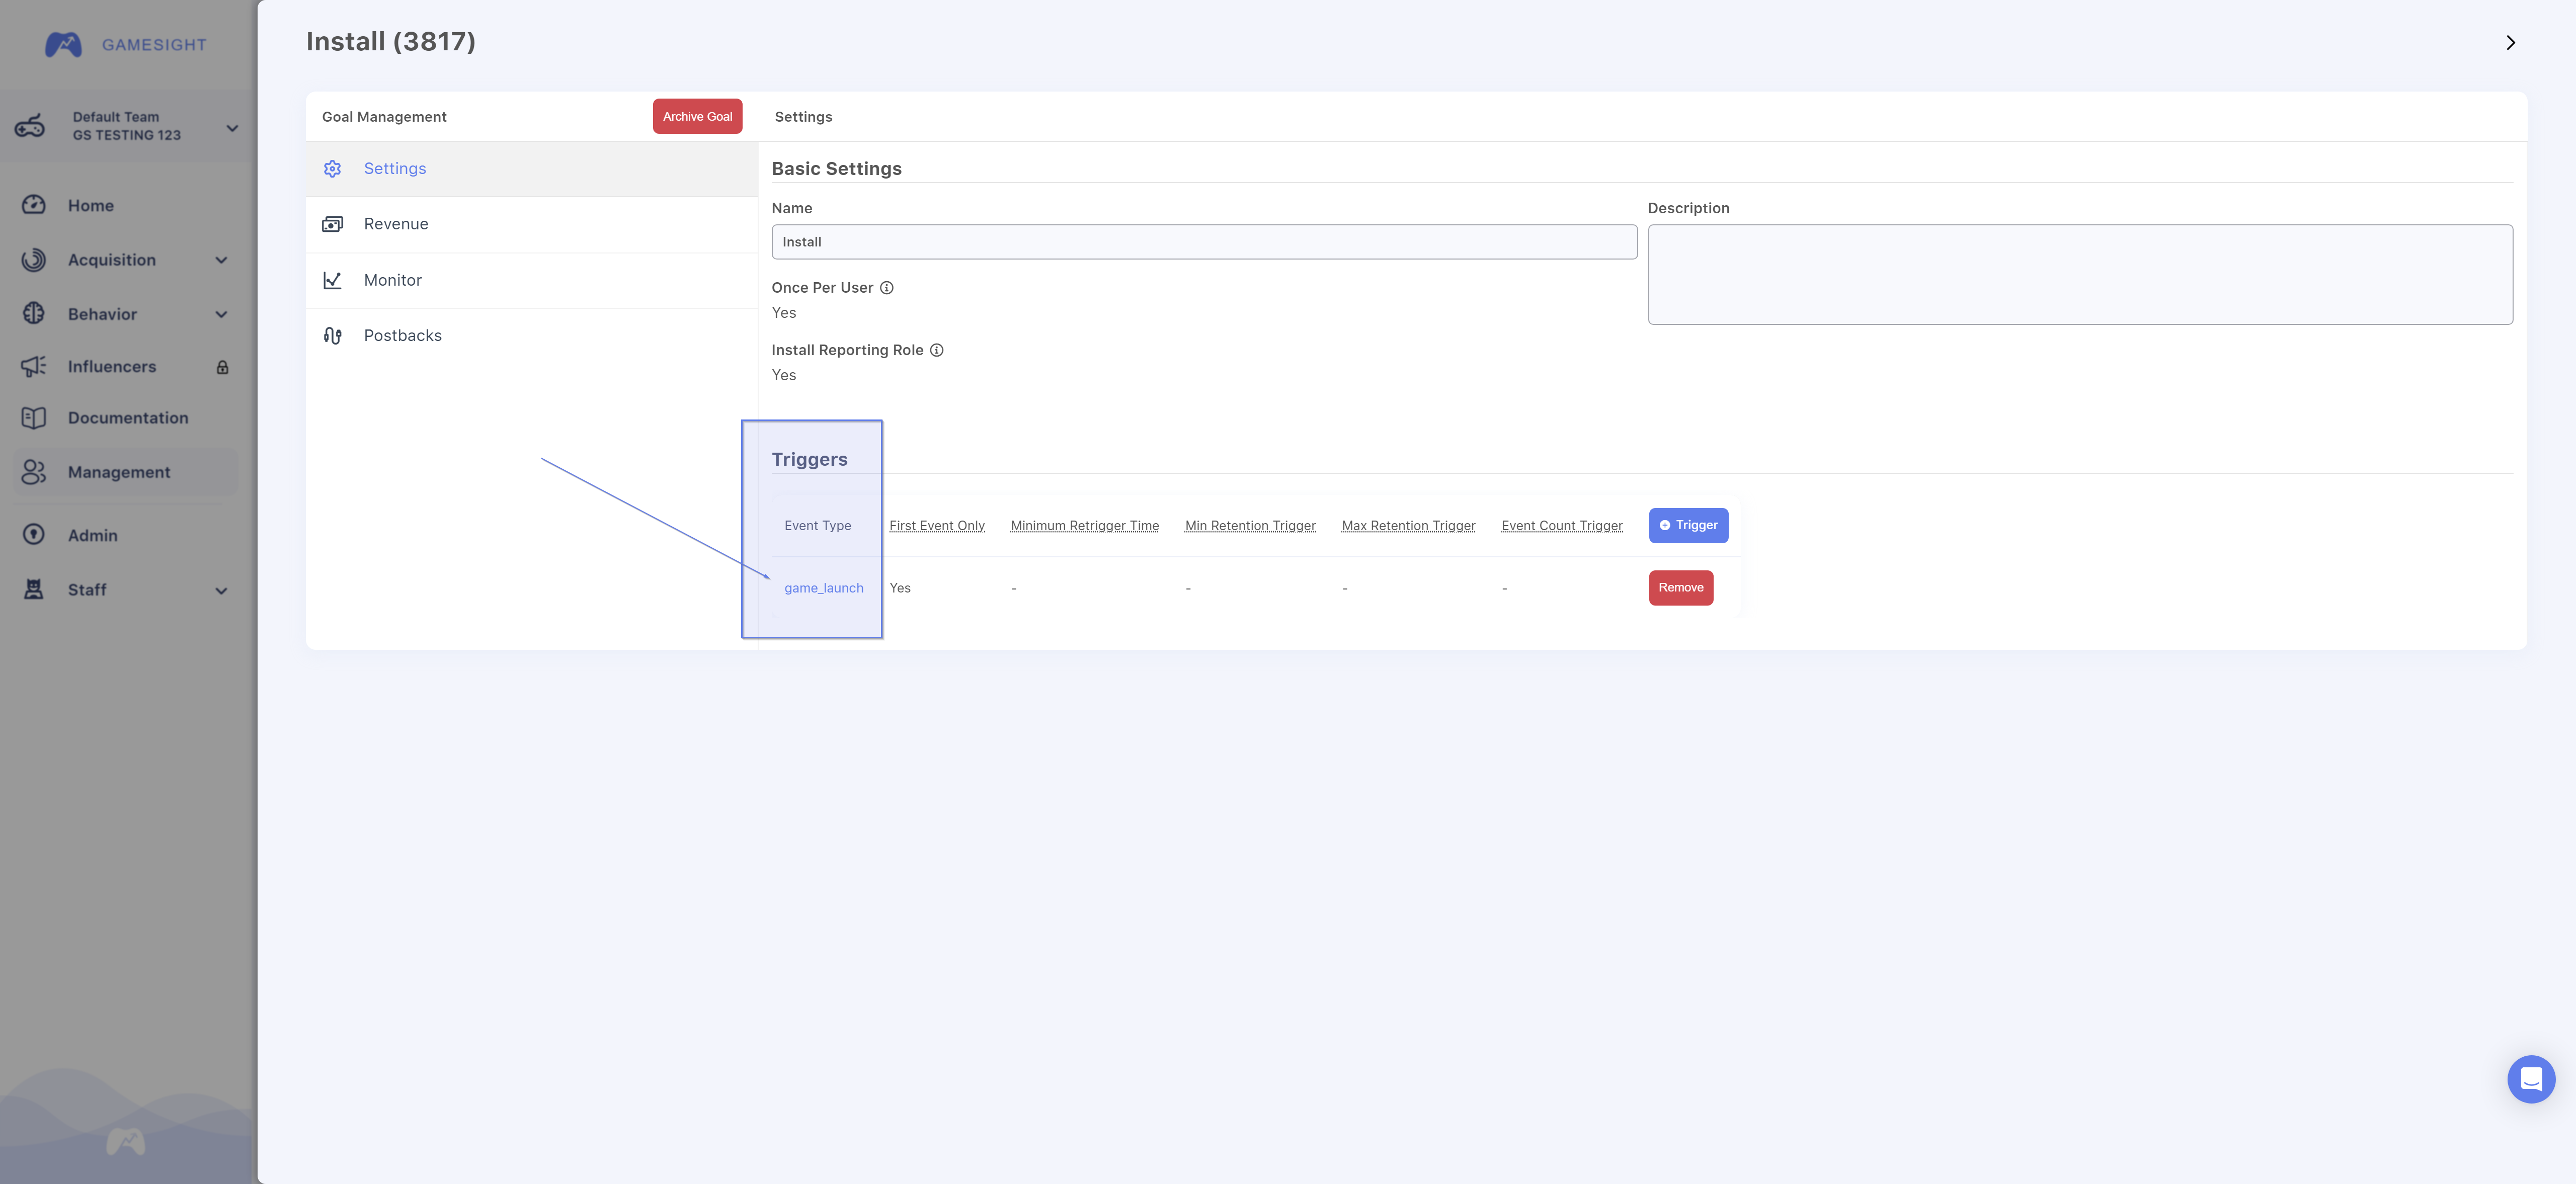
Each Goal may have one or more event triggers. You can click on an existing Goal to view the current Triggers that are set up for your Goal. The Triggers will be listed under the Event Type column as shown below.
Minimum Retrigger Time
The "Minimum Retrigger Time" allows you to configure a goal to trigger after a minimum number of days have passed.
Example: If you would like to set up a 7 day retention goal (D7), you can set the "Minimum Retrigger Time" to 7 while ensuring that the "Event Type" shares the name of of your "game_launch" event.
Event Count Trigger
The "Event Count Trigger" allows goals to be configured to trigger on the specific count of event.
Example: If you would like a Goal to trigger on the 3rd match played by a user, you would set the Event Count Trigger to 3.
Retention Triggers
Goals can also be configured with a minimum and maximum retention window that a user must play during in order to trigger a goal.
Example: If you would like to define a D3 Retention goal to trigger for all users that play between their 3rd and 5th day after install this can be configured by setting the Min Retention Trigger to 3 Days and the Max Retention Trigger to 5 days.
Add Additional Triggers
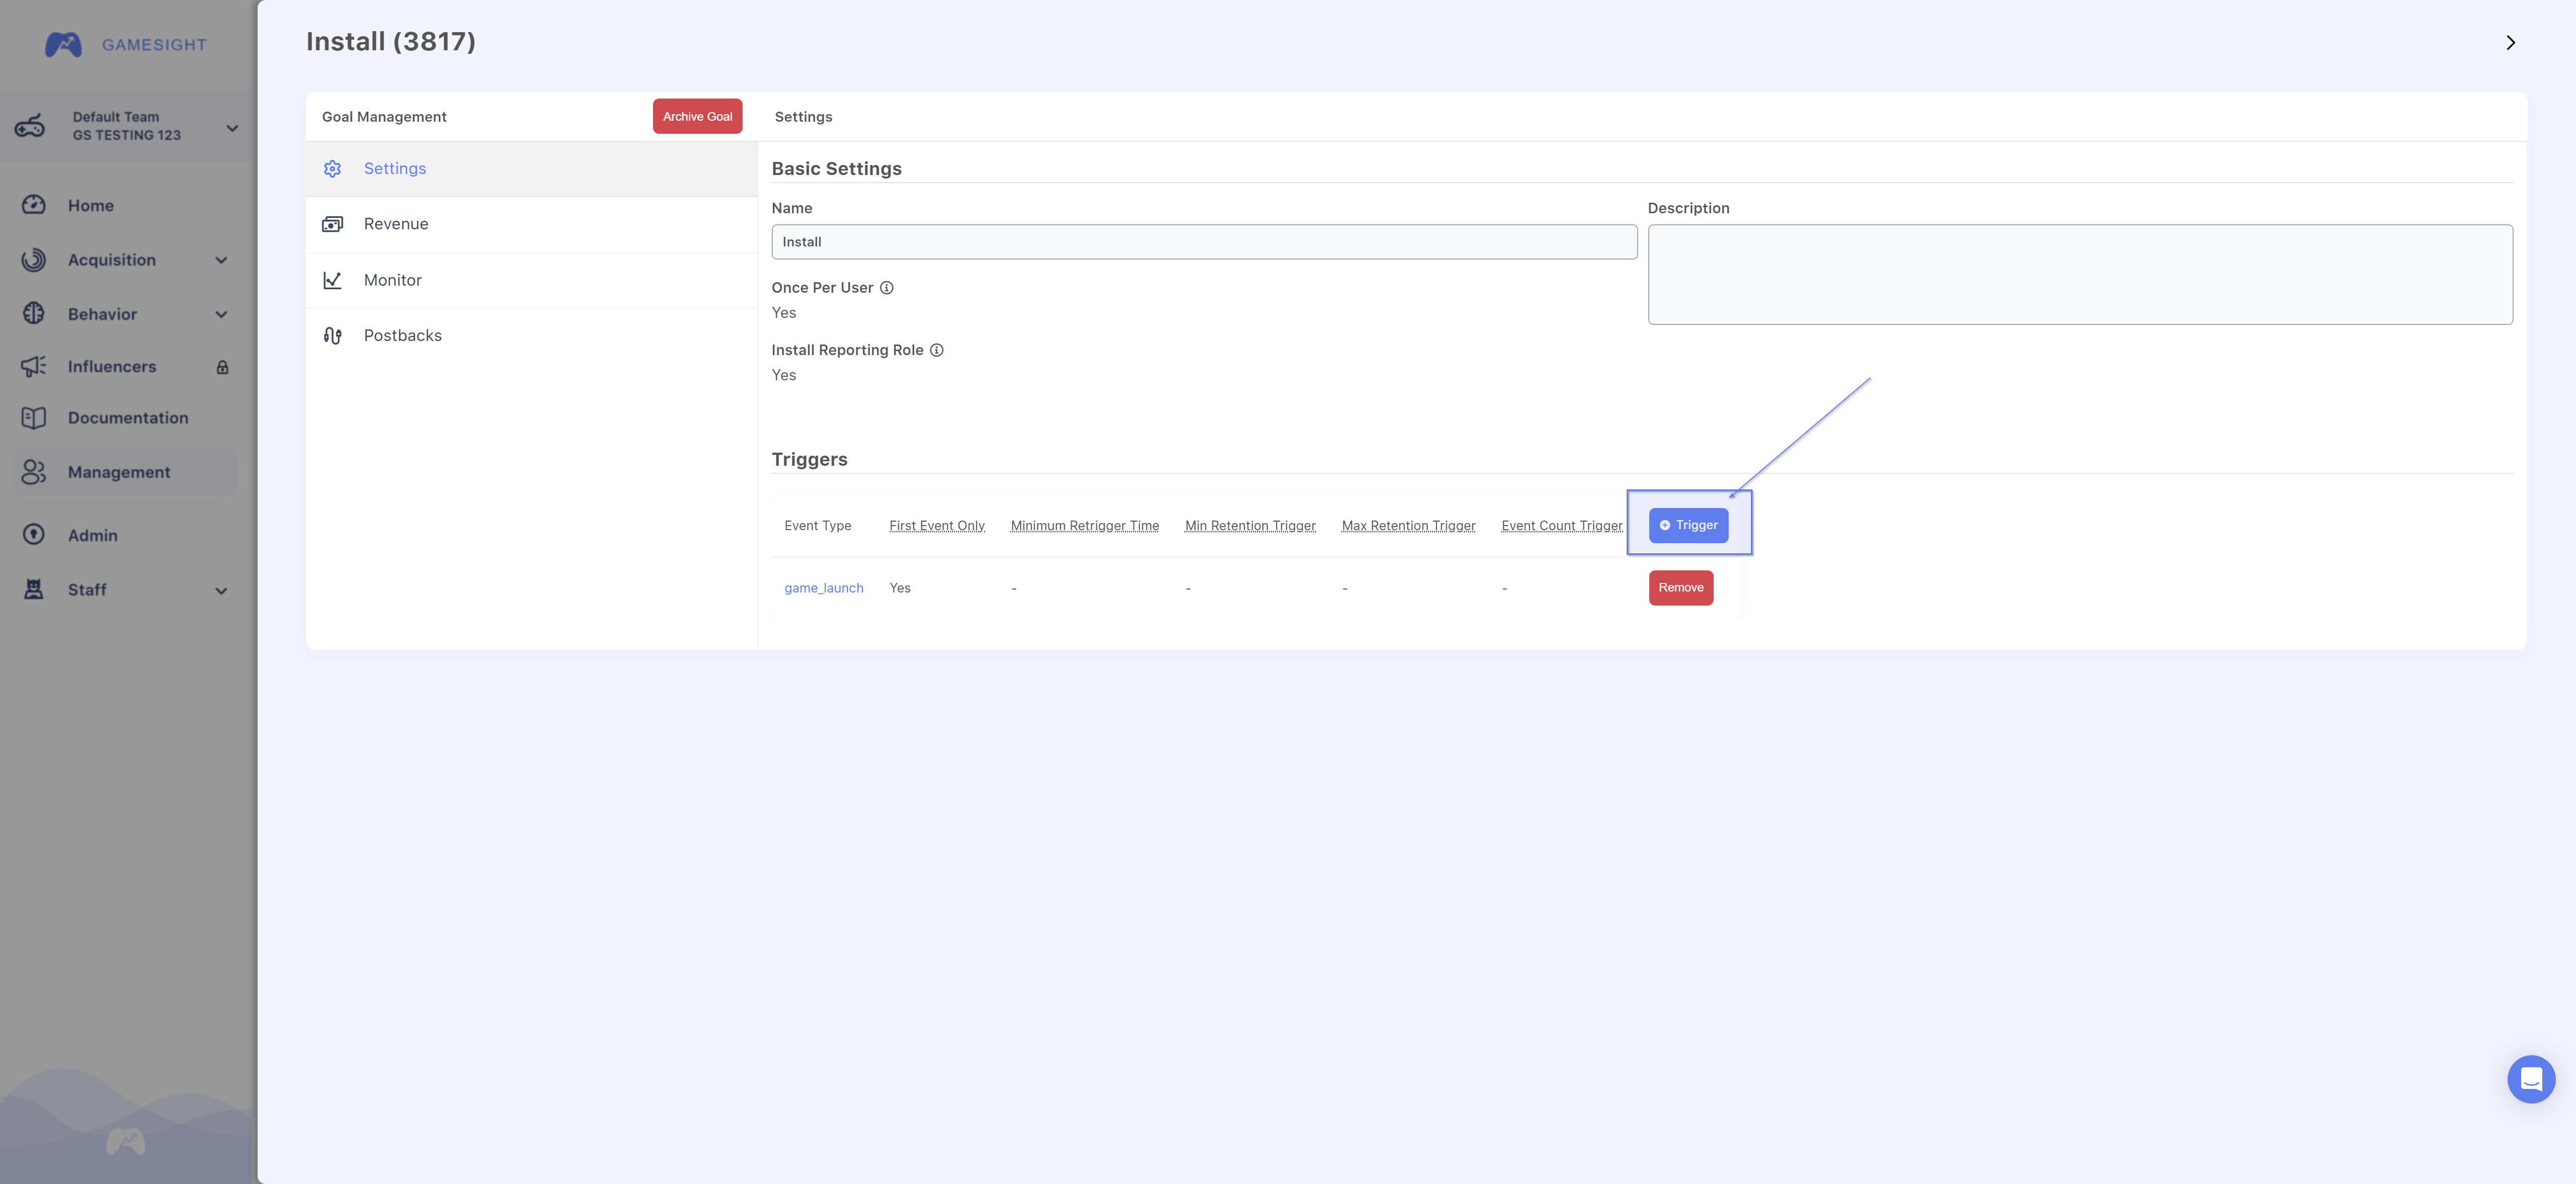
You can add additional Triggers for any Goal of your choice by clicking the blue "+Trigger" button within the Goal configuration menu as shown below.
Goal Frequency
In addition, you can specify whether this event will trigger the Goal only the first time the event is seen, or every time.
The First Time Only setting should be selected for situations like Install measurement where you want to trigger the Goal on the first game launch for a specific user, or a DLC Purchase that can only be purchased once.
Alternatively, you can select Nth Time to set up a count limit which will cause the Goal to trigger after reaching the Count that you specify. As an example, a Count set to 5 will trigger on the 5th event from a user.
Once your new Trigger has been configured, click Add Trigger to add the additional Goal trigger.
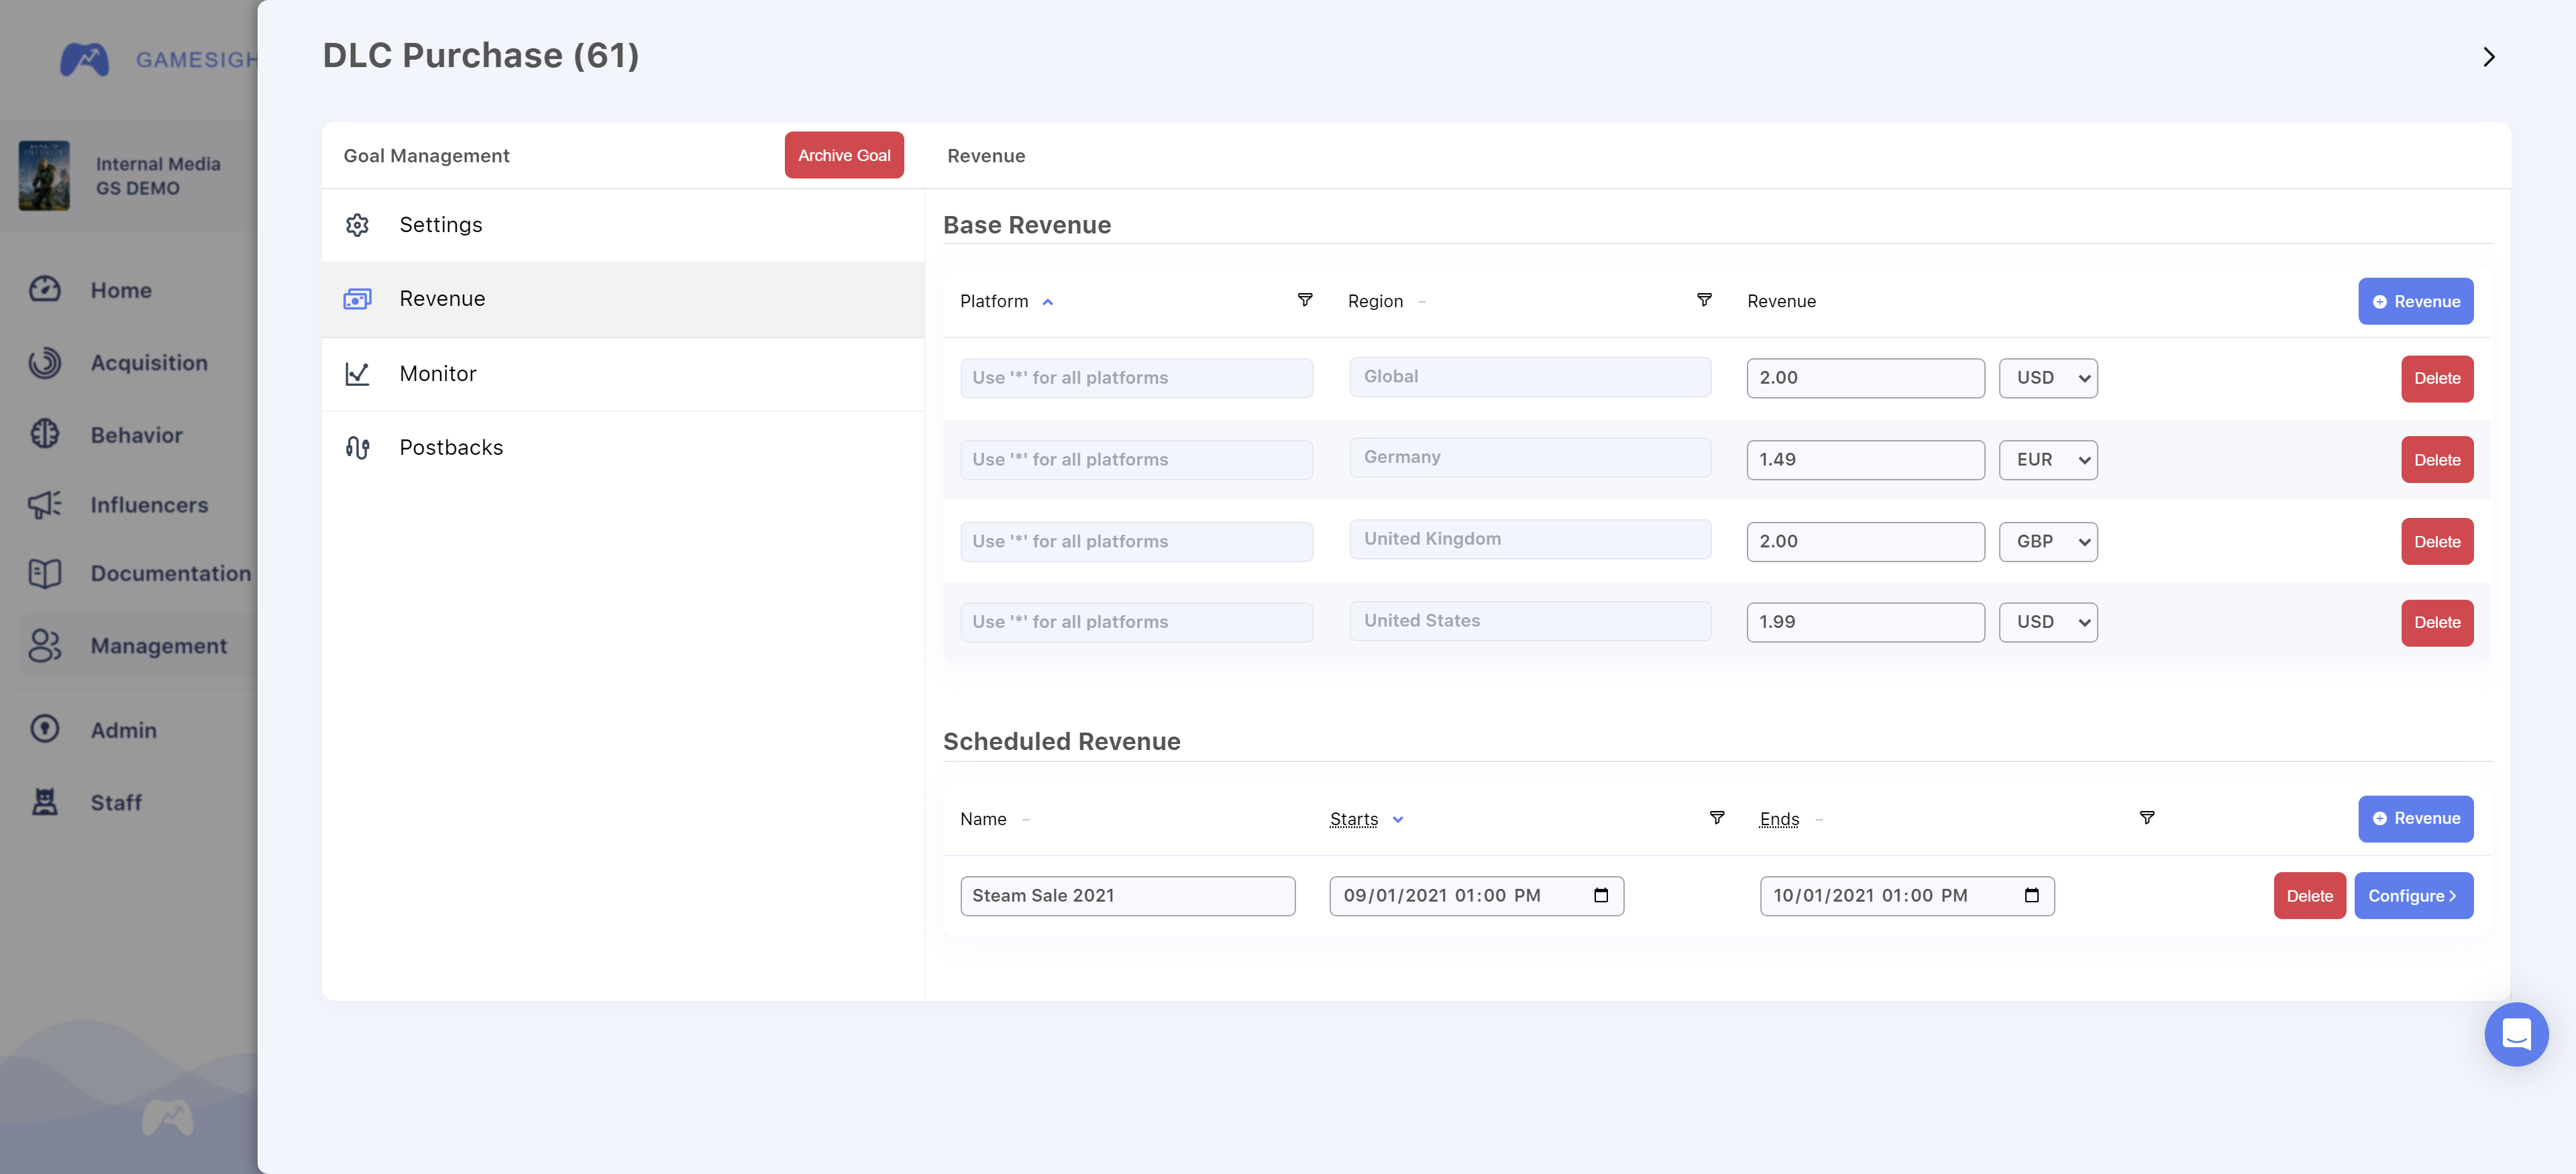
Goal Revenue
Goals can be configured with revenue information based on region. This can be useful if your game is priced differently in various regions. We use the location data attached to the event to determine which revenue value should be used when the goal is triggered.
There are two methods for reporting revenue into Gamesight:
- Event Payload - For cases in which you have a known revenue value when sending the event, you can pass revenue data in the event payload. This is commonly used with in-game purchases.
- Configuring Goals - For cases in which revenue is unknown when an event is triggered. This is commonly the case for game or DLC sales which are handled by a distribution platform. This revenue value is managed through the Gamesight Console and allow you to both specify revenue values by region and made time-based changes for events such as sales or free weekends.
Goal revenue configured through the Gamesight Console will override any revenue values that are passed in the event payload. This enables some common use cases such as:
- Temporarily adjusting the revenue value when the game is on sale either globally or in a specific region
- Setting up revenue values for situations where the game client is unsure of the likely sale price for your game
- Configuring more complex region-specific or multi-currency pricing schemes to more accurately reflect the revenue earned from your game (or DLC).
You should continue to use the revenue fields on events for managing In-Game purchases or other variable revenue values that are known at time of purchase.
"Global" region
The Global region is used when there is no revenue configured for a given event's location. It is the default revenue setting and will be used instead of revenue info set on the event. It is common to set up a single "Global" revenue value if your game has a single price globally.
To add Revenue to a Goal, click the Goal you want to add revenue to first. Next, click the "Revenue" tab and click '+ Revenue'. Pick a platform, region, and the price associated with it and click 'Add'. Then click 'Submit' to save the goal configuration.

Scheduled Revenue
Scheduled Revenue enables you to pre-schedule changes to the price of your game on specific platforms or regions. This enables you to accurately and granularly account for sales or pricing changes for your Game.
To start with Scheduled Revenue, click the + Revenue button under the Scheduled Revenue header on your Goal's configuration apge. This will let you fill out the name, start time, and end time for your event. Note that the start and end times are in your computer's local time.

Next, press Configure to set the prices for your event

Save your changes and that is it! Your updated pricing will automatically be applied to all goal triggers during the timeframe you specified.
Revenue Import
You can import revenue data for your goals with a CSV, which can be helpful in cases where you have a large amount of pricing data to import. To start you will need to prepare a CSV containing the revenue data for your Goals in an appropriate format. You can use the following template to help you get started.
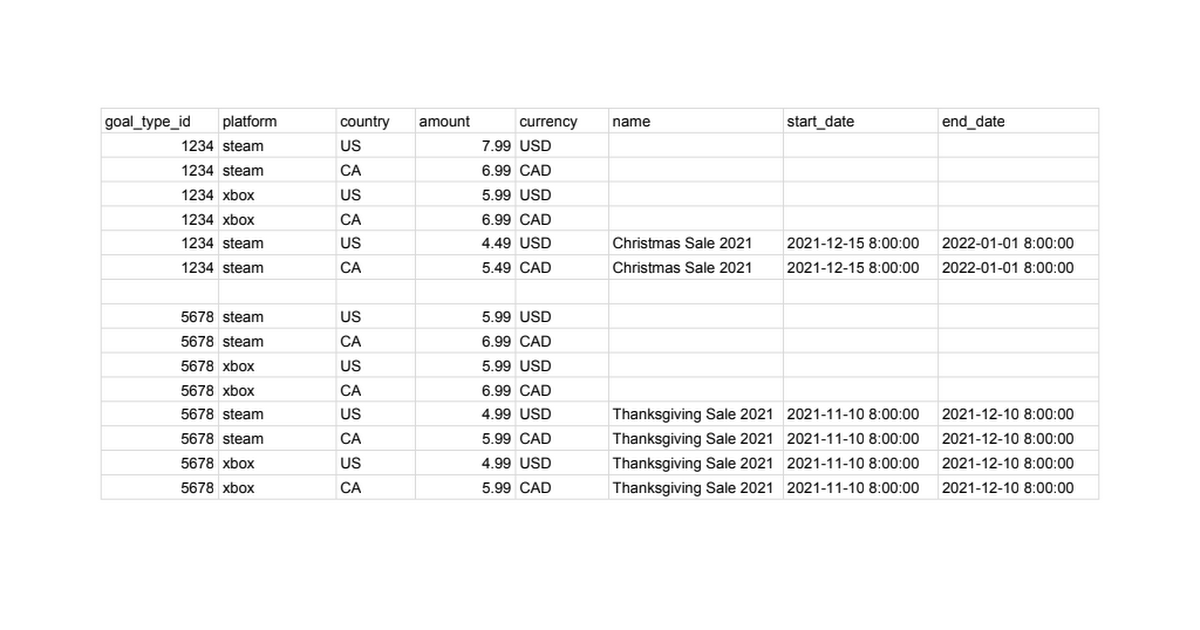
Once you have your revenue data prepared it is time to import it into Gamesight. To do this click the "import" icon at the top right side of the goal configuration panel.
Select your CSV and map the columns to the appropriate data type so that our system can import your data.

We will parse your CSV and surface any issues for you to review. Once the data looks good, click "Import" and your data will be imported.

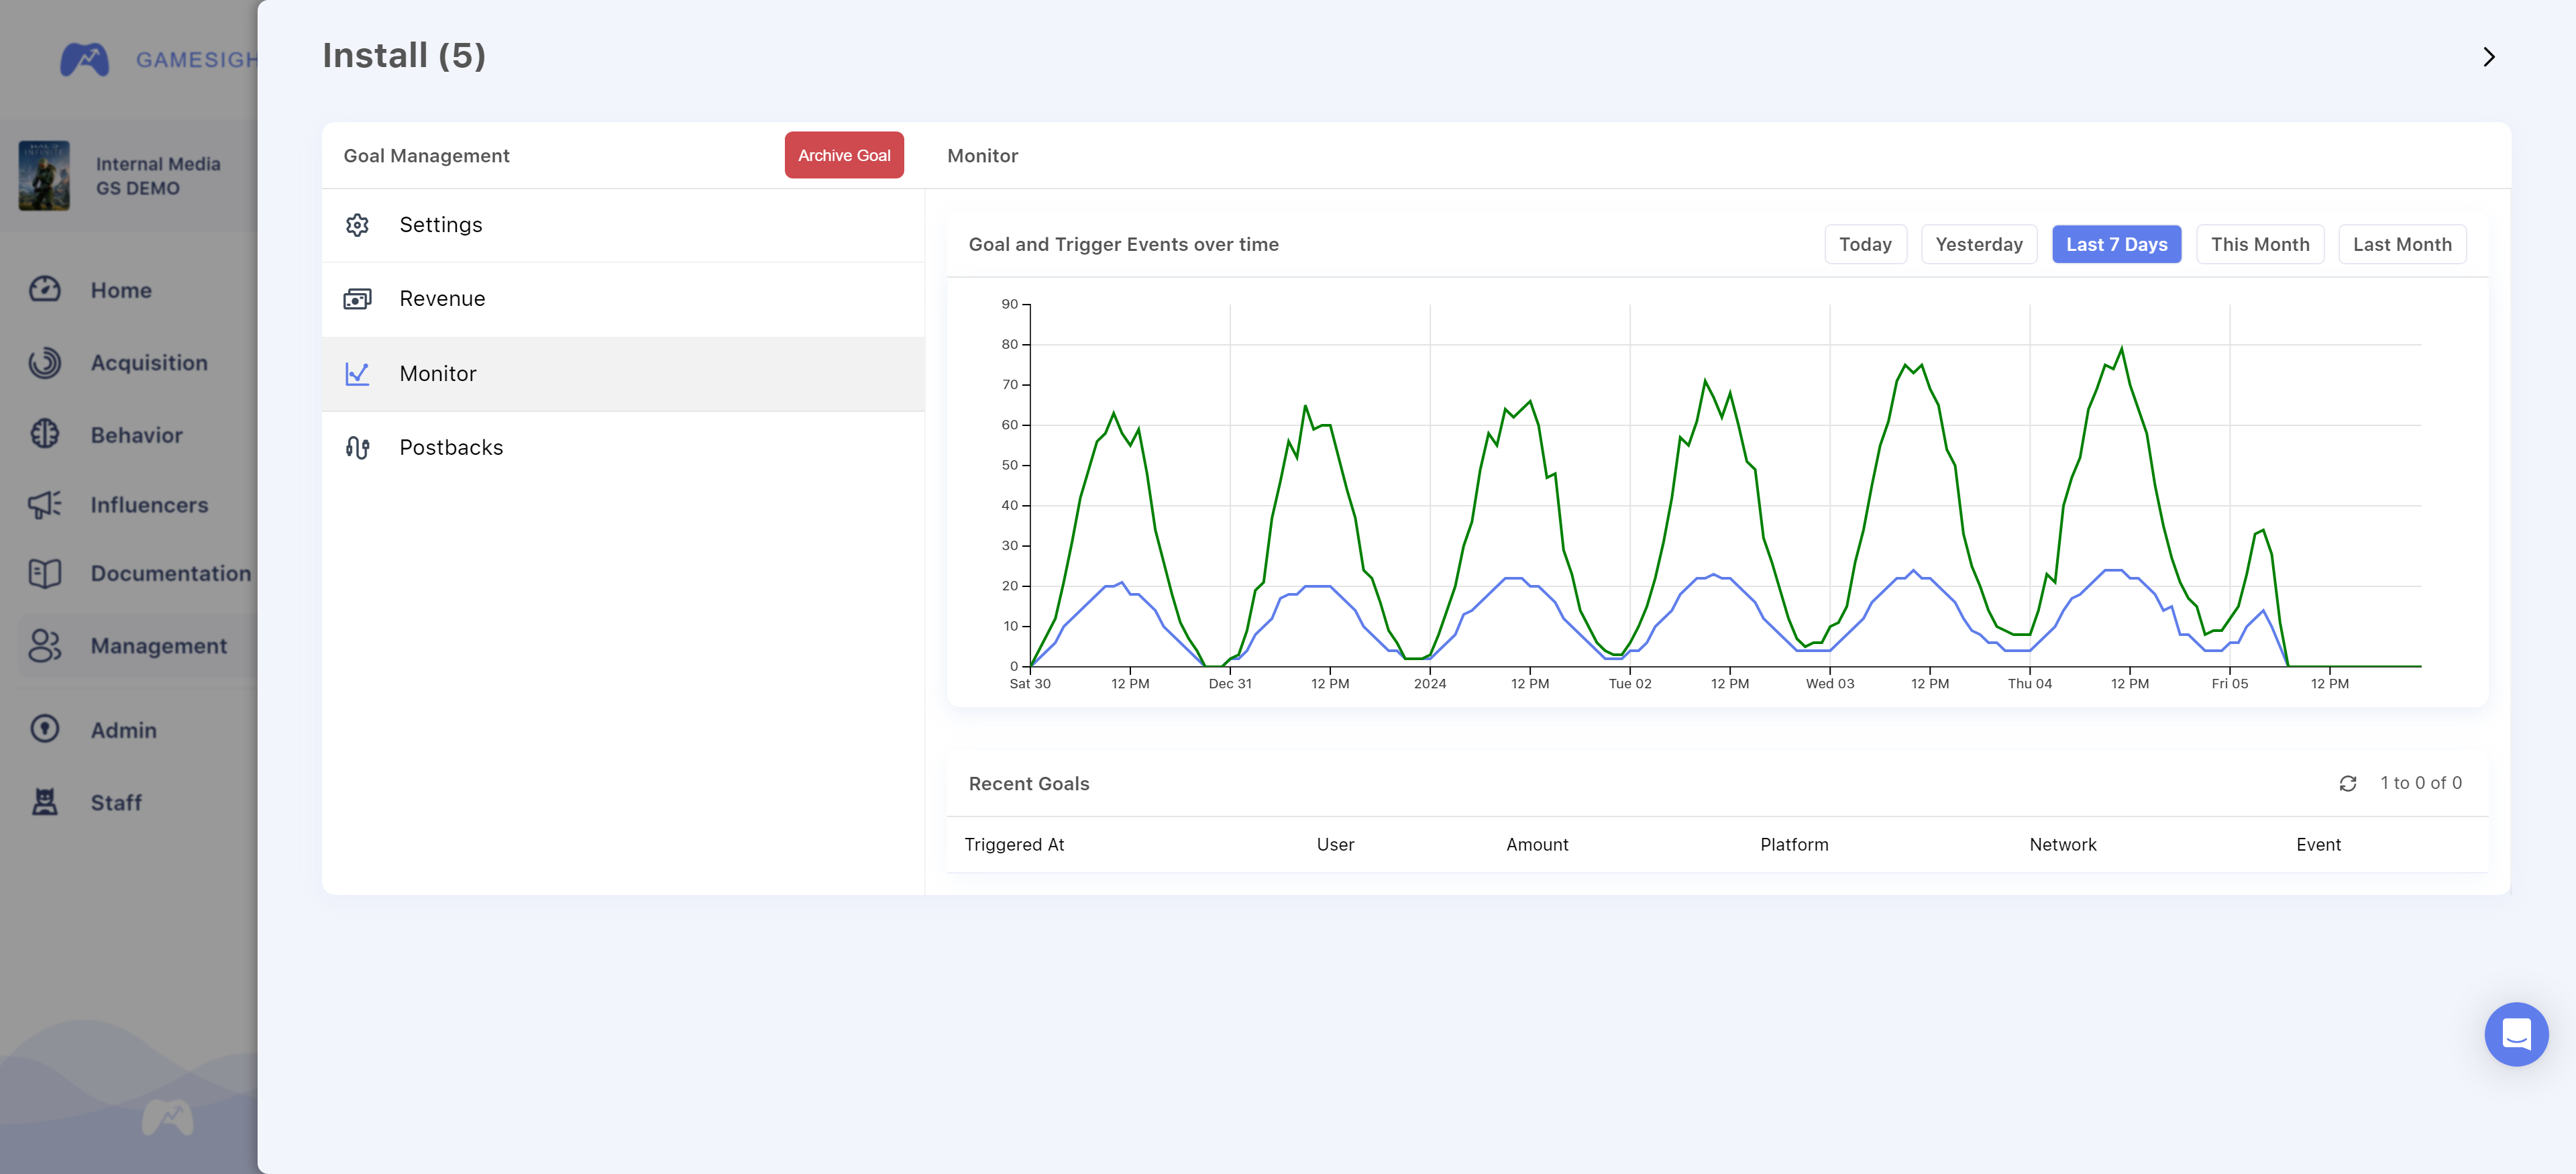
Goal Monitor
You can view detailed Goal activity on the "Monitor" of your Goal's configuration page. The Goal Monitor will display Goal and Trigger Events over time - including how long ago the Goal was triggered, User IDs, Revenue, Platform, Attributed Network and the Event Type as shown below.
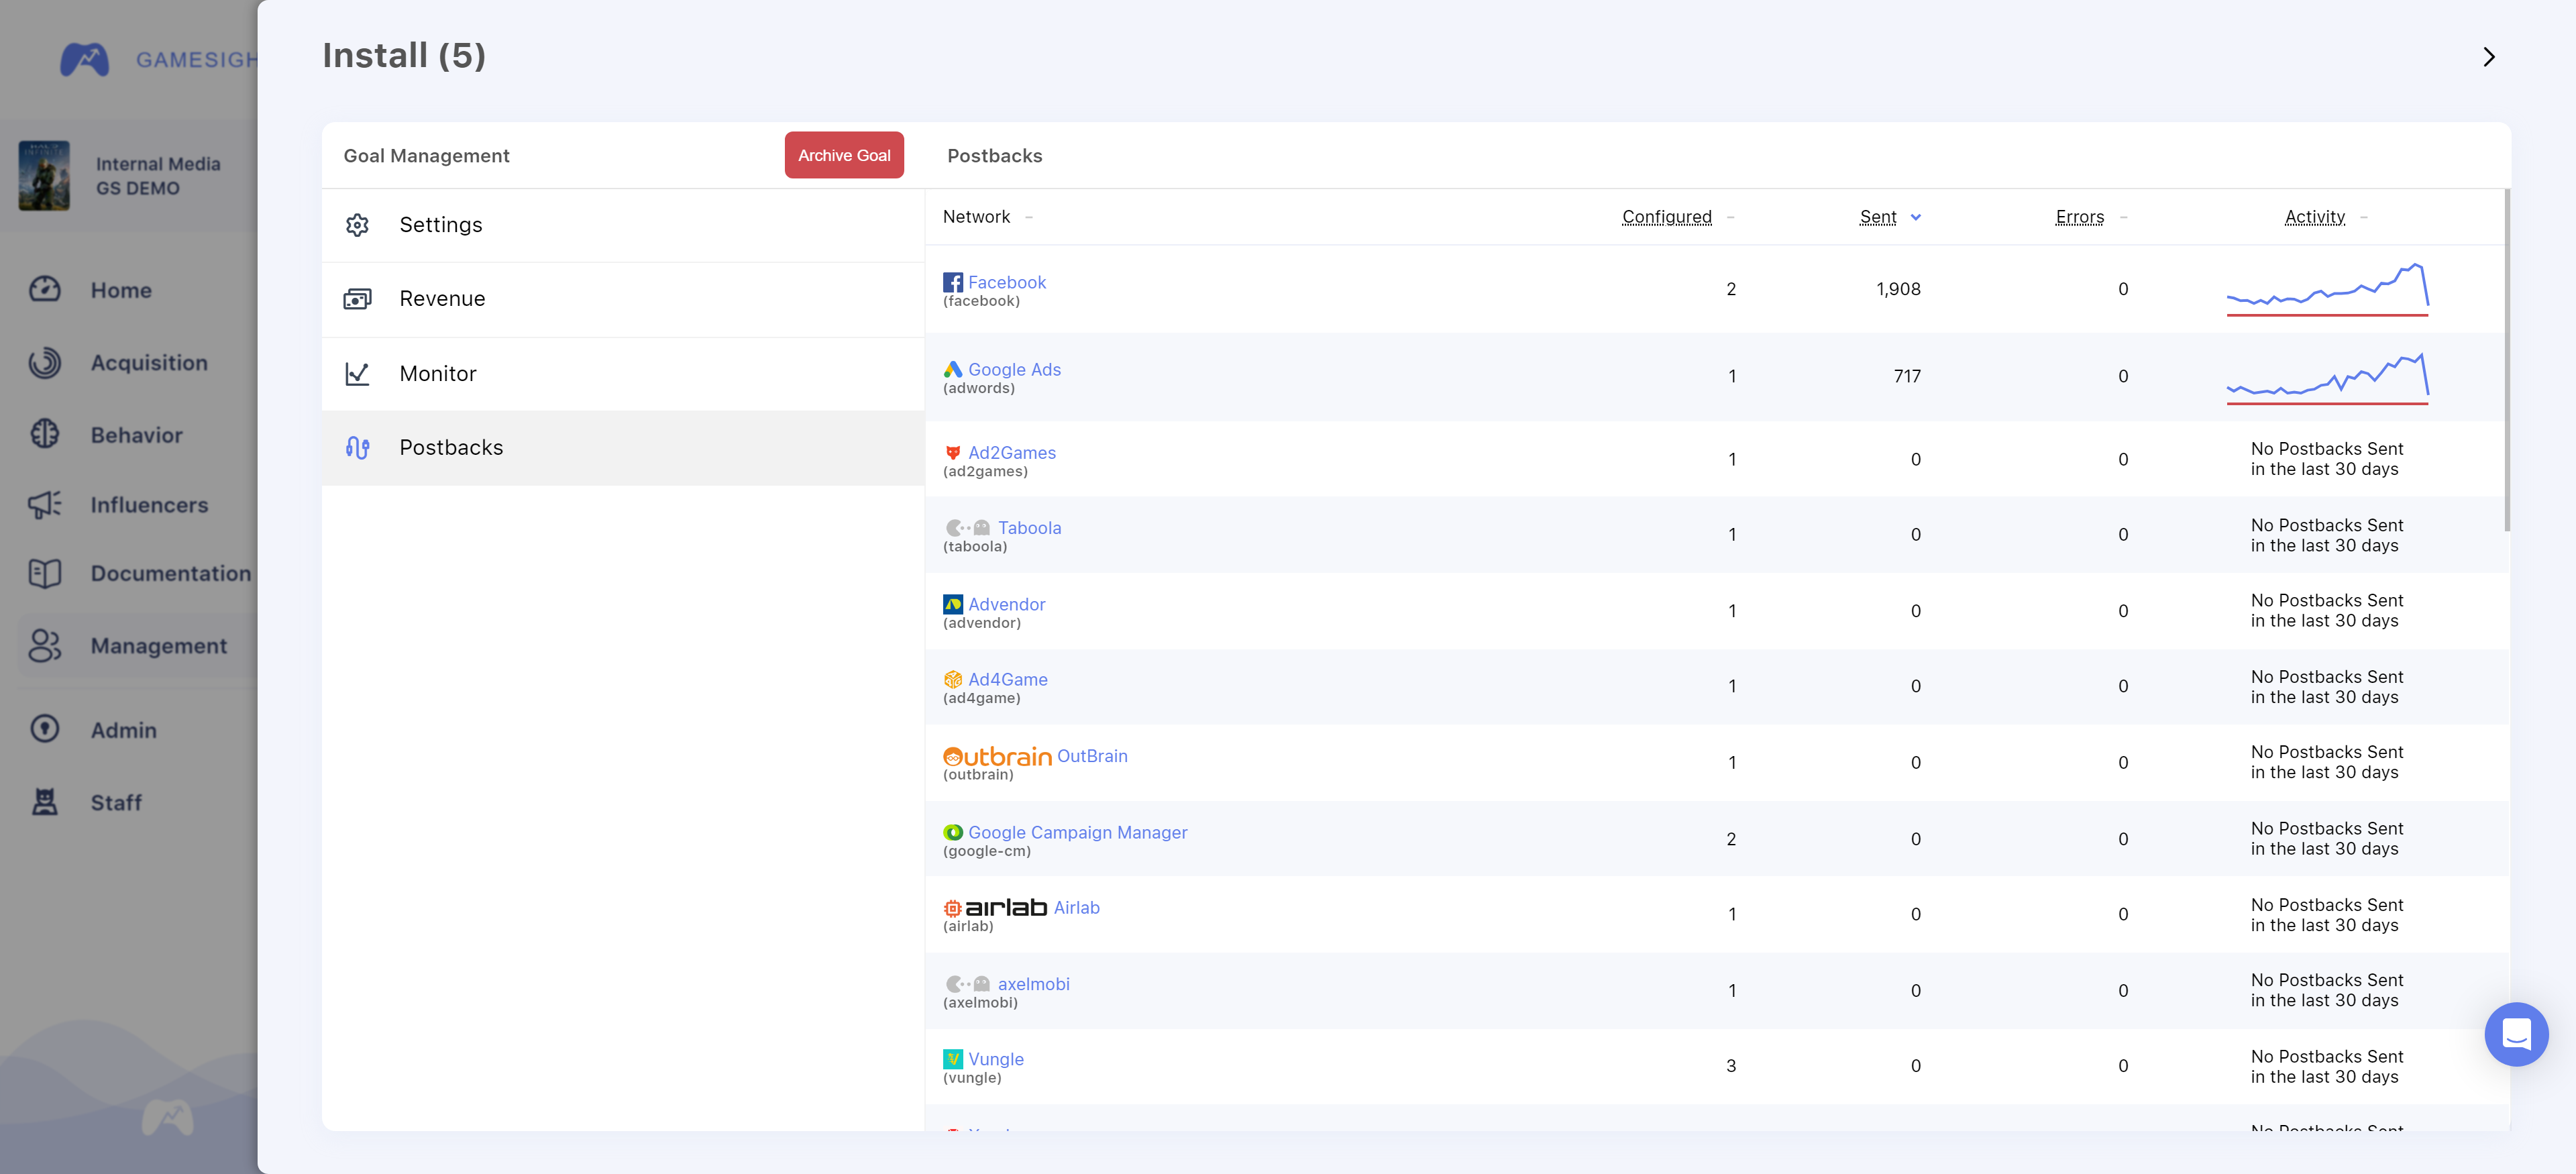
Goal Postback Monitor
Similar to the Goal monitor, you can see which Ad Networks are successfully receiving postbacks (your attributed conversion data being sent back to ad platforms). This page will show you the Ad Network, how many postbacks you have configured for the network in Gamesight at the Tracker level, how many have been sent successfully and recent activity as shown below.
Check out the Testing Attribution guide for some details on how to test your new Goals.
Updated 4 months ago